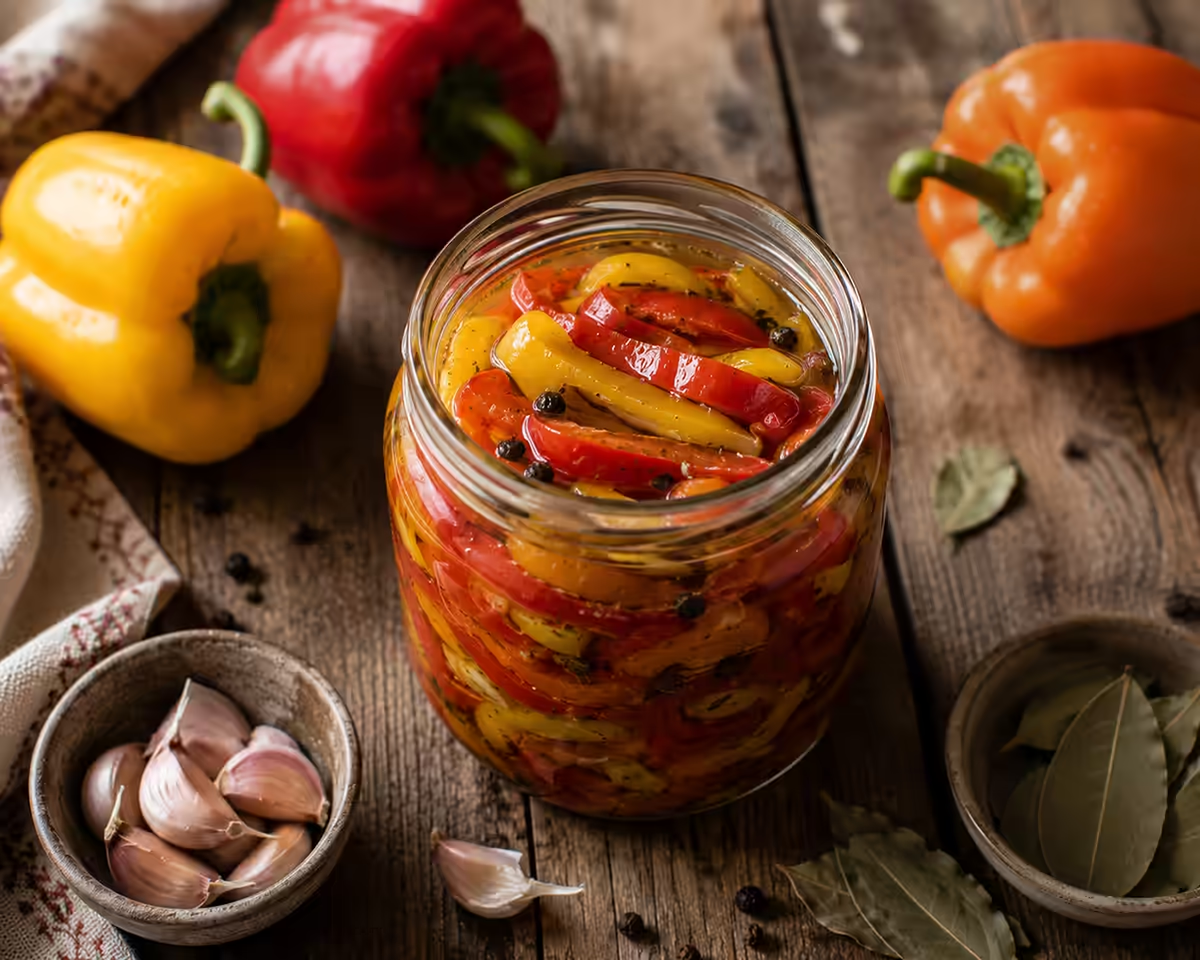
Pickled bell peppers for the winter are a preserve I make every year as soon as juicy, meaty peppers become available at the market at a reasonable price. They turn out sweet, with a slight tang from the vinegar and garlic, and go well with almost anything—from fried potatoes to grilled meat. In this article, I’ll explain how to pickle bell peppers in a one-liter jar so that they’re neither too sweet nor too sour, and taste just like the preserves that experienced home cooks have been making since childhood.
Content
This recipe is designed specifically for one liter jar—a convenient size if you’re trying this preserve for the first time, have a small family, or simply don’t have a lot of peppers from your garden. If needed, you can easily increase the quantities of the ingredients proportionally if you’re making several jars at once to last the whole winter. I personally recommend starting with just one jar—that way, it’s easier to figure out if this ratio of vinegar, sugar, and salt works for you before scaling up the recipe to ten jars and risking your entire pepper harvest all at once.
About the blank
Pickled peppers for the winter are a classic Ukrainian preserve that comes in dozens of variations: some people pickle whole peppers, others cut them into wedges or rings, some add tomato juice or oil, and others even prepare them together with tomatoes and carrots in the same jar. In this recipe, I’m sharing the simplest and most reliable version—peppers cut into wedges or wide strips, covered with a classic marinade made from vinegar, sugar, and salt, without any unnecessary experiments that might ruin the result for a beginner.
These peppers hold their shape well even after several months of storage; they don’t turn mushy and retain a pleasant crunch. These aren’t the kind of peppers that are pickled using the lecho method with tomatoes—here, the brine is clear, and the peppers themselves remain the star of the jar. It is precisely the clarity of the marinade and its crisp, unclouded color that indicate the pickles were prepared correctly and with care.
Why is this particular preparation method so convenient? First, peppers in a clear marinade are versatile: they can be served both as a standalone appetizer and as part of a more complex dish. Second, they keep well and don’t lose their flavor even after six months. Third, the recipe doesn’t require any hard-to-find ingredients or special equipment—everything you need is usually already in your kitchen.
This course is suitable for those who:
- wants to have a ready-made side dish or appetizer to go with meat on hand during the winter;
- enjoys homemade preserves without unnecessary chemicals or preservatives;
- is looking for a simple recipe for their first attempts at canning;
- wants to use up a small amount of peppers left over from the garden or the market;
- He cooks in small batches and doesn’t want to bother with large quantities.
These peppers are usually prepared in late summer and early fall, when they are at their cheapest and juiciest—roughly from mid-August to the end of September, depending on the region and the weather conditions of a given year. During this period, peppers are sold by the whole crate at a fairly reasonable price, so now is the best time to stock up on preserves for the winter.
Which pepper to choose
Fleshy, thick-walled bell peppers are best suited for pickling—they’re the ones that stay crisp longer and don’t become mushy in the brine. Thin-walled peppers can also be used, but they’ll become softer after just a few weeks of storage.
Here are a few things to keep in mind when making your choice:
- Color — choose peppers without dark spots, dents, or signs of rot; yellow, red, and orange peppers are sweeter, while green ones are slightly more bitter;
- firmness — the pod should feel firm to the touch, with no soft spots;
- stem — a fresh, green stem indicates that the pepper was picked recently;
- Size — medium and large pods are easier to cut into even pieces, while small peppers will take a bit more effort.
I usually mix the colors in a single jar—not only does it look beautiful on the table, but it also creates a more balanced flavor, since different colors of bell peppers have varying levels of sweetness. Red peppers are usually the sweetest, yellow ones have a slightly less intense flavor, and green ones add a light herbal note that nicely balances the overall sweetness of the preserve.
If you’re buying peppers at the market, don’t hesitate to ask the vendor for a sample—experienced home cooks always taste the peppers before buying a whole crate for canning. This makes it easier to tell whether this particular crop is sweet enough or if you should add a little more sugar to the marinade.
Ingredients for a 1-liter jar
To ensure the batch turns out well-balanced, I always weigh the peppers after slicing them, rather than before—that way, it’s easier to figure out how much marinade I’ll need and whether there will be enough to completely cover the peppers in the jar.
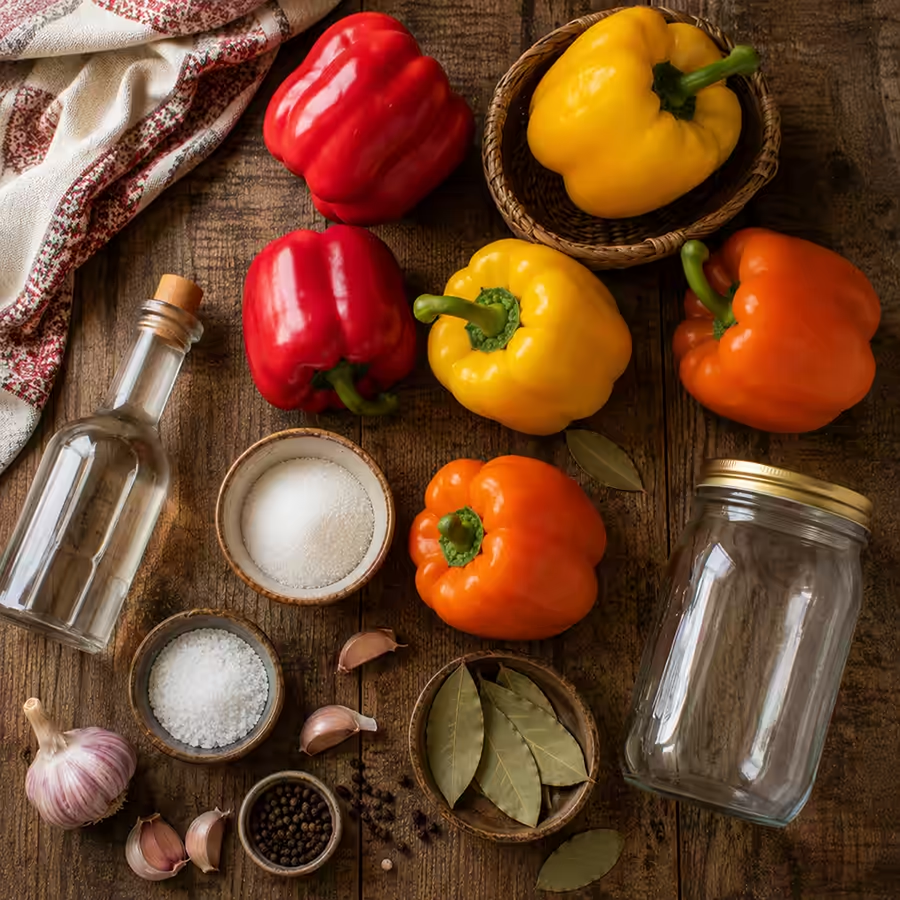
- bell peppers — 600–700 g (about 4–5 medium peppers, depending on size);
- water — 300 ml;
- 9% vinegar — 60 ml (about 4 tablespoons);
- sugar — 60 g (about 3 heaping tablespoons);
- salt — 15 g (about 1 level tablespoon; use table salt, not iodized);
- garlic — 2–3 cloves;
- bay leaf — 1–2;
- black peppercorns — 5–6;
- allspice berries — 2–3 (optional);
- sunflower oil — 1–2 tablespoons (optional; it softens the peppers and adds a subtle flavor);
- hot chili pepper — a small piece, 1–2 cm (optional, for those who like it spicier).
If you want to replace some of the sugar, you can use honey in the same proportion by weight, but then the marinade will turn out a little darker and have a slight honey flavor—that’s normal; it’s just a different flavor variation that’s perfectly acceptable.
As for iodized salt, it’s best to avoid using it in canning, as it can affect the clarity of the brine and impart a slight metallic aftertaste. Regular table salt, whether coarse or fine-grained, works best.
What equipment will you need?
Before you begin, it’s a good idea to have not only the ingredients ready, but also the necessary dishes and utensils. This will save you time and frustration when the marinade is already boiling but the jar isn’t ready yet.
- a 1-liter jar with a twist-off lid or a screw-on rubber lid;
- a 0.5–1-liter saucepan for the marinade;
- a cutting board and a knife for slicing peppers;
- a colander for washing peppers;
- a pouring spout for canning (optional, but it makes it much easier to pour the marinade without splashing);
- a towel or blanket to wrap around the jar after sealing it;
- kitchen scale or measuring cup to ensure accurate proportions.
If this is your first time canning, I recommend not skimping on the lids—it’s better to buy new ones than to use old ones from previous batches, since the rubber gaskets lose their elasticity over time and no longer provide an airtight seal.
How to scale a recipe for several jars
If you have a large harvest of peppers or want to can several jars at once to stock up, it’s easy to adjust the proportions. The main rule is to keep the ratio of ingredients the same, regardless of the number of jars.
For example, for three-liter jars, you’ll need about 1.8–2.1 kg of peppers, 900 ml of water, 180 ml of vinegar, 180 g of sugar, and 45 g of salt, and you can use a little extra of the spices—garlic, bay leaves, and peppercorns don’t necessarily have to be tripled exactly; slight variations aren’t critical here.
The only thing to keep in mind when scaling up is the sterilization time for the jars themselves. Larger batches or a greater number of jars at once may require a slightly longer time in the oven or over steam, so don’t rely solely on the time—also look for visual cues: the jars should be completely dry on the inside and hot to the touch.
How much does it cost to prepare, and is it worth the effort?
The cost of making a one-liter jar of this pepper is usually lower than the price of a similar store-bought product, especially if you buy the peppers during the season when prices are at their lowest. In addition, homemade preserves do not contain preservatives such as sodium benzoate or flavor enhancers, which are often found in store-bought versions, and the flavor turns out to be richer and better balanced to suit your own preferences.
The time it takes to prepare one jar is about 30–40 minutes of active work, not including the time for cooling and steeping. This is one of the quickest canning recipes, so it’s a great option even for those who don’t can very often and don’t want to spend an entire day off on it.
Step-by-Step Recipe
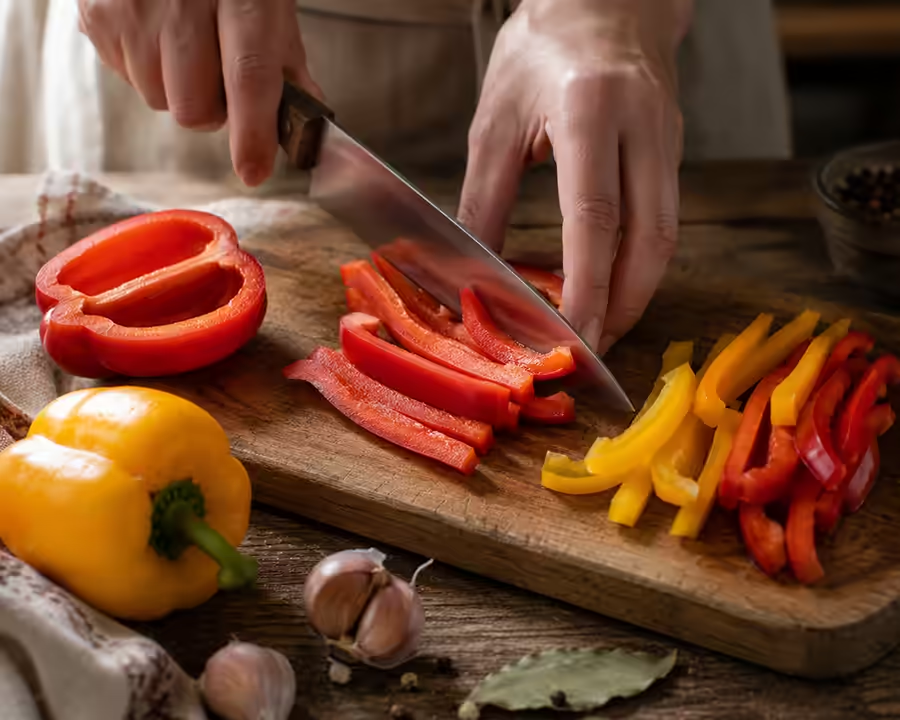
- Wash the peppers, cut them in half, and remove the stem, seeds, and white membranes inside—these are what most often give the finished product a bitter aftertaste.
- Cut the peppers into long wedges about 2–3 cm wide or into wide strips—whichever makes it easier for you to scoop them out of the jar with a fork once they’re ready.
- Sterilize the 1-liter jar and lid using whichever method is most convenient for you: over steam for 10–12 minutes, in the oven at 120 °C for 15 minutes, or in the microwave with a small amount of water at the bottom for 3–4 minutes.
- Place the peeled garlic cloves, bay leaf, and black and allspice peppercorns at the bottom of a clean, dry jar. If you like it spicier, add a piece of chili pepper as well.
- Pack the sliced peppers tightly into the jar, but without applying too much pressure, alternating the colors if you’re using several varieties—this will make the preserves look more appetizing on the shelf.
- In a small saucepan, combine the water, sugar, and salt; bring to a boil over medium heat, stirring until the sugar crystals are completely dissolved and no sediment remains at the bottom of the pan.
- Boil the marinade for 1–2 minutes after it comes to a boil, remove it from the heat, and add the vinegar—this way, less vinegar evaporates and the preserve retains the necessary acidity, which is key to preserving the product.
- Immediately pour the hot marinade over the peppers in the jar until it reaches the very top, leaving just half a centimeter to the top.
- If you’re adding oil, pour it on top before sealing the jar—it will form a thin layer and help the peppers retain their juiciness throughout their shelf life.
- Seal the jar with a sterilized lid, turn it upside down, check to make sure the marinade isn’t leaking, and wrap it in a towel or blanket until it has cooled completely—this takes about 8–12 hours.
- Once it has cooled, transfer the jar to a cool, dark place for storage: a pantry, a basement, or the bottom shelf of the refrigerator.
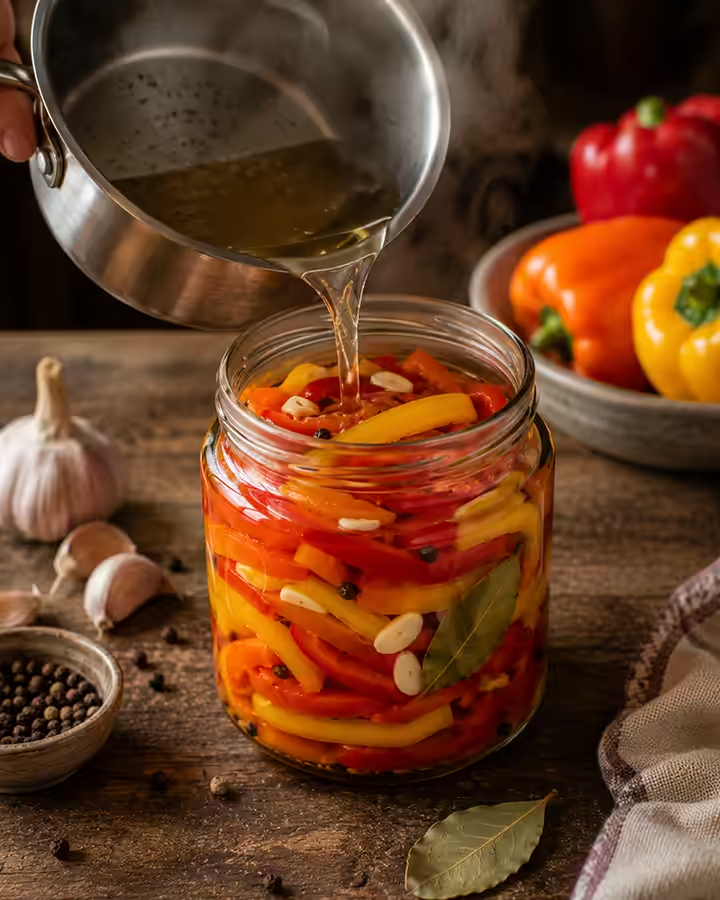
If you’re preparing a preserve without additional sterilization of the jar itself—whether by baking it in the oven or boiling it in a pot of water— but rely solely on the hot brine and a tight seal, it’s best to store such a jar in the refrigerator rather than at room temperature—this is safer from a food preservation standpoint.
For those who want to be on the safe side and plan to store the jar in the pantry at room temperature for a long time, I recommend additionally sterilizing the jar—already filled with peppers and marinade—in a pot of water: Place the jar in a pot lined with a towel at the bottom, fill the pot with water until it reaches the shoulders of the jar, and boil for 10–12 minutes after the water comes to a boil, then immediately seal the lid. This double protection virtually guarantees that the preserves will last until next summer without any problems.
Tips and Common Mistakes
The peppers have gone soft and lost their crunch. The most common reason is that the peppers were cooked in the marinade for too long, or the marinade was too hot when poured in, causing the peppers to “overcook” right in the jar during several rounds of pouring and draining. To avoid this, pour the marinade over the peppers as soon as it comes to a boil, and don’t leave the jar open for too long while the marinade cools.
The marinade turned out cloudy. This can happen if pepper seeds got into the jar or if the vinegar was of poor quality. Be sure to carefully remove the seeds and white membranes before slicing, and strain the marinade through a fine-mesh sieve if you want a perfectly clear liquid, just like in store-bought pickles.
The lid isn’t sealing properly. Most often, the problem is an old or damaged rubber gasket on the lid, or the fact that the jar’s rim wasn’t completely clean before sealing. Always wipe the rim of the jar with a dry, clean cloth before pouring in the marinade and screwing on the lid. Check the lids for damage before each use—even a small dent can compromise the seal.
It tastes too sour or too sweet. This is a matter of personal preference, so I recommend noting down the exact proportions you liked best after your first attempt, and using those as a starting point next time. Vinegar from different manufacturers can vary in acidity, so the approximate 60 ml is a starting point that you can adjust by 5–10 ml in either direction depending on your personal taste.
The peppers have lost their color and turned gray. This usually happens if the peppers have been left cut up and exposed to the air for too long before being placed in a jar. Try to cut the peppers right before packing them, rather than in advance, especially if you’re preparing them on a hot day.
The jar “exploded” or the lid bulged. This is a sign that bacteria have gotten into the jar—most often due to insufficient sterilization or because the marinade wasn’t hot enough when it was poured in. It’s best to discard such a jar immediately without tasting the contents, even if the smell seems normal.
Another point worth noting is the thickness of the pepper walls. Thin-walled peppers become soft and less crunchy more quickly after pickling, so if you want a firm, almost crunchy texture, choose meaty peppers with thick walls—they usually cost a little more at the market, but the result is worth it, especially if you plan to store the preserves for more than a few months.
A Comparison of Pepper Pickling Methods
Below is a short table to help you figure things out if you haven’t yet decided which method of pickling peppers works best for you.
| Method | The texture of the pepper | Cooking time | Complexity |
|---|---|---|---|
| Classic Marinade (this recipe) | Dense, slightly crunchy | Quick, 30–40 minutes | Low |
| Lecho with Tomatoes | Soft, juicy | Longer, 50–60 minutes | Average |
| Peppers in oil without vinegar | Very soft | Takes a long time; needs to be cooked in oil | Average |
| Quick-Pickled Peppers Without Sterilization (Refrigerated) | Crunchy, fresh | Very quickly, 15–20 minutes | Very low |
As you can see, each method has its own advantages depending on how much time you’re willing to spend and what texture you want to achieve. If you’re new to canning, it’s best to start with the classic marinade—it yields the most predictable results and is the most forgiving of minor deviations from the recipe.
Variations and Presentation
Pickled bell peppers are a very versatile preserve that you can experiment with once you’ve mastered the basic recipe.
Cooking Variations:
- Add carrots, sliced into thin rounds or strips—they soak up the marinade well and add a pleasant sweetness to the overall flavor;
- Try using half-rings of onion—they’ll become tender and slightly spicy, pair perfectly with meat, and add an extra kick to the dish;
- For a spicier version, add not only chili but also a pinch of ground coriander or mustard seeds—they’ll add extra depth of flavor;
- If you like spicy notes, add a few sprigs of fresh dill or parsley to the jar—they go well with the vinegar marinade;
- You can add a few slices of lemon for a light citrus note, although this is a somewhat unusual variation on the classic Ukrainian pickling method.
How to serve:
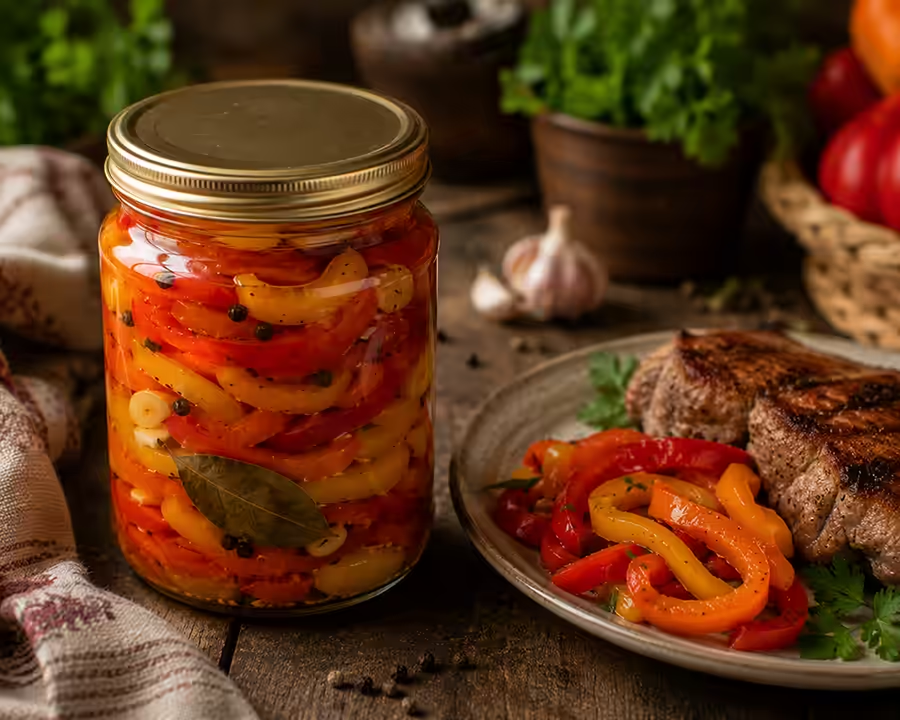
These peppers are perfect as a standalone appetizer on a holiday table, a side dish for pan-fried or roasted meat, or an accompaniment to potatoes in any form—from mashed to skin-on baked potatoes. I also like to add it to a meat platter or serve it alongside pickled cucumbers and sauerkraut—it creates a nice balance of flavors on the New Year’s or Christmas table.
If you have any marinade left over after eating the peppers, don’t rush to pour it out—it’s perfect for dressing a simple vegetable salad, for marinating onions for shashlik, or even as a base for a quick vinaigrette.
A Little About Nutritional Value and Calorie Content
Bell peppers are, in and of themselves, a vegetable high in vitamin C; in fact, when fresh, they contain even more vitamin C than citrus fruits. After pickling, some of the vitamins are, of course, destroyed by the high temperature and vinegar, but the peppers retain their fiber and some of their minerals, so as a side dish or appetizer, they remain healthier than many other prepared foods high in oil or sugar.
The calorie content of this preserve is low—it’s largely determined by the amount of sugar in the marinade, which remains partly in the liquid rather than in the pepper itself. If you add oil, the calorie count increases slightly, but not significantly for those who simply want to add variety to their winter meals. For those who count calories or watch their diet, I recommend making the version without oil—it’s lighter but just as delicious.
A Brief Historical Overview
Pickling vegetables in vinegar is a technique that has been part of Ukrainian cuisine since the days when people had to preserve their harvests without refrigerators, using natural preservatives: salt, sugar, and acetic acid. Bell peppers, despite their name, have been widely grown in Ukraine for decades, which is why pickled peppers have become just as common a part of the winter table as sauerkraut or pickled cucumbers.
Different regions of Ukraine have their own slight variations in the recipe: in some places they add more garlic, in others carrots are a must, and in still others, they simply won’t have pepper without tomato sauce. The recipe I’m sharing in this article is a balanced, versatile version that’s easy to adapt to your family’s traditions or taste preferences.
How long do pickled peppers last?
If sterilized properly and sealed tightly, a jar of pickled peppers will keep in a cool, dark place for up to 8–10 months. Once opened, the jar should be kept in the refrigerator and consumed within 1–2 weeks, since without an airtight seal, the brine loses its preservative properties more quickly, and the peppers may begin to spoil.
If you notice that the lid has bulged, the marinade has become cloudy for no apparent reason, or an unpleasant odor is present when you open it—it’s best not to eat this preserve, but rather throw it away; these are signs that the preserve has gone bad and is unsafe to eat.
Also pay attention to where you store the preserves: direct sunlight and temperature fluctuations significantly shorten their shelf life, so the best place is a dark pantry, a basement, or the bottom shelves of the refrigerator, where the temperature remains stable throughout the year.
Frequently Asked Questions
Is it possible to pickle peppers without sterilizing the jar? Yes, it is, if you plan to store the pickles in the refrigerator and eat them within a few months. For long-term storage at room temperature, it’s essential to sterilize the jars and lids; otherwise, the risk of the preserves spoiling increases significantly.
Can 9% vinegar be replaced with apple cider vinegar or vinegar essence? Apple cider vinegar can be used, but you should increase the amount by about half, since it is less concentrated. Vinegar essence is used in much smaller quantities—approximately 1 teaspoon per liter jar—and it must be added carefully, strictly adhering to the proportions, because vinegar essence is much more concentrated than regular vinegar and can easily ruin the taste of the preserves.
Why did the peppers turn bitter after pickling? Most often, the reason is that seeds or white membranes got into the jar, which is what gives them a bitter aftertaste. Bitterness can also occur if you use overripe or damaged peppers, so it’s important to sort through the ingredients carefully before preparing them.
Can this recipe be made without sugar? Yes, but the marinade will taste more sour and sharp. If you want to reduce the amount of sugar, do so gradually—10–15 g at a time—and taste the marinade before pouring it over the peppers to find a balance that works for you.
How long should the peppers sit before serving? Ideally, let the peppers sit for at least 2–3 weeks so they fully absorb the marinade and the flavors balance out. Immediately after preparation, the peppers still have a rather sharp taste and do not reveal all the nuances of the marinade.
Can I use frozen peppers for this recipe? It’s best to use fresh peppers for this recipe, since frozen peppers become too soft after thawing and lose the crunch we’re trying to preserve in this preparation. It’s better to save frozen peppers for soups or hot dishes, where texture isn’t as important.
Do you need to blanch the peppers before marinating them? For this recipe, blanching isn’t necessary—the fresh peppers are poured over with hot marinade right away, without being blanched first. Blanching would make the peppers softer, but the goal of this recipe is to preserve their light crunch.
Can this prepared ingredient be used in salads during the winter? Yes, that’s one of the most convenient ways to use it. Just take the peppers out of the jar, chop them finer if needed, and add them to a salad with onions, oil, and herbs—you’ll have a quick and delicious appetizer in just a few minutes.
Can I use plastic lids instead of metal ones for the peppers? For this recipe, it’s best to use metal screw-on lids—they provide a more reliable seal and help the preserves last longer at room temperature. Plastic lids are better suited for preserves that will be stored in the refrigerator right away and eaten within one or two months.