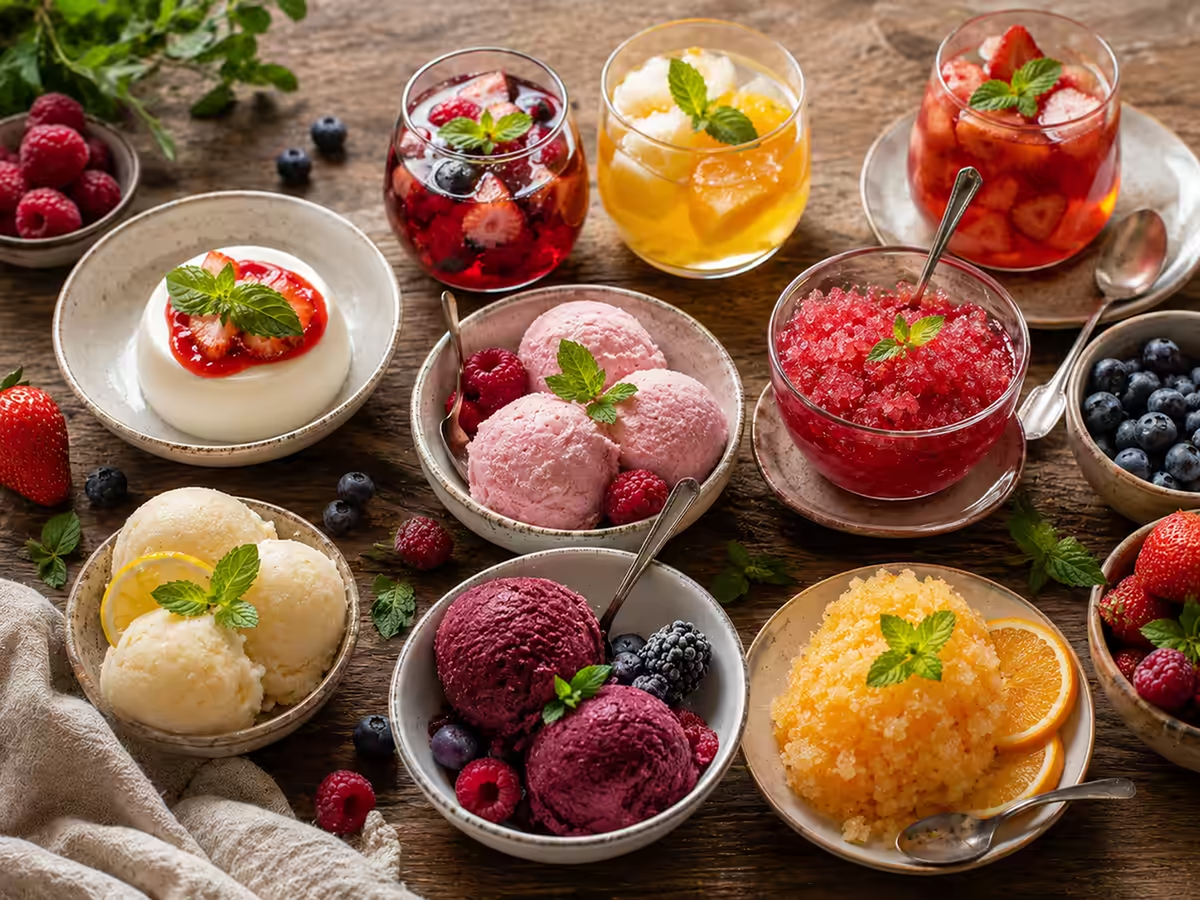
When it’s hot outside, the last thing you want to do is stand at the stove or turn on the oven. That’s why in the summer I mostly make cold desserts: panna cotta, jelly, sorbet, and a few other things that don’t require any baking at all. This is one of those rare occasions when a simple set of ingredients and a little patience yield a result that looks as if a professional pastry chef had worked on it. In this article, I’ve compiled recipes that I’ve been making myself for years, complete with all the nuances, mistakes, and life hacks I’ve learned through my own experience—often through trial and error, and not always with successful results.
Content
I’m deliberately not going to talk about dozens of exotic variations with rare ingredients. Instead, I’ll focus on the desserts I actually make at home using ingredients you can find at any regular supermarket: heavy cream, gelatin, fruit, and sugar. These are the basics you should master first, and then you can experiment to suit your own taste.
Why Cold Desserts Are a Must-Have for Summer
Cold desserts share one common trait: they set or chill, rather than being baked. This means less risk of burning anything, less reliance on the exact oven temperature, and much more freedom to experiment with flavors. Even someone who is terrified of the oven can easily make panna cotta or jelly.
Another reason I love this category of desserts so much is that it saves time exactly when you least want to spend any. You can whip up a panna cotta or jelly in 15–20 minutes in the evening, put it in the fridge, and forget about it until morning. This is especially convenient when you’re cooking for guests: you do most of the work ahead of time, and serving takes literally a minute while everyone is sitting down at the table.
The third point is texture and how it suits the season. In the summer, the body naturally craves something light, creamy, or icy—not something heavy and overly rich. Panna cotta offers a delicate, velvety texture; jelly provides freshness thanks to fruit juices; and sorbet is virtually fat-free and more refreshing than any classic ice cream with a high milk fat content.
The fourth argument is that cold desserts are forgiving of decorating mistakes, which is not the case with sponge cakes or meringues. Even if the panna cotta mold isn’t perfectly even or the jelly cracks a little when you take it out of the mold, you can always top it with berries, a mint leaf, or sauce—and it will look like an intentional touch rather than a failed recipe.
And one last thing: here’s why I think this category is underrated—it’s perfect for planning ahead. Virtually all of the recipes below can be prepared a day or two before the event, and the dessert only benefits from this—the gelatin structure stabilizes, and the flavors have time to develop and blend together.
Panna Cotta: A Classic That’s Easy to Make
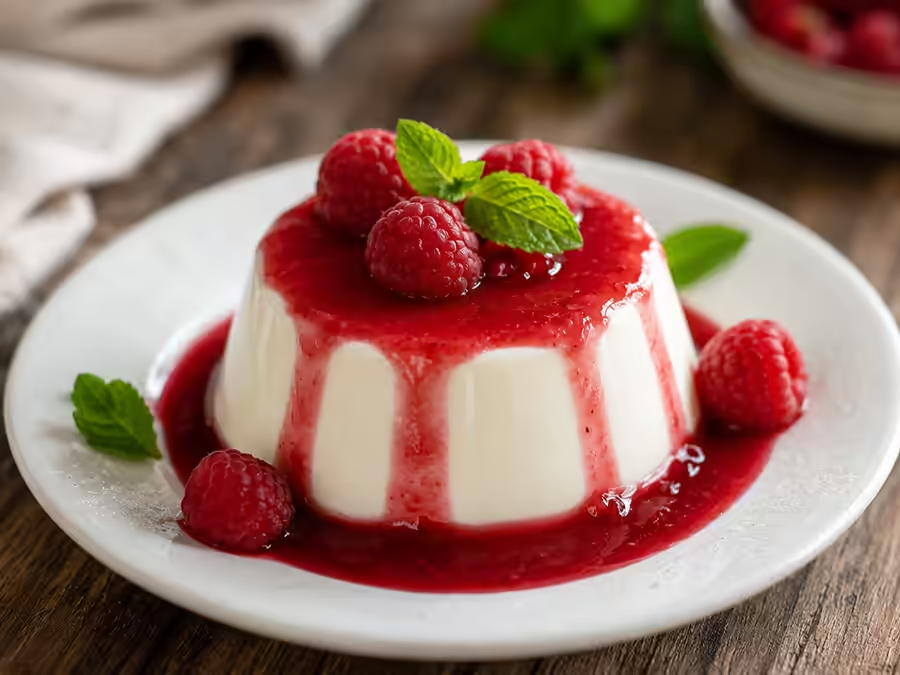
Panna cotta is an Italian dessert whose name translates to “cooked cream.” It’s not just some fancy restaurant dish—it’s a dessert that even someone who’s never cooked anything more complicated than an omelet can make. The key is getting the gelatin proportions right, because that’s where mistakes most often occur, ruining the whole result.
About Panna Cotta
Classic panna cotta originates from Piedmont, a northern region of Italy, where high-quality dairy products have traditionally been abundant. Originally, the dessert was made without any gelatin at all, allowing the cream to set naturally through a long simmering process, but the modern version with gelatin is much simpler and quicker to make, without compromising on flavor.
Panna cotta is perfect for those who like to prepare meals in advance: the dessert will keep well in the refrigerator for 3–4 days without losing its texture. It’s also the perfect base for experimenting with flavors—by adding coffee, chocolate, or fruit puree, you’ll get a completely different dessert using the same preparation technique.
Ingredients for 4 servings
- cream with a fat content of at least 30% — 500 ml
- sugar — 70–80 g
- sheet or powdered gelatin — 8 g
- vanilla bean or vanilla extract — 1 or 1 teaspoon
- a pinch of salt
If 30% heavy cream seems too rich, you can replace some of it with milk in a ratio of 300 ml of heavy cream to 200 ml of milk—the texture will be a little lighter, but still creamy. For a lighter option, 20% cream works well, although the dessert will be less creamy and have a slightly more jelly-like texture.
Step-by-Step Recipe for Panna Cotta
- Soak the gelatin in cold water according to the package instructions—usually 5–10 minutes for sheet gelatin and 10–15 minutes for powdered gelatin.
- Pour the cream into a heavy-bottomed saucepan, add the sugar and a pinch of salt.
- If you’re using a vanilla bean, split it lengthwise and scrape the seeds directly into the cream, along with the pod.
- Place the saucepan over medium heat and warm the cream, stirring constantly, until small bubbles begin to form around the edges of the pan. The mixture should not come to a boil.
- Remove from the heat and take out the vanilla bean, if there was one.
- Squeeze the excess water out of the gelatin and add it to the hot cream; stir well until it is completely dissolved, making sure there are no lumps.
- If you’re using vanilla extract instead of a vanilla bean, add it now, while the mixture has cooled slightly.
- Pour the mixture into molds, glasses, or small cups.
- Let it cool at room temperature for 15–20 minutes, then refrigerate it for at least 4 hours—preferably overnight.
The Most Common Mistakes with Panna Cotta
The main problem almost all beginners face is a rubbery texture. This happens when there’s too much gelatin. Stick to a ratio of about 8 g of gelatin per 500 ml of liquid—this results in a delicate yet firm set, where the dessert wobbles slightly on the plate but holds its shape well without spreading.
The second mistake is letting the cream boil. If the cream boils and starts to foam, its protein structure changes, and the dessert may end up with small lumps or an unpleasant aftertaste of burnt milk. Heat the cream over medium heat and remove it from the stove as soon as the first small bubbles appear around the edges of the pot.
The third problem is that the panna cotta doesn’t come out of the mold in one piece; instead, it falls apart or stays partially inside. If you’re using silicone molds, you usually won’t have any problems thanks to the material’s flexibility. But if you’re using a ceramic or glass mold, dip it in hot water for 5–10 seconds before serving—this will slightly soften the edges of the dessert, allowing it to slide easily onto a plate in one smooth motion.
The fourth, less obvious mistake is not letting it chill long enough. Even if the panna cotta feels set to the touch after just two hours, its texture hasn’t fully stabilized yet. Let it chill for at least 4 hours; ideally, prepare the panna cotta the evening before serving.
Jelly: Deceptive Simplicity
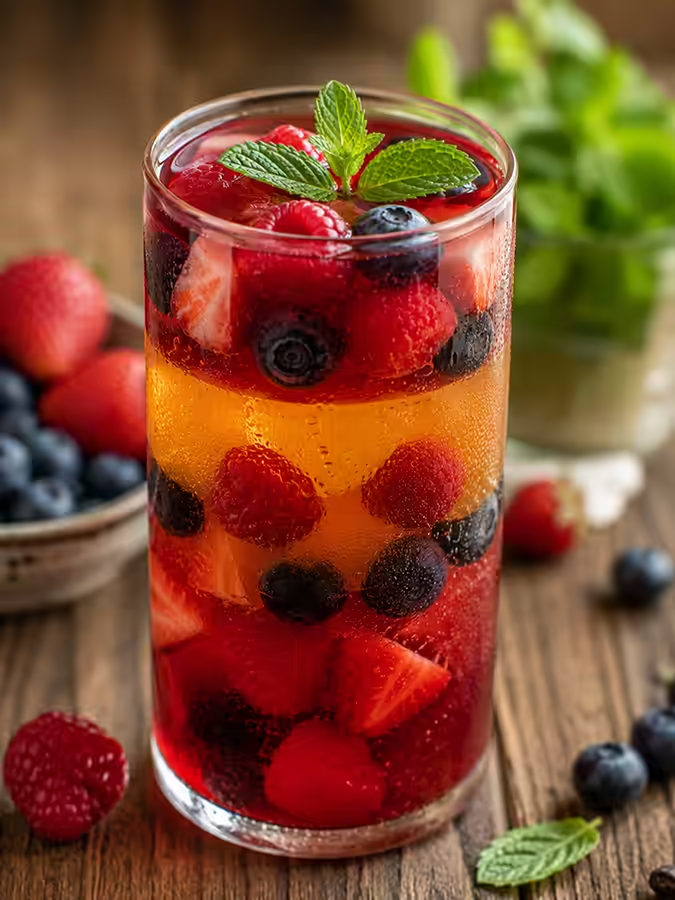
Jelly might seem like a childish dessert from kindergarten, but good homemade jelly made with natural juice and fresh fruit is a whole different story compared to store-bought packets full of food coloring. Here, too, the main secret is getting the right proportion of gelatin and handling acidic juices carefully, as they can sometimes prevent the gelatin from setting properly.
About Jelly
Unlike panna cotta, jelly doesn’t require heat treatment of fatty ingredients, so it’s a much lighter dessert in terms of calories. It’s perfect for hot days when your body craves something refreshing and light. In addition, jelly is a great way to use seasonal berries that are a little too ripe to eat fresh but are still perfectly suitable for cooking.
Jelly also stands out thanks to its visual appeal: the transparent layers with berries inside look stunning even without any extra effort on the part of the cook, making this dessert especially convenient for guests.
Ingredients for 6 servings
- freshly squeezed or high-quality store-bought juice without pulp — 700 ml
- gelatin — 20 g
- sugar — 50–100 g, depending on the acidity of the juice
- fresh or frozen berries — 200 g, optional
Step-by-Step Jelly Recipe
- Soak the gelatin in 150 ml of cold water or some of the juice for 10–15 minutes until it has fully swollen.
- Heat the remaining juice in a saucepan, add the sugar, and stir until it dissolves, being careful not to bring the liquid to a boil.
- Remove the juice from the heat and add the softened gelatin; stir thoroughly until it dissolves completely in the warm liquid.
- If the juice is too hot, let it cool slightly before pouring it over the berries—otherwise, they’ll lose their bright color and become too soft.
- Divide the fresh or frozen berries evenly among the molds or clear glasses.
- Pour in the gelatin mixture, leaving a little space at the top of the mold.
- Let it cool at room temperature, then refrigerate for 3–5 hours until completely set.
Why Doesn’t Jelly Set Sometimes?
This is where experience really comes in handy to save you from a ruined dessert. Some fruits and juices contain enzymes that break down gelatin and prevent it from setting properly—these include kiwi, pineapple, fresh papaya, and figs. If you want to add these specific fruits to your jelly, be sure to boil them for a few minutes or use canned versions: heat treatment destroys the problematic enzyme, and the gelatin will set without any problems afterward.
The second reason for a runny jelly is using too little gelatin relative to the volume of liquid. Aim for 15–20 g of gelatin per liter of liquid for a soft jelly that can be easily scooped up with a spoon, and 25–30 g for a firmer version that can be cut into neat pieces with a knife.
The third, less obvious reason is that the base is too acidic. Very acidic juices, such as lemon or cranberry juice in concentrated form, can partially break down the gelatin if left in contact with it for a long time. If you’re making jelly with such a juice, increase the amount of gelatin slightly—by about 15–20% of the standard amount.
Sorbet: You Can Make It Without an Ice Cream Maker, Too
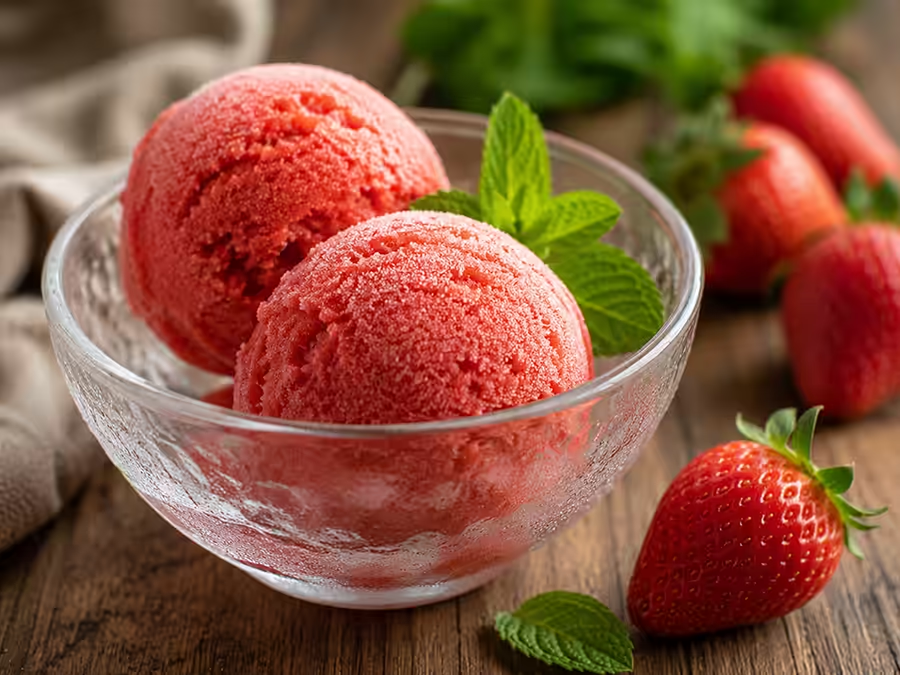
Sorbet is a fruit puree frozen to a creamy texture, with no dairy or eggs in its ingredients. It’s the lightest of all cold desserts—both literally and figuratively—and at the same time the most refreshing option on a hot day, when even panna cotta seems too heavy.
About Sorbet
Historically, sorbet is considered the precursor to modern ice cream: the first recipes for frozen fruit mixtures appeared long before people learned how to consistently freeze milk-based mixtures. Today, sorbet is valued above all for its lightness—it contains no fat, and its calorie content is determined almost entirely by the amount of sugar in the syrup.
Another advantage of sorbet is its versatility. It works equally well as a standalone dessert, as a refreshing interlude between courses during a multi-day festive meal, and even as a base for cocktails or lemonades if you let it soften a bit before serving.
Ingredients for 4 servings
- fruit puree (strawberry, mango, raspberry, or watermelon) — 500 g
- sugar syrup made from sugar and water in a 1:1 ratio and cooled — 100–150 ml
- lemon juice — 1–2 tablespoons
- a pinch of salt
Step-by-Step Recipe for Sorbet Without an Ice Cream Maker
- Make a sugar syrup: mix equal parts sugar and water, bring to a boil, stir until the sugar is completely dissolved, and remove from the heat. Let the syrup cool completely.
- Blend the fruit in a blender until it forms a smooth, lump-free puree.
- Combine the mashed potatoes with the cooled syrup, lemon juice, and a pinch of salt.
- Taste the mixture—it should be a little sweeter than you think it needs to be, because the cold dulls your sense of sweetness by almost a third.
- Pour the mixture into a shallow container suitable for freezing.
- Place the container in the freezer for 45 minutes, then remove it and stir thoroughly with a fork or mixer, breaking up the ice crystals that have already begun to form around the edges.
- Repeat this process every 30–45 minutes for 3–4 hours, until the mixture is smooth and creamy throughout.
- Before serving, let the sorbet sit at room temperature for 5–10 minutes so it’s easier to scoop with an ice cream scoop.
How to Avoid Icy Sorbet
The most common problem is that the sorbet turns into a solid block of ice instead of a creamy mixture. This is usually due to a lack of sugar: sugar not only sweetens the dessert but also lowers the freezing point of the liquid, making the texture noticeably softer. Don’t reduce the amount of syrup below the recommended amount, even if the fruit itself seems sweet enough to you.
The second reason is insufficient stirring during freezing. If you simply pour the mixture into a container and leave it overnight, you’ll end up with ordinary fruit ice, not a proper sorbet. Stirring the mixture every 30–45 minutes is exactly what creates that characteristic creamy texture without the need for special equipment like an ice cream maker.
The third reason, which is often underestimated, is the shape of the container. Wide, shallow containers freeze much more evenly than tall, narrow ones, so the contents mix more easily and without a thick layer of ice forming around the edges—which is hard to break up with a fork.
A few more cold desserts worth trying
Semifreddo
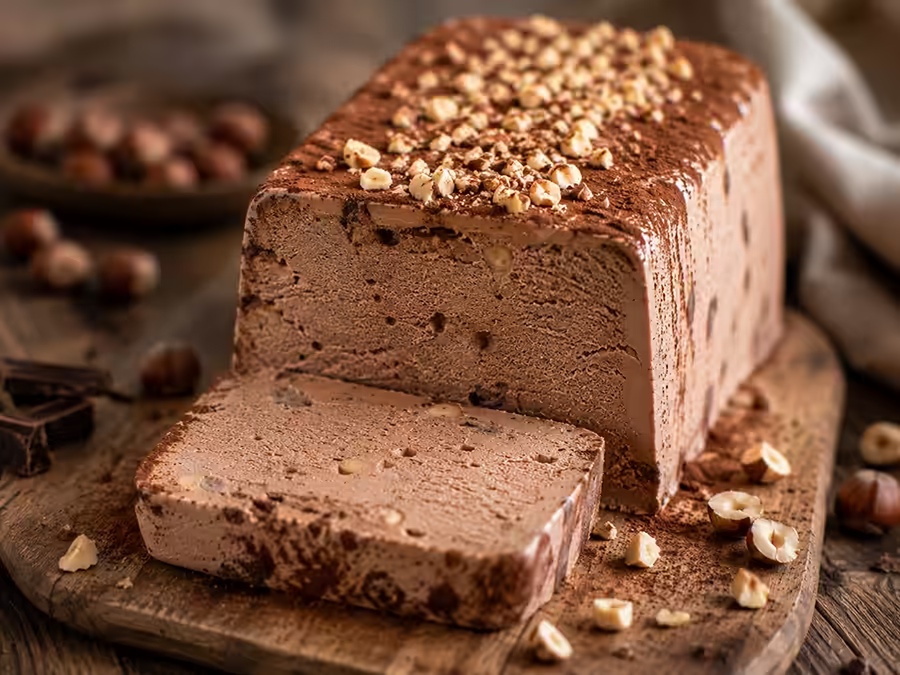
Semifreddo is a semi-frozen Italian dessert made with whipped cream and meringue, with a texture that’s somewhere between a light mousse and classic ice cream. It never freezes solid thanks to the large amount of air whipped into the mixture during preparation.
Here’s how to make it: Whip the chilled heavy cream until soft peaks form; separately, beat the egg whites with sugar until you have a glossy, stiff meringue; gently fold the two mixtures together with a spatula, using an up-and-down motion to preserve the light, airy texture. Add flavorings to your liking—cocoa, coffee extract, chopped nuts, or berry puree. Pour the mixture into a pan lined with plastic wrap, leaving a small overhang, and freeze for at least 6 hours, or preferably overnight. Serve straight from the freezer, cutting with a sharp knife that has been dipped in hot water beforehand to ensure clean slices.
Semifreddo is especially handy when you need to prepare something impressive in advance: it keeps well in the freezer for up to two weeks without losing any of its flavor or texture.
Granite
Granita is the Sicilian cousin of sorbet, except that its texture is intentionally icy and grainy, rather than creamy and smooth. It’s even easier to make than sorbet: fruit juice or purée is mixed with sugar syrup, poured into a shallow tray, and frozen, with the mixture broken up into small ice crystals with a fork every 30 minutes.
The result is something like a refreshing fruit slush—perfect for the hottest days, when even sorbet seems too heavy. The classic flavors of granita in Sicily are lemon, coffee, and almond, although it turns out just as delicious with any seasonal fruit juice. The main difference from sorbet is that granita doesn’t need to be blended into a smooth, creamy consistency: the more pronounced and distinct the ice crystals are, the closer the dessert is to the authentic version.
Parfait
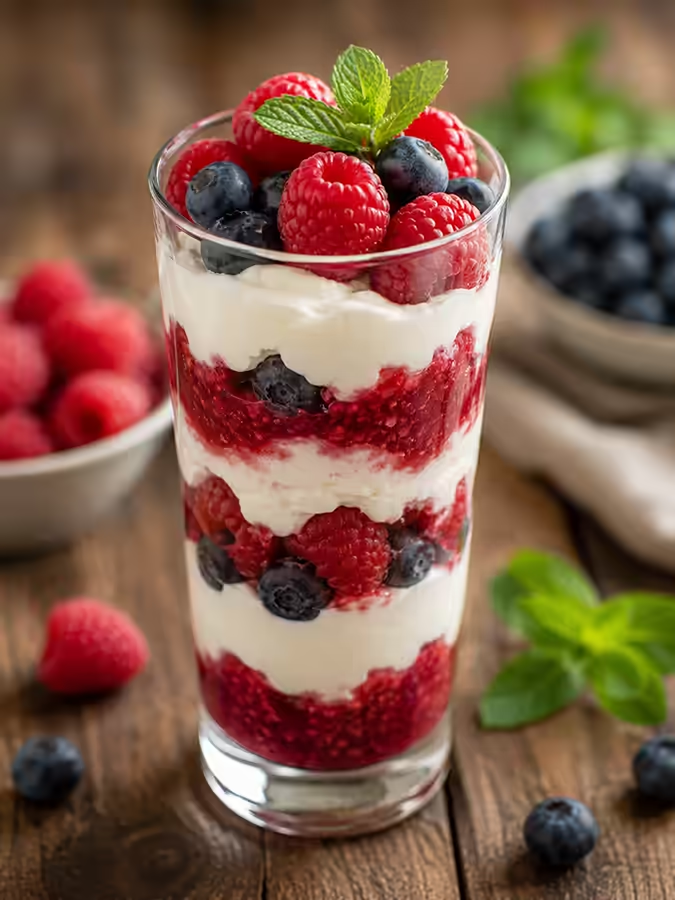
A parfait is a layered dessert made of frozen cream, fruit purée, and sometimes meringue, which is usually prepared in tall molds or clear glasses. Essentially, it is a lighter version of semifreddo, often made without eggs, but with an emphasis on a beautiful layered presentation.
Seasonal berries are perfect for parfaits—simply alternate a layer of cream base with a layer of berry purée or whole berries, and freeze each layer separately for about 30–40 minutes before adding the next one. This ensures you get distinct, beautiful layers instead of them blending together into a single mixture. Parfait is best served in a clear glass precisely because the layers are visible, making the dessert look impressive even before you take a bite.
Ice Cream Without an Ice Cream Maker
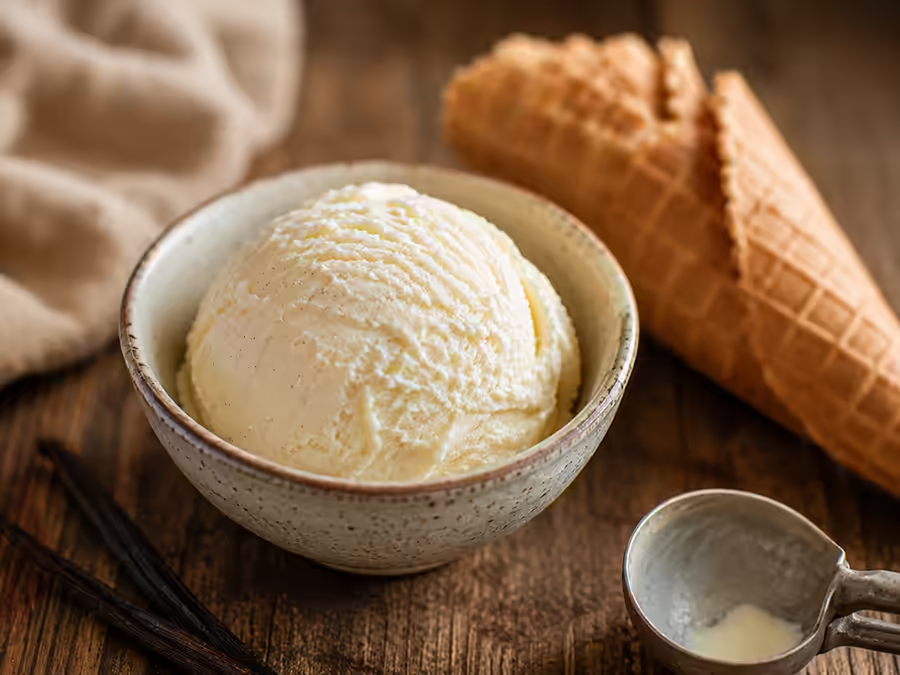
If you’re craving ice cream specifically—not sorbet or semifreddo—there’s a simple way to make it at home without any special equipment. Whip chilled heavy cream into a thick, stiff foam. Separately, mix condensed milk with a flavoring of your choice—vanilla, cocoa, coffee paste, or nut paste. Gently fold the two mixtures together with a spatula using bottom-to-top motions to preserve the airiness of the whipped cream, pour into a mold, and freeze for at least 6 hours.
Thanks to the condensed milk, the sugar prevents the mixture from freezing solid, and the texture turns out creamy even without constant stirring during freezing—unlike sorbet. This is probably the simplest homemade ice cream recipe of all—just two main ingredients and no cooking required.
Chocolate Mousse
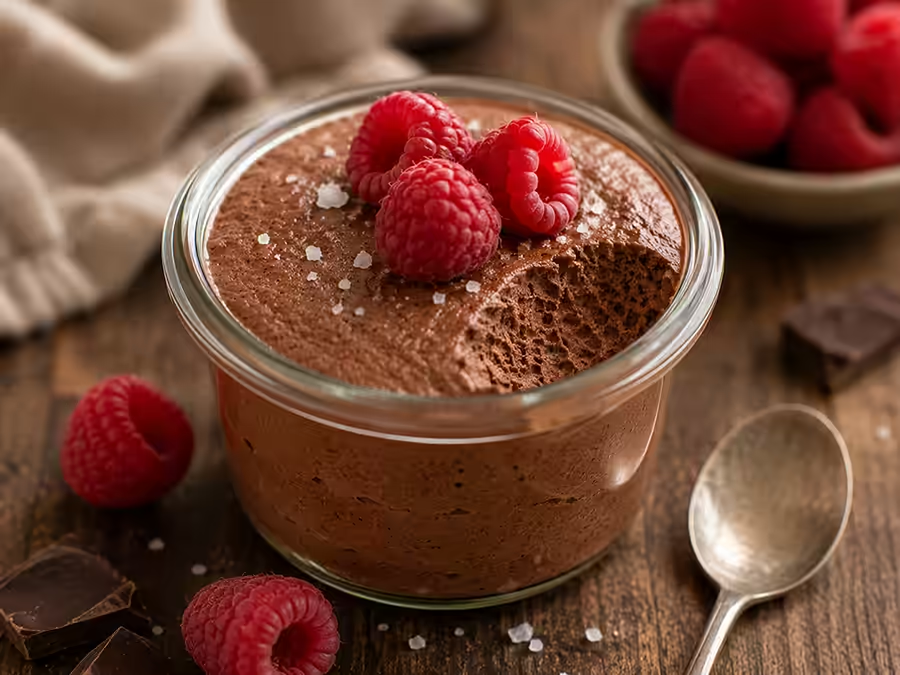
Chocolate mousse is a dessert made from melted chocolate, whipped cream, and sometimes egg yolks, which sets in the refrigerator to form a light, airy texture. Unlike panna cotta, the main thickening agent here is not gelatin, but the chocolate itself, which sets when cooled due to its cocoa butter content.
Melt the dark chocolate in a double boiler, then let it cool slightly so it doesn’t curdle the cream when mixed. Separately, whip the chilled cream to soft peaks. Gently fold the cooled chocolate into the whipped cream with a spatula, using upward strokes to keep the mixture light and airy. Divide among glasses and refrigerate for 3–4 hours until set. You can elevate the mousse by adding a pinch of sea salt on top before serving, or a bit of orange zest to the mixture itself for a pleasant, fresh note that contrasts with the rich chocolate.
No-Bake Cheesecake
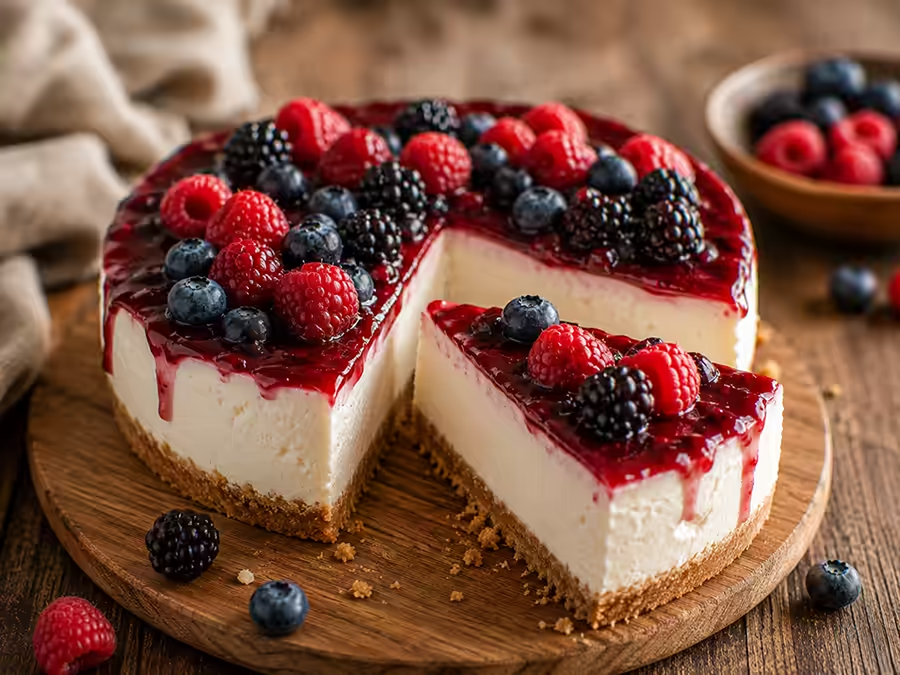
No-bake cheesecake is a dessert made with cream cheese, whipped cream, and gelatin, layered over a crunchy crust of crushed cookies. It combines the lightness of panna cotta with the richness of a classic cheesecake, but without any baking in the oven.
The crust is made from crushed cookies mixed with melted butter and pressed into the bottom of the pan. The filling is made from cream cheese, whipped with sugar until smooth, with a little gelatin added for stability and whipped cream for lightness. Spread the filling over the crust and refrigerate for at least 5–6 hours, or preferably overnight. This cheesecake is best topped with a berry sauce or fresh fruit—the contrast between the tartness and the rich, creamy filling makes the dessert well-balanced rather than cloying.
Comparison Chart of Cold Desserts
| Dessert | Active working hours | Setting time | Equipment Needed | Complexity |
|---|---|---|---|---|
| Panna cotta | 15–20 min | 4+ years | Dessert Molds | Easy |
| Jelly | 15–20 min | 3–5 hours | Molds or glasses | Easy |
| Sorbet | 20 min + stirring | 3–4 years | Blender | Average |
| Granite | 10 min + stirring | 2–3 years | Fork, tray | Easy |
| Semifreddo | 25–30 min | 6+ hours | Mixer | Average |
| Parfait | 20–25 min | 4–6 hours | Clear wine glasses | Average |
| Ice Cream Without an Ice Cream Maker | 20 min | 6+ hours | Mixer | Average |
| Chocolate Mousse | 15–20 min | 3–4 years | Mixer | Easy |
| No-Bake Cheesecake | 25–30 min | 6+ hours | Baking pan with a removable rim | Average |
This table clearly illustrates the basic logic behind choosing a dessert for a specific occasion. If you’re short on time and want the simplest possible result with no risk of failure, go for panna cotta, jelly, or chocolate mousse. If you have time to make a few trips to the freezer and want something refreshing on a hot day, sorbet or granita win out for their lightness. And if you’re preparing for a special occasion and want to impress with texture and presentation—semifreddo, parfait, or no-bake cheesecake will stand out on the table.
Tips and Common Mistakes
The first rule I’ve learned over the years of making cold desserts is to always taste for sweetness before setting or freezing, not after. Cold significantly dulls the perception of sweet and sour flavors, so a mixture that seems perfect when warm may taste bland and unremarkable after cooling. It’s better to make it a little “too sweet” during the preparation stage, using the taste of the warm mixture as your baseline.
The second rule is: don’t rush the gelatin. Not allowing enough time for it to swell or mixing it into a liquid that’s too hot are the main causes of uneven setting and small lumps in the finished dessert. Let the gelatin fully hydrate in cold water according to the package instructions, and always stir it into a warm—not boiling—liquid; otherwise, the gelatin will partially lose its binding properties.
Third, the mold and temperature when removing the finished dessert. Panna cotta and jelly are much easier to remove from the mold in one piece if you dip the mold in hot water for a few seconds before serving. This won’t damage the dessert’s structure if done quickly and carefully, but if you leave it in too long, you risk partially melting the edges and losing the mold’s sharp lines.
Rule number four: Be patient when freezing. Sorbet, granita, and homemade ice cream made without an ice cream maker require regular stirring during the first few hours of freezing—not just a single pour into the mold. Skip this step, and instead of a creamy texture, you’ll end up with a solid block of ice that you’ll have to completely thaw and start over from scratch.
Rule Five—the quality of the ingredients matters much more than in complex baked desserts. Since heat treatment is minimal—and some desserts aren’t cooked on the stove at all—the flavor of fresh cream, ripe fruit, or high-quality juice comes through directly, without being masked by caramelization or baking. If possible, choose seasonal fruits at the peak of ripeness—the difference in the finished dessert will be noticeable.
The sixth, less obvious rule is: don’t over-chill the cream before whipping it for mousses and semifreddos. Cream that’s too cold—straight from the freezer—whips unevenly and may separate into butter and whey instead of forming a stable foam. The optimal temperature for whipping cream is refrigerator temperature—that is, about 4–6 degrees—not freezer temperature.
Variations and Presentation
Panna cotta doesn’t have to be flavored only with vanilla: try adding lemon or orange zest, a little ground cinnamon, cardamom, or even freshly brewed espresso in place of some of the liquid for a rich coffee-flavored version. It’s best to serve panna cotta with a berry sauce, caramel, or fresh fruit on top—the contrast in textures and flavors makes the dessert more interesting and less monotonous.
Jelly looks best when served in clear glasses, which clearly show the layers of berries inside—this requires almost no extra effort on the cook’s part, but looks much more impressive than jelly served in a regular bowl. Also try layered jelly made with different types of juice: pour the layers one at a time, allowing each previous layer to set for 30–40 minutes in the refrigerator before pouring the next layer on top.
Sorbet pairs well with fresh mint leaves, lime zest, or even a pinch of freshly ground black pepper for an unexpected flavor accent that highlights the fruitiness. The classic Italian way to serve it is in a champagne glass with a small amount of Prosecco poured on top just before serving.
Granita is a great way to end or break up a heavy, multi-course meal, serving as a pause before the main course—this is the traditional practice in Sicily, where a small portion of lemon granita is served between courses to refresh the palate and prepare for the next dish.
Chocolate mousse can be served with thinly sliced strawberries or raspberries, a pinch of sea salt on top, or even a small amount of crunchy nut topping for a contrast in textures. A no-bake cheesecake pairs well with fresh berry sauce, caramel, or even slices of fresh peaches in the summer—depending on which cookie crust you’ve chosen.
How to Serve Cold Desserts to Guests Without Too Much Hassle
When you’re making cold desserts for a group, the main advantage is that you can do all the heavy lifting ahead of time, and on the day of the gathering, all that’s left is the final serving. Here’s how I usually plan it: I make panna cotta or jelly the day before the event, no-bake cheesecake a day or two in advance, and sorbet or granita can be kept in the freezer even longer—the main thing is not to forget to let them soften a bit before serving.
It’s convenient for the company to prepare desserts in individual portions right away, in small glasses or molds, rather than in one large pan. This eliminates the extra hassle of cutting and arranging the dessert on plates right in front of the guests, and everyone gets their own neat portion without the risk of anything falling apart when transferring it from a large pan.
If you want to add some variety to your table, you don’t have to make several different desserts from scratch—you can use one base, such as panna cotta, and pour it into separate portions with different flavorings: classic vanilla, chocolate, and coffee versions all made from a single batch of cream. It looks like a full-fledged dessert plate with an assortment, although essentially you’re making a single recipe with variations only at the flavoring stage.
Here’s another tip for guests: combine different textures on a single plate. For example, a scoop of sorbet next to a slice of panna cotta, or a small serving of granita as a refreshing interlude before the main cheesecake. The contrast between icy freshness and creamy richness always comes across well and requires no additional culinary skills beyond careful plating.
Frequently Asked Questions About Cold Desserts
Can gelatin be replaced with agar-agar?
Yes, but the proportions differ significantly—you need about half as much agar-agar by weight compared to gelatin, and unlike gelatin, it must be boiled for one minute, rather than simply dissolved in a hot liquid. Agar-agar desserts also set at room temperature, whereas gelatin-based versions must be chilled in the refrigerator.
How long do cold desserts last in the refrigerator or freezer?
Panna cotta and jelly keep well for 3–4 days in a tightly sealed container in the refrigerator without losing their texture. Sorbet, granita, and homemade ice cream are best stored in the freezer for up to two weeks, although the texture becomes slightly denser over time due to the gradual crystallization of moisture.
Why did the sorbet turn out too hard, making it difficult to scoop with a spoon?
The most likely cause is that there isn’t enough sugar in the syrup relative to the amount of fruit puree, or that you skipped the step of stirring regularly during freezing. Try letting the sorbet sit at room temperature for 10–15 minutes before serving; this will soften the texture slightly and make it easier to scoop.
Is it possible to make these desserts without sugar, using sugar substitutes?
That said, most recipes work well with erythritol or stevia in the appropriate proportions instead of sugar, although the sorbet’s texture may turn out slightly different, since it is sugar that affects a liquid’s freezing point, whereas sugar substitutes do not always have the same effect.
Is it possible to make jelly without gelatin for vegetarians?
That’s right, agar-agar is a plant-based alternative to gelatin, derived from seaweed, which is perfect for jellies and actually holds its shape better at room temperature—which is especially convenient for summer picnics outdoors.
What should you do if the panna cotta turned out too runny and won’t hold its shape?
If the dessert hasn’t set even after 6 hours in the refrigerator, it’s most likely that there wasn’t enough gelatin for the amount of liquid. It’s difficult to fix a failed batch that has already set, but you can remelt the mixture in a double boiler, add a little more pre-soaked gelatin, and repeat the entire setting process from the beginning.
Can you freeze panna cotta or jelly instead of chilling them in the refrigerator?
Don’t do it—freezing breaks down the gelatin’s structure, and after thawing, the dessert loses its smooth texture, becoming watery and uneven. These desserts are meant for the refrigerator, not the freezer, unlike sorbet or granita.
How many calories are there, on average, in a serving of cold dessert?
This depends heavily on the specific recipe, but as a rough estimate, panna cotta contains 250–300 kcal per serving due to its high content of heavy cream; jelly contains much less—about 80–120 kcal—because it’s water-based, while sorbet falls somewhere in between, at about 120–150 kcal, due to its fat-free sugar syrup.
Is it okay to add alcohol to cold desserts for a group of adults?
Yes, alcohol pairs well with many of these desserts: a little amaretto or rum in panna cotta, rum or cognac in chocolate mousse, and Prosecco or champagne—a classic pairing for sorbet when served. The key is not to overdo it, since alcohol can prevent the panna cotta or jelly from setting properly if you add more than two or three tablespoons per entire volume of liquid.