
Turning on the oven at 35°C is a real ordeal. The kitchen turns into a sauna, and even the most die-hard baking enthusiast would back down. But there’s no need to give up sweets—especially since no-bake cold desserts often come together faster than any cake. They look impressive, keep in the fridge for several days, and are just as suitable for a casual evening as they are for a holiday celebration.
Content
This collection features 8 tried-and-true recipes to suit every taste and cooking skill level. Some take just 15 minutes of active preparation. Others require only patience and a refrigerator. All are made with readily available ingredients—no exotic ingredients or special equipment needed. Pick whatever you like, and let the oven take a break.
Recipe Overview: Time, Difficulty, and Servings
Before choosing a dessert, it’s helpful to know what to expect. Some no-bake desserts take just a few steps to prepare but need to chill in the fridge overnight. With others, the active prep takes only 10 minutes, and then the freezer does the rest.
| Dessert | Active cooking | Time in the cold | Difficulty | Servings |
|---|---|---|---|---|
| Panna cotta | 15 min | 4+ years | Easy | 4 |
| Tiramisu | 30 min | 6+ hours (overnight) | Average | 6–8 |
| No-Bake Cheesecake | 25 min | 5–6 years old | Average | 8–10 |
| Chocolate Mousse | 20 min | 2–3 years | Average | 4–6 |
| Banana ice cream | 5 minutes + freezing | 4+ years | Easy | 2–3 |
| Fruit Granita | 15 minutes + stirring | 3–4 years | Average | 4–6 |
| Coconut Parfaits | 15 min | 3–4 years | Easy | 4 |
| Jelly Cake | 30 min | 4–5 years | Average | 8–10 |
Most of these dishes can be prepared in the evening and served the next day—they actually taste better after sitting in the fridge for a while.
A few important points to keep in mind before you begin
Almost all the desserts in this collection rely on one of three methods: gelatin, whipped cream, or freezing. To avoid ruining the result right from the start, there are a few basic things you should know.
About gelatin. Always soak it in cold water, and dissolve it in warm water—not hot or boiling. Temperatures above 80–85 °C destroy its gelling properties. Also check the expiration date: old gelatin doesn’t set well, and no amount of it will fix the problem. Agar-agar is a good plant-based alternative, but it needs to be boiled: it behaves differently.
About the cream. For whipping, use cream with at least 33% fat content—any lower percentage simply won’t produce the desired volume and texture. Keep the cream in the refrigerator before whipping. Warm cream whips poorly or won’t whip at all.
About molds. Split molds make it much easier to remove the dessert. If you’re using regular bowls or glasses, moisten them with water or line them with plastic wrap. Silicone molds require no preparation at all.
About planning. Most recipes require 4–6 hours, or even overnight, in the refrigerator. It’s not difficult, but you need to plan ahead. If you’re cooking for a holiday, it’s convenient to prepare most dishes the day before.
About the equipment. You’ll need a mixer for whipping cream and making certain types of frosting. A blender is for slushies and banana ice cream. For most recipes, all you need is a mixing bowl, a silicone spatula, and a baking pan.
1. Panna cotta with strawberry sauce
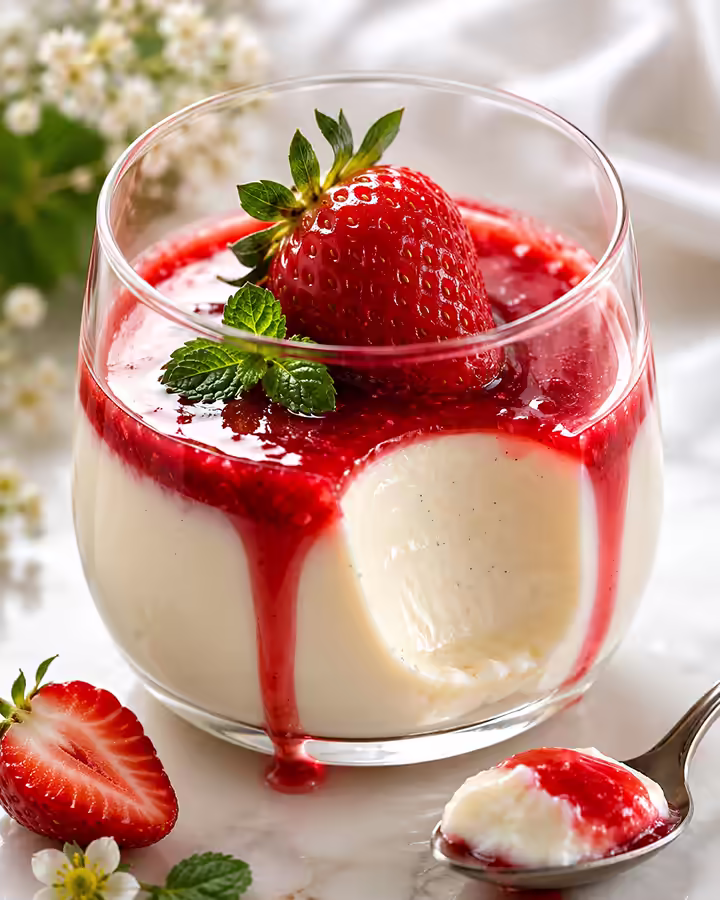
Panna cotta is one of those desserts that looks like it belongs on a restaurant menu, but can be made in 15 minutes plus a few hours in the fridge. The name literally means “cooked cream”—and that’s exactly what it is: a delicate, slightly wobbly milk-based texture with a hint of vanilla. It’s a classic of Northern Italian cuisine that fits perfectly into a summer menu and wins you over from the very first spoonful.
Ingredients (serves 4)
- Heavy cream (33%) — 500 ml
- Sugar — 60 g
- Gelatin powder — 10 g
- Cold water for soaking — 50 ml
- Vanilla extract — 1 tsp
For the sauce:
- Strawberries — 200 g
- Sugar — 2 tbsp.
- Lemon juice — 1 tbsp.
Step-by-step recipe
- Pour the gelatin into cold water and let it sit for 10 minutes to soften.
- Heat the cream and sugar in a saucepan until hot—but do not bring to a boil.
- Remove from the heat, add the vanilla extract and the softened gelatin. Stir until completely dissolved.
- Pour the mixture into molds or glasses. Let it cool at room temperature, then refrigerate for at least 4 hours.
- For the sauce, blend the strawberries, sugar, and lemon juice in a blender or mash them with a fork. Heat over low heat for 3–4 minutes, then let cool.
- Serve the panna cotta directly in the glass, or turn it out onto a plate and drizzle with sauce.
Tip: If the panna cotta won’t come out of the mold, dip the bottom in hot water for 5–10 seconds. It will come out easily.
Variations and presentation
Strawberry sauce is a classic, but currant coulis, passion fruit purée, or simply sliced fresh peaches also work well. For a coffee version, add 1–2 tsp of instant coffee to the cream while heating it. Chocolate panna cotta is made by adding 30–40 g of melted dark chocolate. It can be served in elegant individual serving dishes or simply in regular glasses—it looks beautiful either way.
2. Classic Tiramisu
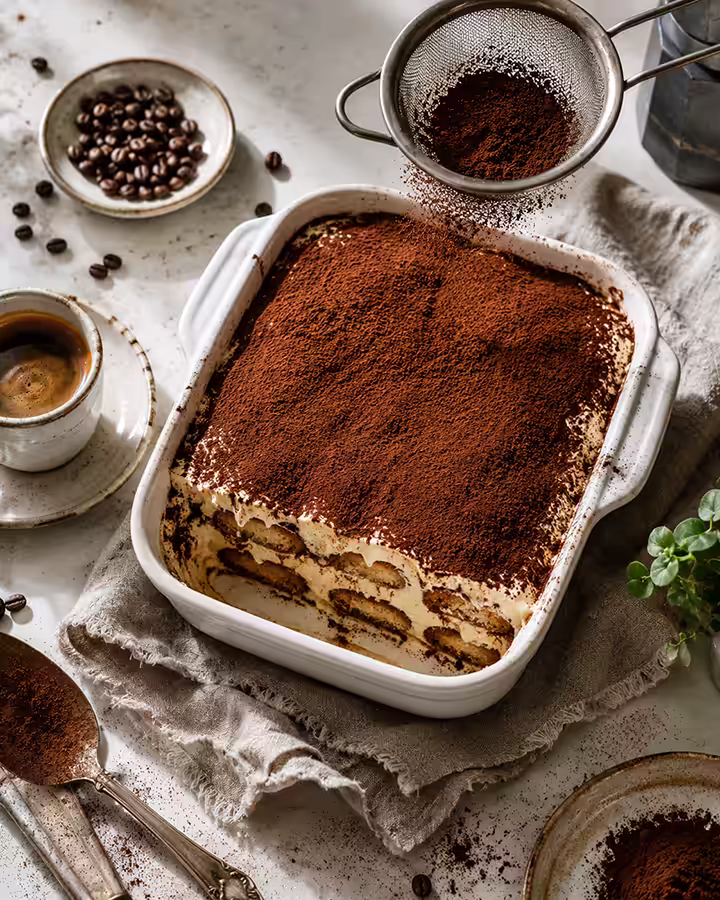
No-bake tiramisu is the real deal. The dessert originated in Northern Italy in the 1960s and has never required an oven. Coffee-soaked ladyfingers, rich mascarpone cream, and a dusting of bitter cocoa on top. Here, it all comes down to the quality of the ingredients and the time spent in the fridge—the longer it sits, the better the flavors blend together.
Ingredients (serves 6–8)
- Savoiardi (ladyfingers) — 250 g
- Mascarpone — 500 g
- Eggs — 4
- Sugar — 100 g
- Strong espresso — 250 ml, chilled
- Cocoa powder — 2–3 tbsp.
- Amaretto or rum extract — 2 tbsp. (optional)
Step-by-step recipe
- Brew a strong cup of coffee and let it cool. Add alcohol if desired.
- Separate the egg yolks from the whites. Beat the yolks with the sugar using an electric mixer until the mixture is light and fluffy—about 4 to 5 minutes.
- Add the mascarpone and stir with a spatula until smooth—do not use a mixer, so the cream doesn’t become too runny.
- Beat the egg whites with a pinch of salt until stiff peaks form, then gently fold them into the cream using a folding motion.
- Dip each savoiardi quickly—literally 1–2 seconds—into the coffee and arrange them in a single layer on the bottom of the pan.
- Spread half of the cream on top and smooth it out. Repeat the layer of ladyfingers and cream.
- Sift the cocoa powder through a sieve, cover with plastic wrap, and refrigerate for at least 6 hours—preferably overnight.
A common mistake: If you leave savoiardi in coffee for too long, they get soggy and turn to mush. One or two seconds on each side is enough.
Variations and presentation
Tiramisu can be served either as a whole cake, cut into portions, or assembled directly into individual glasses—it looks very impressive. For a kid-friendly version, use cocoa or barley tea instead of coffee, and omit the alcohol. Fruit variations—using raspberry juice or fresh orange juice instead of coffee—are also common, though this is a significant departure from the original.
3. No-Bake Cheesecake
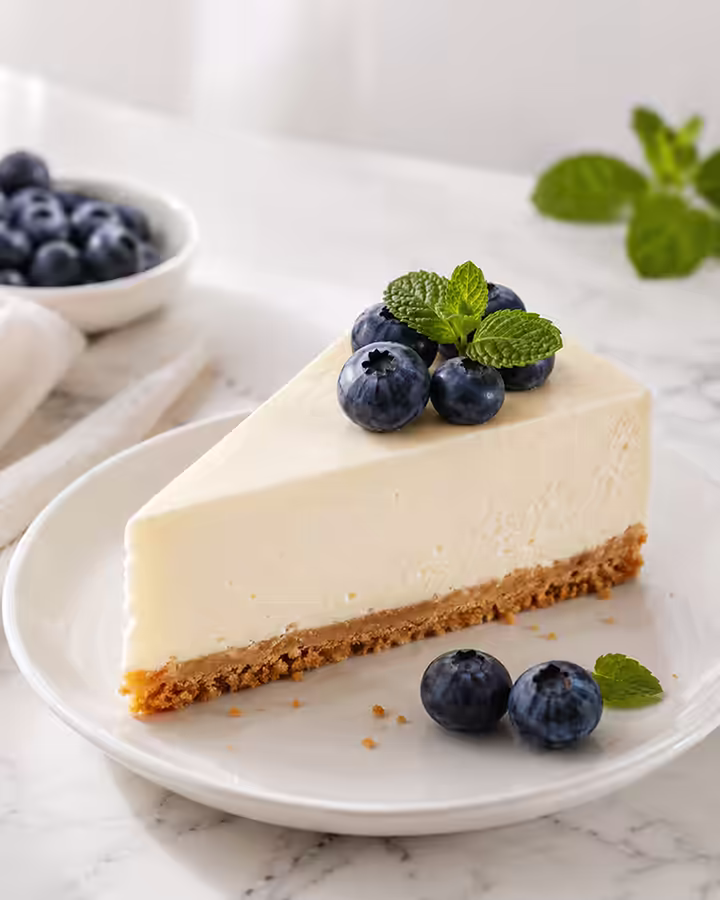
No-bake cheesecake is one of the most popular cold desserts for home cooking. It features a crunchy cookie crust, a delicate creamy cheese filling, and berries on top. The main difference from the classic baked version is the texture: it’s softer, creamier, closer to a mousse. And no cracks, no water baths, no oven.
Ingredients (for a 20–22 cm pan)
Background:
- Shortbread cookies (Digestive, “Yuvileine,” or similar) — 200 g
- Butter — 80 g
Filling:
- Cream cheese (Cream Cheese, Philadelphia, or Violette) — 500 g
- 33% heavy cream — 200 ml
- Powdered sugar — 100 g
- Gelatin — 10 g
- Cold water — 50 ml
- Lemon juice — 1 tbsp.
- Vanilla extract — 1 tsp
Step-by-step recipe
- Soak the gelatin in cold water for 10 minutes.
- Crush the cookies in a blender or crush them in a bag until they form fine crumbs.
- Melt the butter, then mix it with the crumbs—the mixture should resemble wet sand.
- Place the crust in a springform pan, spread it out evenly, and press it down firmly. Refrigerate for 20 minutes.
- Dissolve the swollen gelatin in a double boiler or in the microwave (20–30 seconds).
- Beat the cream cheese with powdered sugar, lemon juice, and vanilla until smooth.
- Whip the cream separately until soft peaks form.
- Combine the cream cheese mixture with the heavy cream, add the dissolved gelatin, and stir quickly.
- Pour the filling onto the crust and smooth it out. Refrigerate for at least 5–6 hours.
- Garnish with berries or fruit sauce before serving.
Tip: To ensure the sides of the cheesecake are smooth, line the sides of the pan with a strip of plastic wrap.
Variations and presentation
For a chocolate cheesecake, add 100 g of melted dark chocolate to the cream cheese mixture. For a lemon cheesecake, increase the lemon juice to 3 tbsp and add the zest of one lemon. Oatmeal cookies or whole-grain crackers work well as a substitute for Digestive cookies—the crust turns out crispier and more grainy. Serve with strawberry sauce, caramel glaze, or simply with fresh berries and a mint leaf.
4. Chocolate Mousse
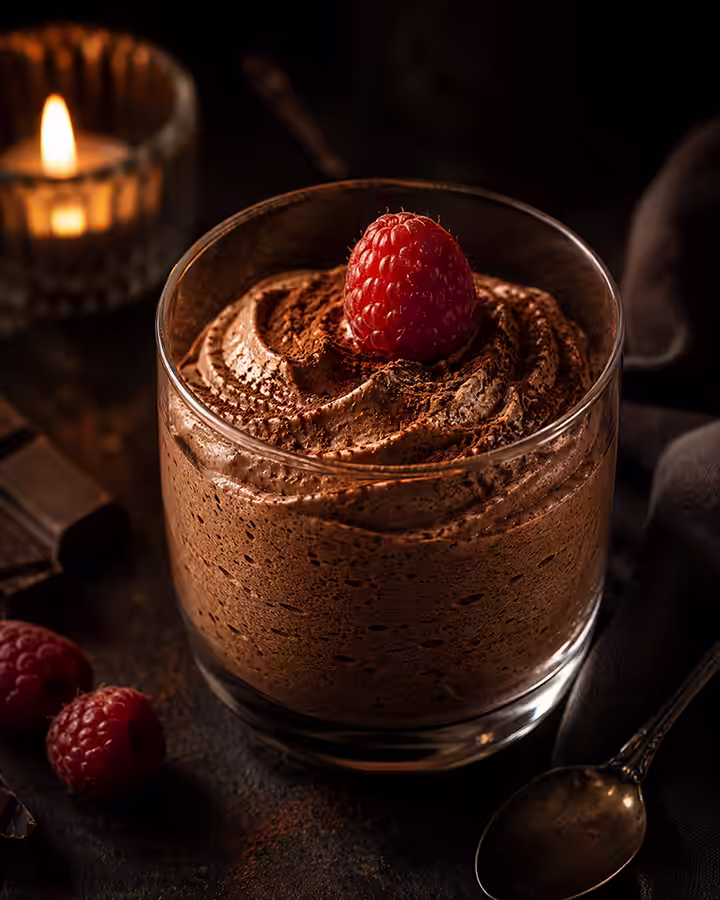
Chocolate mousse is when four ingredients transform into something light and airy yet rich at the same time. A French classic that has been made without an oven since the 19th century. The secret to its texture lies in properly whipped cream and egg whites: they’re what give it that lightness and volume. Dark chocolate with at least 70% cocoa content offers the richest flavor, but if you prefer a sweeter version, go for milk chocolate.
Ingredients (serves 4–6)
- 70% dark chocolate — 200 g
- Heavy cream (33%) — 350 ml
- Eggs — 3
- Sugar — 40 g
- A pinch of salt
Step-by-step recipe
- Melt the chocolate in a double boiler or in the microwave in 30-second intervals, stirring occasionally. Let it cool slightly.
- Separate the egg yolks from the whites. Beat the yolks with 20 g of sugar until pale.
- Add the egg yolks to the warm chocolate and stir until smooth.
- Beat the egg whites with a pinch of salt and the remaining sugar until stiff peaks form.
- Whip the cream until soft peaks form—stop right at this stage; don’t overbeat it.
- First, fold the whipped cream into the chocolate mixture using a folding motion. Then gently fold in the whipped egg whites.
- Divide the mousse among glasses or cups, then refrigerate for 2–3 hours.
Tip: If you’re cooking for children and want to avoid raw eggs, skip the steps involving the yolks and whites, and increase the amount of cream to 400 ml. The mousse will be less light and fluffy, but it will still be delicious and safe.
Variations and presentation
Fresh raspberries, orange zest, and sea salt are classic accompaniments to chocolate mousse—these are tried-and-true pairings with dark chocolate. Serve in glass bowls or coffee cups topped with whipped cream and grated chocolate. If you want a coffee flavor, add 1 tsp of instant coffee to the melted chocolate before combining it with the eggs.
5. Two-Ingredient Banana Ice Cream
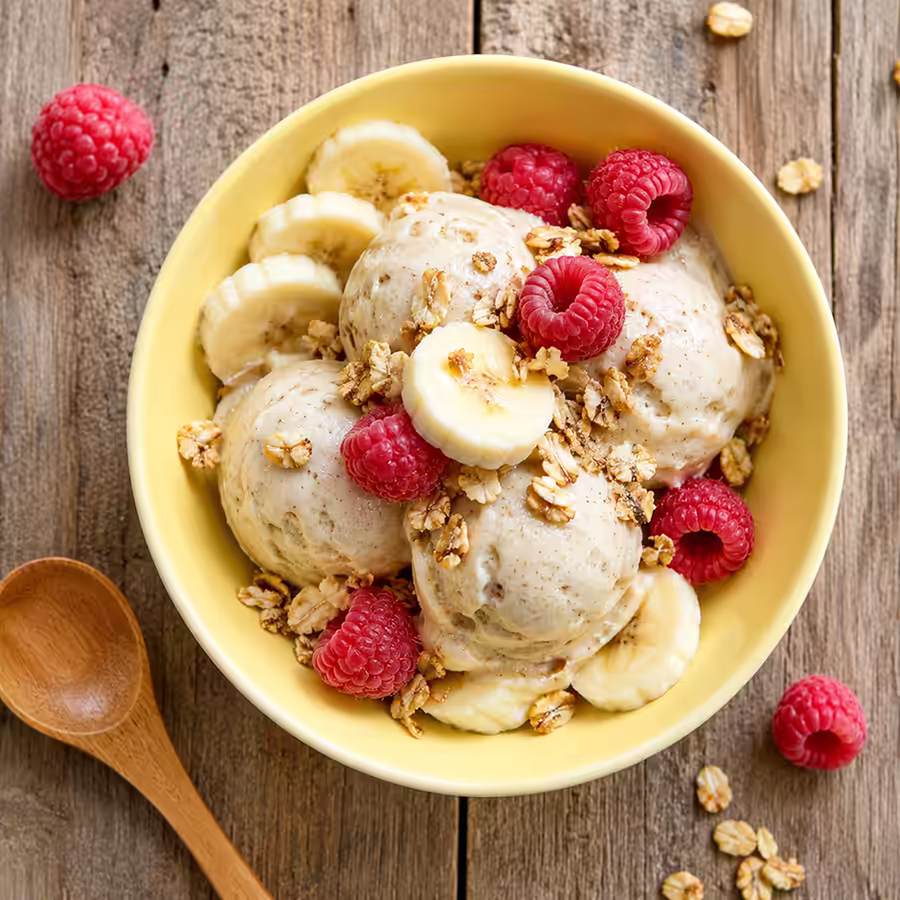
Banana nice cream isn’t exactly traditional ice cream, but its texture and flavor are very similar. It’s one of those desserts where the real magic happens in the blender. The main rule: the bananas must be very ripe—with dark spots on the skin. These are the ones that provide the right sweetness and, after freezing, create a creamy texture without any cream or added sugar.
Ingredients (serves 2–3)
- Ripe bananas — 3
- Peanut butter or any nut butter — 2 tbsp.
Optional: vanilla extract, cocoa powder, berries for garnish.
Step-by-step recipe
- Peel the bananas and slice them into rounds about 2 cm thick.
- Spread them out in a single layer on a cutting board or plate and freeze for at least 4 hours or overnight.
- Transfer the frozen pieces to a blender or food processor, then add the peanut butter.
- Beat until the mixture is creamy and smooth—it will be crumbly at first, but will become smooth after 2–3 minutes. Stop and scrape down the sides as needed.
- Serve immediately—in a waffle cup or bowl with berries, nuts, and grated chocolate.
Tip: If you want a thicker texture, transfer the whipped mixture to a container and freeze it for another 1–2 hours. It turns out almost like store-bought ice cream.
Variations and presentation
Banana ice cream is the perfect base for variations. Add 2 tbsp of cocoa powder for a chocolate version. A handful of frozen raspberries will add a fruity note and a beautiful pink color. Top it with shredded coconut or caramel sauce, and it’s almost like a treat from a coffee shop. If you’re making this for kids, it’s one of the healthiest dessert options: no added sugar, no artificial colors—just fruits and nuts.
6. Fruit Granita
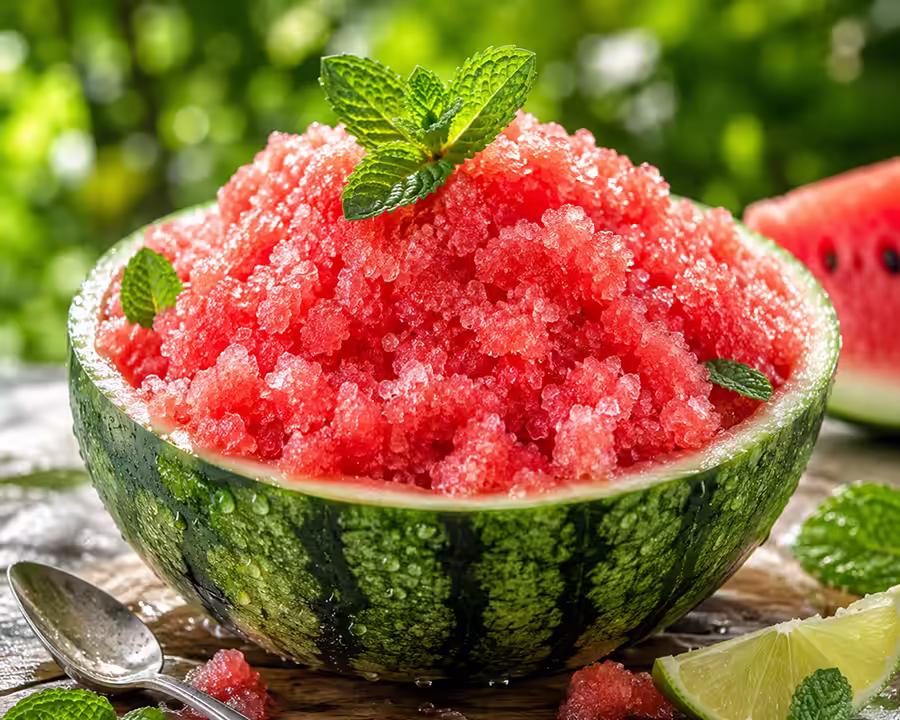
Granita is a traditional Sicilian cold dessert, somewhere between sorbet and crushed ice. Its grainy, crystalline texture comes from being stirred regularly while freezing—that’s the extent of the chef’s “work.” It’s made without an ice cream maker, without whipping, and without gelatin. It turns out especially well with watermelon or cantaloupe in August. Coffee granita with cream is a Sicilian masterpiece in its own right, if you’re looking for something unusual.
Ingredients (serves 4–6)
- Watermelon or cantaloupe flesh — 700 g
- Sugar — 50–70 g (depending on the sweetness of the fruit)
- Lemon or lime juice — 2 tbsp.
- Water — 100 ml
- Mint — a few leaves (optional)
Step-by-step recipe
- Heat the water and sugar in a saucepan for 2–3 minutes until completely dissolved. Let cool.
- Chop the fruit flesh and blend it until smooth. If desired, strain it through a sieve for a smoother consistency.
- Mix the mashed potatoes with the sugar syrup and lemon juice.
- Pour into a shallow metal or glass container. Place in the freezer.
- After 45–60 minutes, when the edges start to freeze, remove it and stir vigorously with a fork to “break up” the ice crystals.
- Repeat this every 30–40 minutes 3–4 more times. The entire process takes 3–4 hours.
- Serve in chilled glasses garnished with mint leaves.
Tip: The more you stir, the smoother the texture will be. If you skip stirring, you’ll end up with solid ice. You can fix it by grating it on a coarse grater, but then it’s no longer granita—just flavored ice.
Variations and presentation
Lemon granita is another classic option: 200 ml of freshly squeezed lemon juice, 200 ml of water, and 100 g of sugar. Coffee granita is made with chilled strong coffee and sugar syrup and served topped with whipped cream—it’s a unique treat unlike anything else. Serve the granita beautifully in chilled glasses or in a hollowed-out watermelon half—it creates a great atmosphere and is perfect for an outdoor summer party.
7. Coconut Parfait with Berries
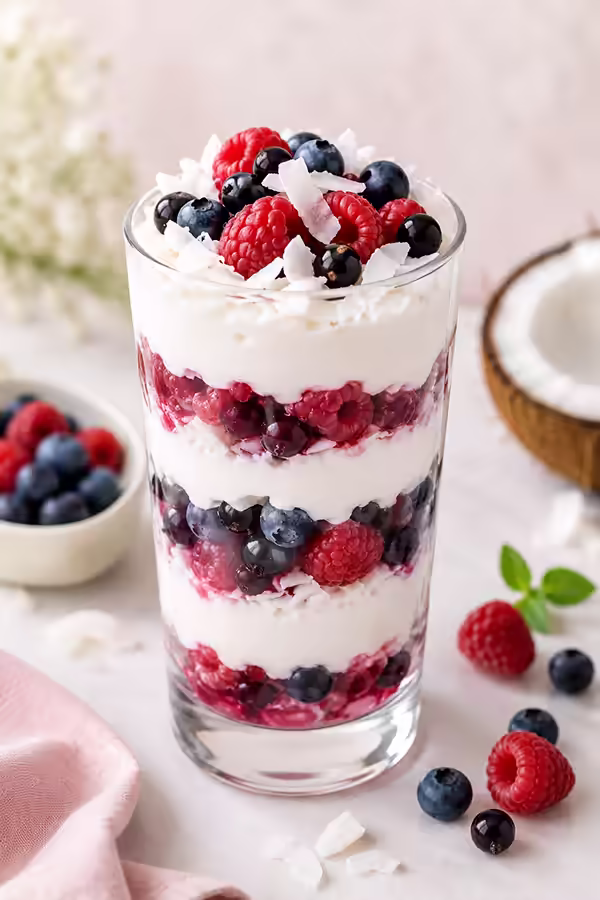
Parfait is a French frozen dessert that requires neither constant stirring, like granita, nor a special ice cream maker. The whipped cream base is frozen directly in a mold or glass and remains light and airy thanks to the cream’s fat content. The coconut flavor makes this version especially summery—coconut and tart berries balance and complement each other well.
Ingredients (serves 4)
- 33% heavy cream — 250 ml
- Coconut cream or coconut milk — 150 ml
- Powdered sugar — 60 g
- Vanilla extract — 1 tsp
- Fresh or frozen berries (raspberries, blueberries, currants) — 200 g
- Sugar for the berries — 1 tbsp.
Step-by-step recipe
- Mix the berries with sugar and let them sit for 15–20 minutes to release their juices. If using frozen berries, simply thaw them.
- Whip the heavy cream and coconut cream with powdered sugar and vanilla until soft peaks form.
- Layer the glasses with the following: cream mixture—berries—cream mixture—berries on top.
- Cover with plastic wrap and freeze for 3–4 hours.
- Take it out of the freezer 10–15 minutes before serving—the parfait should thaw slightly so it’s easy to scoop with a spoon.
Variation: You can use regular coconut cream instead. Add a pinch of cinnamon or a little lemon zest to the berries—this adds depth of flavor.
Variations and presentation
Parfait is one of the most convenient desserts to prepare for a large group: you can make it in a one-liter container and serve it with a spoon, just like ice cream. The mango version—made without berries, using mango puree instead—turns out very delicate and fragrant. Chocolate parfait: add 2 tbsp. of cocoa powder to the cream mixture before whipping. Caramelized nuts or shredded coconut look great on top of all versions.
8. Jellied cake with sour cream and fruit
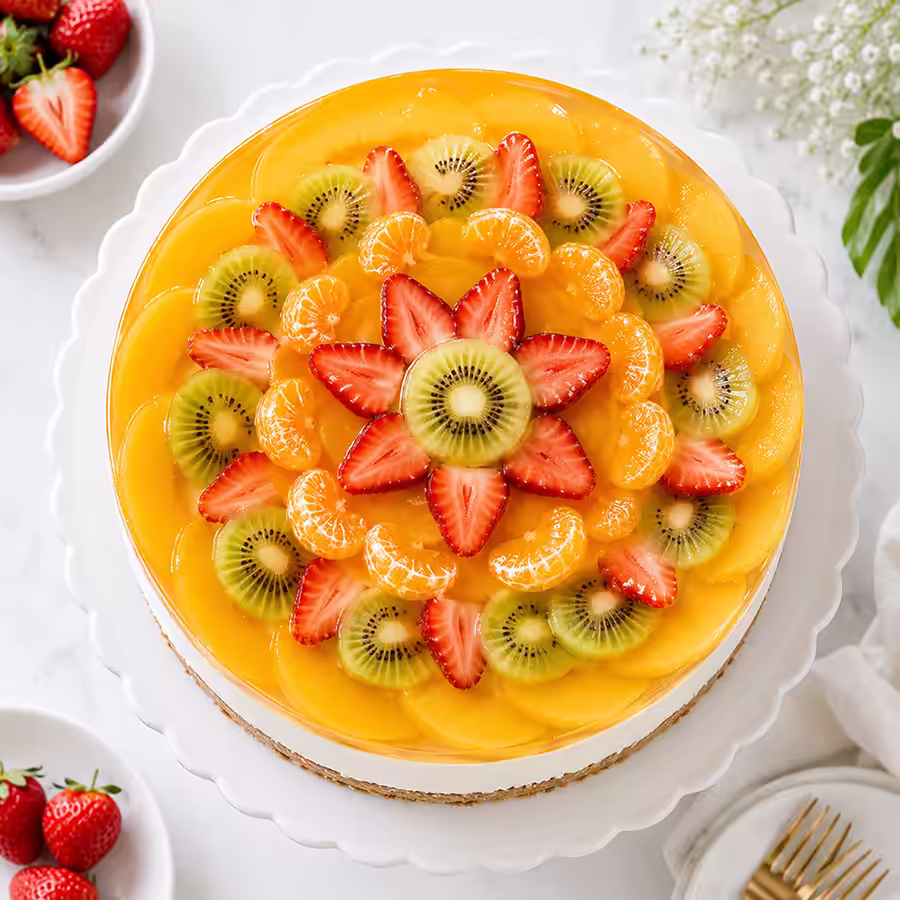
A jelly cake is impressive, easy to make, and always a hit at a festive table. The transparent top layer with fruit inside makes quite an impression—even though it’s actually not complicated at all. A cookie base, a delicate sour cream filling, and seasonal fruit under a clear jelly coating. A classic that doesn’t need improving—it just needs to be made.
Ingredients (for a 22-cm pan)
| Part | Ingredient | Quantity |
|---|---|---|
| Home | Shortbread cookies | 180 g |
| Home | Butter | 80 years |
| Filling | Sour cream (20–25% fat) | 400 g |
| Filling | Powdered sugar | 100 g |
| Filling | Gelatin | 15 years |
| Filling | Water | 70 ml |
| Filling | Vanilla extract | one teaspoon |
| Jelly Ball | Fruit juice (orange, peach, apple) | 300 ml |
| Jelly Ball | Gelatin | 8 years |
| Jelly Ball | Water | 40 ml |
| Decoration | Peaches, kiwis, strawberries, tangerines | to taste |
Step-by-step recipe
- Crumble the cookies and mix them with the melted butter. Press the mixture into the pan, press it down firmly, and refrigerate for 15–20 minutes.
- Soak the gelatin (15 g) in cold water, then dissolve it in a double boiler or in the microwave.
- Whip the sour cream with powdered sugar and vanilla. Pour in the dissolved gelatin and stir.
- Pour the filling onto the crust and smooth it out. Refrigerate for 2–3 hours until completely set.
- Slice the fruit and arrange it attractively on top of the set filling.
- Soak the gelatin (8 g), dissolve it, and mix it with fruit juice at room temperature.
- Carefully pour the jelly over the fruit. Return to the refrigerator for another 1–2 hours.
Tip: To keep the fruit from shifting while pouring, first pour a thin layer of jelly—about 3–4 mm thick—let it set in the refrigerator for 20–30 minutes, and then pour the rest. This two-step approach keeps the dessert looking neat.
Important information about kiwis and pineapples: Fresh kiwis and fresh pineapples contain enzymes that break down gelatin—in a sour cream filling, they will prevent the dessert from setting. In the outer jelly layer made with juice (without pieces of these fruits), there are no issues. Heat-treated or canned fruits do not have this problem—the enzymes are deactivated when heated.
Variations and presentation
You can substitute the sour cream with a 1:1 mixture of cream cheese and sour cream—the filling will be thicker and hold its shape better when sliced. For a brighter-colored jelly layer, use cherry, pomegranate, or berry juice. The cake holds its shape well when sliced and is easy to transfer to a plate—it’s convenient to make a few days in advance.
Common Mistakes and How to Avoid Them
Even the simplest recipes have subtle details that make all the difference. Here are the most common mistakes people make when preparing cold desserts.
Overheated gelatin. Boiling completely destroys its gelling properties. Dissolve it in warm water, no hotter than 70–75 °C. If you’re unsure, use a double boiler, where the temperature is controlled.
Over-whipped cream. For fillings and mousses, stop at soft or medium peaks. Over-whipped cream results in a grainy, greasy texture that can’t be fixed—it’s already starting to turn into butter.
Time-saving tips for the refrigerator. Shortening the chilling time almost always results in a runny or unstable dessert. If a recipe says “at least 6 hours,” it’s not just a suggestion—it’s a technical necessity.
Hot liquid with eggs without tempering. In recipes that include egg yolks and hot liquid, always pour the hot liquid in a thin stream while constantly stirring the yolks. If you pour it all in at once, you’ll end up with an omelet in a cream sauce.
The savoiardi have been soaked for too long. For tiramisu, one or two seconds is standard. If you leave the biscuits in the coffee any longer, they turn to mush and fall apart when you take them out. It may seem like they haven’t “soaked up” the coffee yet—but they will soak up the rest in the fridge.
The wrong kind of cheese for cheesecake. For the filling, you need cream cheese—rich and full-fat. Cottage cheese or curd cheese results in a different texture and often tastes too sour. If Philadelphia isn’t available, Violette, Bonfesto, or any other brand labeled “cream cheese” will work.
Conclusion: How to Choose Your Dessert
If you want something simple and quick, go for panna cotta or banana ice cream. If you’re planning a dessert for guests and want to make an impression, try tiramisu or a jelly cake. For those who prefer a refreshing and light option without cream—granita. Cheesecake and chocolate mousse fall somewhere in the middle: they’re not difficult, but they require a bit more attention to texture.
All eight recipes have one thing in common: they taste even better after sitting in the fridge overnight. Make them in the evening—and start the next day with a delicious dessert.
Frequently Asked Questions
Can gelatin be replaced with agar-agar in these recipes? Yes, but the proportions are significantly different: you use about half as much agar-agar—around 4–5 g instead of 10 g of gelatin. Important: it only activates when brought to a boil, so you must boil it with the liquid for 1–2 minutes. The texture with agar-agar turns out denser and less “wobbly”—more firm. This is acceptable for panna cotta and jelly cake. Agar-agar is not suitable for mousse—it requires a soft gelatin structure, not a plant-based one.
How long do these desserts last in the refrigerator? Panna cotta, cheesecake, and jelly cake—up to 3–4 days in a covered dish or wrapped in plastic wrap. Tiramisu is best eaten within 2 days: after that, the ladyfingers become too soft and the dessert loses its contrasting texture. Chocolate mousse and parfait — 2–3 days. Granita can be stored in the freezer for up to a week, but it becomes slightly denser each day — before serving, it’s worth “raking” it with a fork to restore its grainy texture.
Which of these desserts are suitable for children? Banana ice cream, no-bake cheesecake, Jell-O cake, and panna cotta are all excellent choices with no reservations. Tiramisu should be made without alcohol—instead of amaretto, simply increase the amount of chilled coffee or replace it with children’s cocoa. It’s best to adapt the chocolate mousse with raw eggs: increase the cream to 400 ml and omit the eggs—the mousse will be less airy but safer.
Why won’t the gelatin set—what should you do? The most common reasons are: the gelatin was overheated while dissolving, too little was used relative to the amount of liquid, or it has expired. If the dessert is already in the mold and hasn’t set after 5–6 hours in the refrigerator, it can’t be salvaged. Next time, increase the amount of gelatin by 1–2 g, monitor the temperature while dissolving it, and check the production date on the package.
Can you make do without a mixer? For most recipes, yes. Panna cotta, granita, and jelly cake don’t require a mixer at all. For cheesecake and parfaits, you could theoretically whip the cream by hand with a whisk, but that would take 10–15 minutes of vigorous whisking. Making chocolate mousse without a mixer is much more difficult—whipping egg whites and cream by hand to the right consistency takes both time and effort.
Which fruits are best suited for no-bake summer desserts? Strawberries, peaches, nectarines, raspberries, blueberries, cherries, and currants—anything that’s in season right now will work perfectly. For recipes with gelatin fillings, avoid fresh kiwi, pineapple, and papaya: these fruits contain enzymes that break down gelatin and prevent it from setting. The exception is heat-treated or canned versions: the enzymes are deactivated when heated. In the outer jelly layer made with juice without pieces of these fruits—no problem at all.
Can you freeze panna cotta or cheesecake? It’s not recommended to freeze panna cotta—after thawing, the gelatinous texture becomes watery and uneven. No-bake cheesecake handles freezing better: it can be stored in the freezer for up to a month and thawed in the refrigerator overnight. Tiramisu can also be frozen—some people prepare it specifically in its frozen form and serve it as an ice cream-style dessert. Chocolate mousse in the freezer turns into something similar to ice cream—it’s also delicious, but it’s a different dish.