
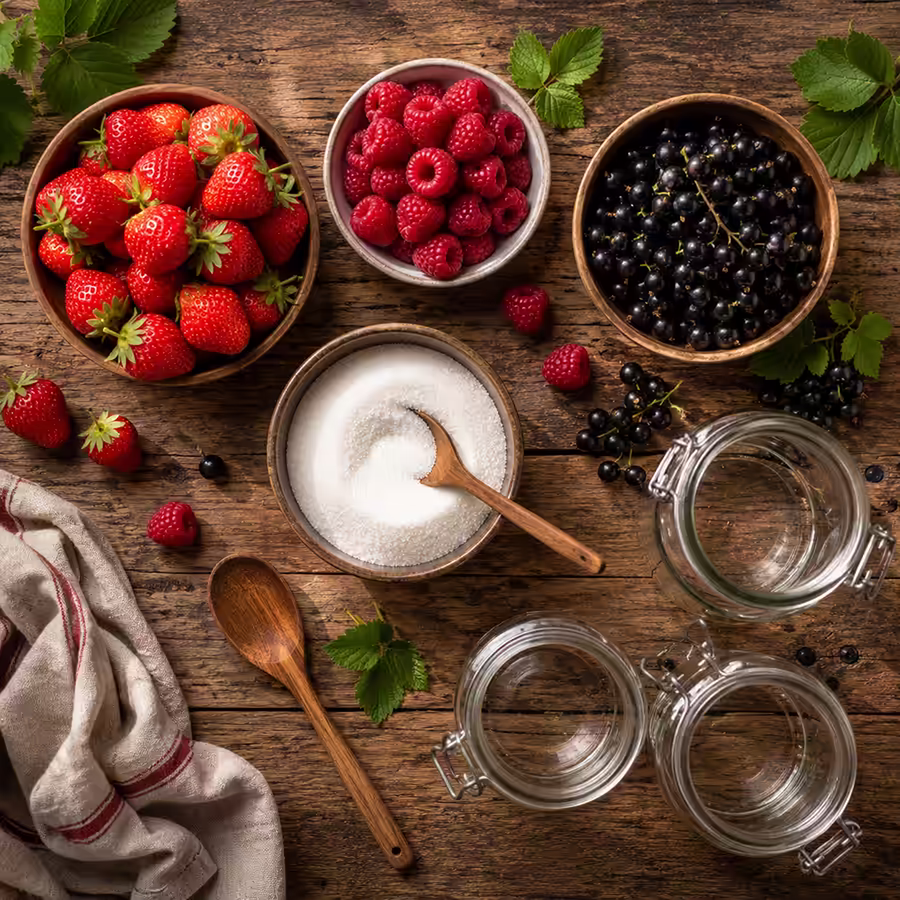
Summer is that brief period when strawberries, raspberries, and blackcurrants all appear at the same time at the market or in the garden, and right now is the perfect time to make a few jars of jam for the winter. In this article, I’ve compiled three tried-and-true recipes that I’ve been making for years, plus practical tips on how to make jam that’s thick, flavorful, and keeps perfectly until spring. If you’re looking for a simple, hassle-free berry jam recipe for the winter—let’s get started.
Content
Why these three berries in particular?
Strawberries, raspberries, and black currants are probably the most popular trio for homemade jam in Ukrainian households, and for good reason. Each produces a jam with a completely different character: strawberry jam is sweet, bright red, and tastes a bit like summer in a jar; raspberry jam is rich, with a slight tartness and a unique aroma; and currant jam is the most tart, the healthiest, and at the same time the thickest thanks to its natural pectin.
One of the best parts is that these berries ripen almost simultaneously—from late June to mid-August, depending on the region and variety. So if you have access to your own garden, a summer cottage, or a market with local berries, you can plan a “jam-making marathon” over a weekend or two and cover all three types at once.
I’m deliberately not suggesting any exotic recipes here that call for jam sugar, agar-agar, or other commercial thickeners—just the classic ratio of sugar to berries, which has been tried and tested over the years and yields predictable results even for first-time jam makers.
What are the health benefits of strawberry, raspberry, and currant jam?
Jam is, first and foremost, a way to preserve summer berries for a long time, not a diet food, so let me start with the basics: because of its high sugar content, jam should be viewed as a treat, not as a primary source of vitamins. But that doesn’t mean it has no benefits at all.
Black currants retain the most vitamin C of the three even after heat treatment—some of the vitamin is destroyed when heated, but black currants are so rich in it when fresh that even after cooking, a noticeable amount remains in a spoonful of jam. That is why blackcurrant jam is traditionally added to tea at the first signs of a cold—not as medicine, but as a pleasant way to support the body.
Raspberries are rich in antioxidants and fiber, as well as natural compounds that give them their distinctive aroma—some of which remain even after cooking. The small raspberry seeds that remain in the compote also contain a small amount of fiber and beneficial fatty acids.
Strawberries are a source of vitamin C and folic acid when eaten fresh, although cooking destroys a significant portion of these compounds due to heat. However, strawberries are rich in natural antioxidants—substances that give them their bright red color—and these compounds are better preserved than vitamin C.
If you want to get the most nutritional benefits—not just the taste—there are a few practical options. First, no-cook jam (which I mentioned above) retains far more vitamins because the berries aren’t heat-treated—though, to be fair, you can only store this kind of jam in the fridge or freezer, and not for very long. Second, jam made with less sugar (700–800 g per 1 kg of berries) automatically makes the product lower in calories, though it does shorten the shelf life.
Overall, I’d put it this way: homemade jam is a wholesome product free of preservatives, artificial colors, and flavorings—unlike many store-bought versions—and that fact alone makes it the better choice. And the vitamins and antioxidants are a nice bonus, not the main reason to make it.
Calorie content of jam (approximately per 100 g)
The calorie content of homemade jam depends primarily on the ratio of sugar to berries and on how long it was cooked—the longer the moisture evaporates, the higher the sugar concentration in the finished product. Approximate figures for jam with a 1:1 ratio (1:1.2 for currants):
| Type of jam | Calories per 100 g |
|---|---|
| Strawberry | 250–260 calories |
| Raspberries | 255–265 kcal |
| Currants | 265–280 kcal |
For comparison: one tablespoon (about 20 g) contains approximately 50–55 calories. If you reduce the amount of sugar to 700–800 g per 1 kg of berries, the calorie content decreases by about 15–20%, but, as already mentioned, this jam has a much shorter shelf life and requires refrigeration.
General guidelines: how to make jam so that it turns out thick and doesn’t become too sugary
Before moving on to specific recipes, it’s worth going over a few basic points that apply to any berry jam. If you ignore them, you may end up with a runny jam that “drips” off the spoon, or, conversely, a caramelized lump of sugar instead of a berry mixture.
Sugar-to-berry ratio. The classic ratio for most berry jams is 1:1, meaning 1 kilogram of sugar is used for every 1 kilogram of berries. This results in a thick consistency and good shelf life at room temperature. If you prefer a less sweet jam, you can reduce the sugar to 700–800 g per 1 kg of berries, but in that case, it’s best to store it in the refrigerator or basement, and the shelf life will be reduced to a few months.
Preparing the berries. Be sure to wash the berries, but do so quickly and gently, especially raspberries and strawberries—they’re very delicate and can easily turn to mush under running water. It’s best to submerge the berries in a bowl of cold water, gently stir them with your hands, and then let the water drain in a colander. Strawberries should be washed with their calyxes still attached, and the calyxes should be removed after washing—this way, the berries absorb less water.
Cooking time. There are two approaches here. The first is to cook for a long time, all at once, for 30–40 minutes over medium heat, skimming off the foam constantly. The second is to cook in several stages for 5–10 minutes each, with breaks of several hours (or overnight), allowing the berries to soak up the syrup. The second method results in more intact berries and a richer color, but takes longer overall.
Checking for doneness. The easiest way is to test a drop on a cold plate. Drip a little syrup onto a plate that has been in the refrigerator, and wait a minute. If the drop doesn’t spread and holds its shape a little, the jam is ready. If it spreads quickly and is runny, it needs to cook a little longer.
Sterilizing jars. It is essential to sterilize the jars before filling them—this is the best way to ensure that the jam doesn’t develop mold or ferment. The easiest way: wash the jars with baking soda, place them in a cold oven, set the temperature to 100 °C, and heat for 15 minutes after the oven has heated up. It is sufficient to boil the lids in water for 5 minutes.
Hot-filling. Pour the jam into jars while it is still hot, immediately after cooking, filling each jar almost to the top. This creates a natural vacuum as it cools and extends the shelf life.
Now that we’ve covered the basics, let’s move on to some specific recipes.
Strawberry jam
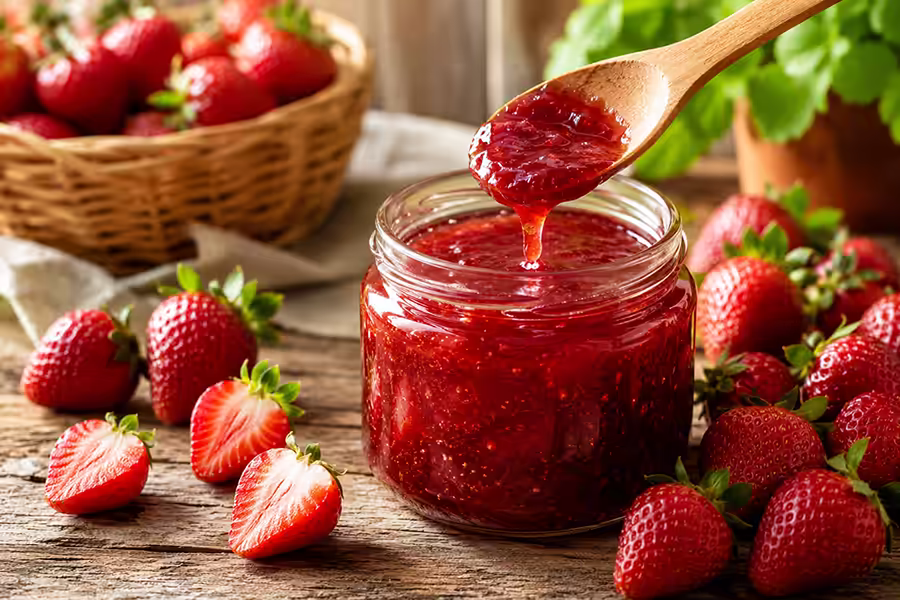
Strawberry jam is probably the most “summery” of the three. It’s bright red, sweet, and has a light strawberry aroma—which is especially pleasant to enjoy in winter when you open a jar to go with tea or pancakes.
The main challenge with strawberries is that they’re very juicy and release a lot of liquid when cooked, so the jam can easily turn out runny if you don’t follow the proper technique. I usually use the method of cooking in several stages—it takes a little longer, but the result is much thicker, and the berries stay whole instead of turning into a puree.
Ingredients
- strawberries — 1 kg (it’s best to choose firm, not overripe berries)
- sugar — 1 kg
- lemon juice — 1–2 tablespoons (optional, for tartness and to preserve color)
Step-by-step recipe
- Sort through the strawberries and remove any damaged or overripe berries—they will release excess liquid and may cause the mixture to ferment.
- Rinse the berries in cold water, then let them drain in a colander for about 15 minutes.
- Remove the sepals (the green stems).
- If the berries are small, leave them whole; if they’re large, cut them in half.
- Arrange the strawberries in a wide pot or bowl in layers, sprinkling each layer with sugar.
- Let it sit for 3–4 hours (or overnight in the refrigerator) so the berries release their juice and the sugar begins to dissolve.
- Place the pot over medium heat, bring to a boil, stirring constantly with a wooden spoon.
- Once the jam comes to a boil, let it boil for 5 minutes, skimming off any foam that forms on the surface.
- Remove from the heat and let cool completely—about 6–8 hours or overnight.
- Repeat the cooking process: bring to a boil, simmer for 5–7 minutes, and add the lemon juice 2 minutes before the end.
- Check the consistency by placing a drop on a cold plate. If necessary, simmer for another 5 minutes.
- Pour the hot jam into sterilized jars, cover with lids, and turn them upside down until completely cooled.
Tips and Common Mistakes
One of the most common mistakes is to cook strawberry jam in one long session over high heat. This quickly evaporates the moisture from the surface, but the berries inside remain juicy, and the jam becomes runny after cooling. The method involving several short cooking sessions solves this problem naturally.
If the jam is still too runny even after the third boiling, don’t panic—put the pot back on the stove and boil it for another 5–10 minutes. The main thing is not to walk away from the stove, because strawberry jam burns easily at this stage due to its high sugar content.
The lemon juice in this recipe not only adds a pleasant tartness but also helps preserve the bright red color—without it, the jam often darkens and takes on a more beetroot-like hue when stored for a long time.
Raspberry jam

Raspberry jam is probably the most fragrant of the three. Raspberries have a very delicate, fleeting aroma that can easily be “lost” if cooked for too long over high heat, so it’s especially important not to overcook the berries on the stove.
Raspberries are also quite tender and have small seeds, so jam is often made from them without straining—the seeds are barely noticeable in the finished product, especially if the berries are cooked thoroughly.
Ingredients
- raspberries — 1 kg (fresh, ripe, undamaged)
- sugar — 1 kg
- vanilla sugar — 1 teaspoon (optional, for flavor)
Step-by-step recipe
- Sort through the raspberries, removing leaves, twigs, and damaged berries.
- It’s best not to rinse raspberries under running water—they’re very delicate and fall apart easily. If the berries are clean (from your own garden), there’s no need to wash them. If there is dust or small insects on them, gently rinse them in a bowl of water and immediately place them on a towel to dry.
- Layer the raspberries in a pot, sprinkling sugar between each layer.
- Let it sit at room temperature for 2–3 hours to allow the juice to release.
- Place over medium heat and bring to a boil, stirring gently so as not to crush the berries.
- Once it comes to a boil, reduce the heat to low and simmer for 15–20 minutes, skimming off the foam occasionally.
- Add the vanilla sugar 3–5 minutes before it’s done, if using.
- Check the consistency by placing a drop on a plate.
- Pour the hot jam into sterilized jars and seal them with lids.
- Turn the jars upside down, cover them with a towel, and let them cool for 24 hours.
Tips and Common Mistakes
Raspberry jam is often cooked in a single batch—unlike strawberry jam, this is actually preferable here, since storing hot berries for long periods between cooking sessions leads to a significant loss of flavor. If the jam turns out a little thinner than you’d like, don’t worry—raspberry jam is traditionally a bit thinner than strawberry jam, and that’s perfectly normal, especially if you plan to use it as a filling for pies or a topping for yogurt.
If you want seedless jam, once it comes to a boil, you can strain the berries through a sieve, then simmer the syrup with the strained mixture for another 10–15 minutes. This results in a smooth, jam-like texture, but it takes longer.
One more thing—raspberries quickly absorb odors from the pot, so be sure to wash the cookware used for making raspberry jam thoroughly without using harsh, strongly scented cleaning products.
Blackcurrant jam
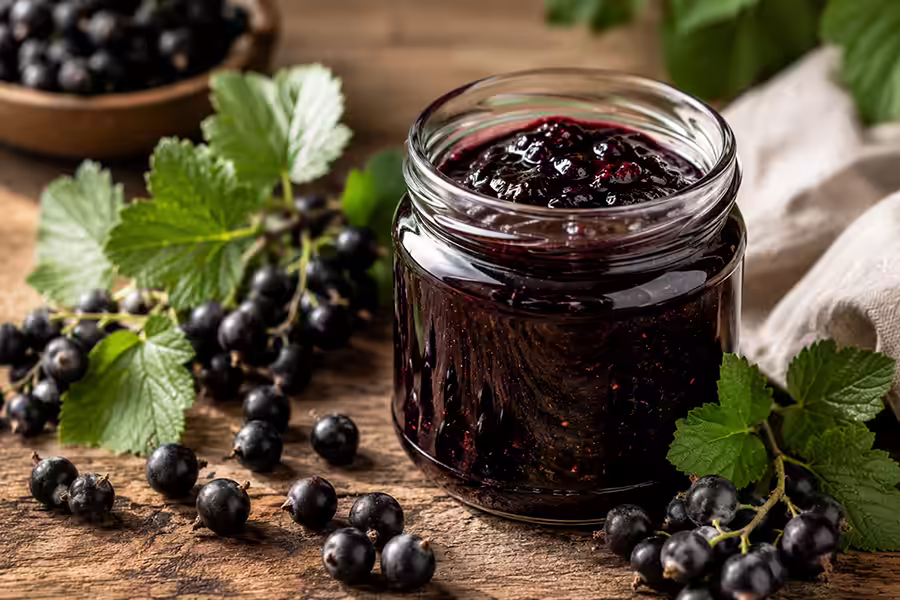
Blackcurrants are the “healthiest” of the three berries thanks to their high vitamin C content, and they also contain a lot of natural pectin, which is why blackcurrant jam sets the fastest and most easily of the three. This makes blackcurrant jam a good option for beginners.
The tart flavor of the currants is nicely balanced by the sweetness of the sugar, and the finished jam has a rich, deep purple color and a thick, almost jelly-like consistency.
Ingredients
- black currants — 1 kg
- sugar — 1–1.2 kg (the currants are quite tart, so use a little more sugar)
- water — 100–150 ml (optional, if the berries are very dry)
Step-by-step recipe
- Pick the currants off the stems, sort through them, and remove any green or damaged berries.
- Rinse the berries in cold water and let them drain in a colander.
- If you like, you can crush some of the berries with a blender or a pestle—this will speed up the release of pectin and make the jam thicker.
- Place the currants in a saucepan and add 100–150 ml of water if the berries are dry and there isn’t much juice.
- Place over medium heat, bring to a boil, and simmer for 5–7 minutes until the skin softens.
- Add the sugar and stir until it is completely dissolved.
- Bring to a boil over medium heat, stirring constantly.
- Reduce the heat and simmer for 20–25 minutes, skimming off any foam.
- Check the consistency by placing a drop on a plate—currant jam usually thickens faster than other types.
- Pour the hot jam into sterilized jars and cover with lids.
- Turn it upside down until it has cooled completely.
Tips and Common Mistakes
Because of its high pectin content, currant jam thickens very quickly after being removed from the heat, so don’t rely solely on its consistency while it’s hot—it will always be thinner than after it cools. If the jam seems a little runny while cooking, let it cool before deciding whether to cook it further.
If the currants are very tart (which is often the case with early-harvested berries), it’s best to start with the maximum amount of sugar—1.2 kg per 1 kg of berries—otherwise the jam will turn out too tart, and the kids definitely won’t eat it.
Some cooks add a few mint leaves to the currant jam while it’s cooking (and remove them afterward)—this gives it an interesting, refreshing flavor that pairs well with the tartness of the berries.
A Comparison of Three Types of Jam
If you plan to make all three types at once, here’s a quick reference chart showing the proportions, cooking times, and specific characteristics of each jam.
| Параметр | Полуничне варення | Малинове варення | Смородинове варення |
|---|---|---|---|
| Пропорція цукру до ягід | 1:1 | 1:1 | 1:1,2 |
| Кількість варінь | 2–3 етапи | 1 етап | 1 етап |
| Орієнтовний час варіння | 15–20 хв загалом | 15–20 хв | 25–30 хв |
| Густота за пектином | Низька, бажано додати лимонний сік | Середня | Висока, багато природного пектину |
| Орієнтовний вихід з 1 кг ягід | 1,2–1,3 л | 1,1–1,2 л | 1–1,1 л |
As you can see, currant jam thickens most easily thanks to its natural pectin, whereas strawberry jam requires the most attention precisely because of the high moisture content in the berries.
Common mistakes when making berry jam
Even with tried-and-true recipes, it’s easy to run into a few common problems. Here are the ones I’ve encountered most often over the years of making homemade jam.
The jam turned out runny. The most common reason is that it wasn’t cooked long enough or there was too much moisture in the berries (especially true for strawberries after it rains). You can fix this by simmering it for an additional 10–15 minutes, and next time, reduce the amount of time the berries sit with the sugar before cooking, or let them drain a little longer in a colander after washing.
The jam has burned. This usually happens when the jam is cooked over too high a heat without constant stirring, especially during the last 5 minutes, when the sugar is already highly concentrated. If you notice a slight burnt smell, it’s best not to use the jam from the bottom layer of the pot; instead, pour the rest into a clean container without touching the bottom.
The jam crystallized in the jar. This happens when the sugar is allowed to crystallize—for example, if undissolved sugar crystals remained on the sides of the pot during cooking, which then ended up in the jar and became the “nucleus” for the crystallization of the entire mixture. To avoid this, stir the jam regularly until the sugar is completely dissolved, especially during the early stages of cooking.
Mold has formed on the surface. The most common cause is jars that weren’t sterilized properly, or jam that was poured into the jars while warm or cold rather than hot. Mold can also appear if the jar was left open for a long time after the first use. It is best not to eat jam with mold, even if you simply remove the top layer—toxins can penetrate deeper than is visible to the naked eye.
The jam has lost its color and turned brown. This is a natural process that occurs during long-term storage (more than a year) or when the jam is cooked over too high a heat for an extended period of time. The color does not affect the safety of the jam, but if you want to preserve its brightness for as long as possible, add lemon juice (especially for strawberries) and do not exceed the recommended cooking time.
Winter storage
Ready-made jam in airtight, sterilized jars—made with a 1:1 ratio of sugar to berries—can be stored in a cool, dark place (basement, pantry, or cupboard away from the stove) for 12–18 months. If there is less sugar—for example, 700–800 g per 1 kg of berries—it is best to keep the jam in the refrigerator and consume it within 4–6 months.
Once opened, store the jam in the refrigerator and use it within 2–3 weeks, always using a clean, dry spoon—moisture and dirt on the spoon can significantly speed up spoilage.
When it comes to serving, this jam made from these three berries is incredibly versatile. Strawberry jam is perfect with pancakes, fritters, and as a layer in cakes. Raspberry jam is a classic filling for pies and dumplings and a base for homemade fruit drinks and compotes in winter (just dilute a few spoonfuls of jam with hot water). Currant jam pairs well with tea at the first signs of a cold, and it can also be used as a base for a sauce for meat or game, with a little balsamic vinegar and spices added.
Variations and possible substitutions
If you’d like to expand on the basic recipes a bit, here are a few options I’ve tried out myself.
A berry mix. You can mix strawberries and raspberries in a 1:1 ratio—the result will be jam with a bright aroma and rich color, with the strawberries adding juiciness and the raspberries adding aroma.
Less sugar. If you need to reduce the amount of sugar for health reasons, you can lower the ratio to 600–700 g of sugar per 1 kg of berries, but in that case, be sure to store the jam in the refrigerator and consume it within 3–4 months. Alternatively, you can replace some of the sugar with honey (up to 30% of the total amount), adding it after removing the jam from the heat to preserve its beneficial properties.
Spicy notes. You can add a pinch of cinnamon or a few black peppercorns to currant or raspberry jam while it’s cooking (then remove them)—this adds an unexpected, but pleasant spicy note, especially if you plan to use the jam in sauces for meat.
No-cook jam (raw jam). For raspberries and strawberries, you can make “raw” jam—blend the berries in a blender, then mix them with sugar in a 1:1 ratio,5 (more sugar for preservation without heat treatment), mix thoroughly until the sugar is completely dissolved, and store exclusively in the refrigerator or freezer. This preserves the maximum amount of vitamins, but the shelf life is significantly shorter—up to 1 month in the refrigerator.
Frequently Asked Questions
How much sugar do you need per 1 kg of berries for jam? The standard ratio is 1:1, meaning 1 kilogram of sugar for every 1 kilogram of berries. For more tart berries, such as black currants, you can increase the amount of sugar to 1.2 kg. If you want a less sweet jam, you can reduce it to 700–800 g, but then the shelf life is shorter and the jam must be kept in the refrigerator.
Why did the jam turn out runny, and what can you do about it? The most common reason is that it wasn’t cooked long enough or there was too much moisture in the berries. Put the jam back on the heat and simmer for an additional 10–15 minutes, checking the consistency with a drop on a cold plate. Keep in mind that jam always thickens after it has cooled completely, so don’t judge the consistency while it’s still hot.
Should you skim the foam off when making jam? Yes, it’s recommended. The foam consists mainly of air and impurities that rise to the surface when boiling. If you don’t skim it off, the jam may crystallize faster or lose its clarity, and the flavor will become slightly less pure.
How can you tell if jam is ready without a thermometer? The easiest way is to test it on a cold plate. Place a teaspoon of syrup on a plate that has been in the refrigerator for a few minutes, and wait a minute. If the drop holds its shape and doesn’t spread quickly, the jam is ready.
How long does homemade jam last without refrigeration? Jam made with a 1:1 ratio of sugar to berries, sealed in sterilized jars and inverted until cool, can be stored in a cool, dark place for up to 12–18 months. The key is to sterilize the jars and fill them while the jam is still hot.
Can you make jam with frozen berries? Yes, absolutely. You don’t need to thaw the frozen berries first—just add sugar and let the berries thaw and release their juice at room temperature for a few hours, then follow the same recipe. Cooking time may be slightly longer due to the extra moisture from the ice.
If you plan to make all three types over the weekend, I recommend starting with the currant jam, since it cooks the fastest, then move on to the raspberry jam, and save the strawberry jam—which requires several cooking stages with breaks in between—for last or spread it out over two days. I hope you enjoy making these preserves and savoring them this winter when you open your first jar!