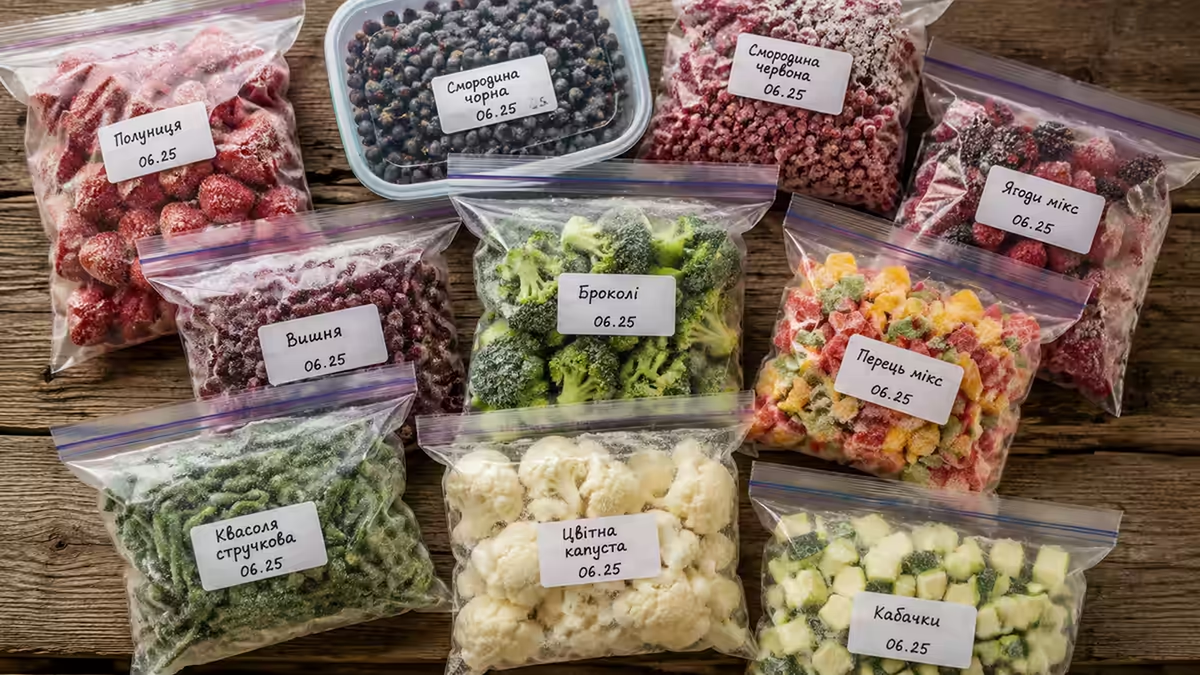
Every summer I freeze several dozen kilograms of berries and vegetables—and over the years, I’ve made quite a few mistakes. Freezing berries and vegetables for the winter seems like a simple task: just toss them in a bag and pop them in the freezer. But it’s precisely because of this simplicity that people often end up ruining their food: they end up with a solid mass of berries, a mush instead of pieces of bell pepper, or greens that turn into a slop after thawing. In this article, I’ve compiled everything I’ve learned from my own experience—which vegetables and berries are really worth freezing, how to do it right, and how long they’ll keep.
Why Freezing Is the Best Way to Preserve Your Harvest
Freezing has an advantage over canning in that it preserves the product’s structure and most of its vitamins. When food is flash-frozen to minus 18°C, fine ice crystals form that cause almost no damage to cell walls — so after thawing, berries and vegetables remain similar to fresh ones, rather than turning into mush, as happens with slow freezing in older freezers.
Vitamins are also in good shape: food science studies show that fruits and vegetables frozen immediately after harvest often retain more vitamin C than those that have been sitting on a supermarket shelf for several days. Canning, on the other hand, always “washes away” some of the nutrients.
For me personally, the main advantage is seasonality. In the summer, berries and vegetables cost next to nothing and have that same flavor that’s the whole reason we cook in the summer to begin with. If you freeze them properly, in winter you can pull a little piece of summer out of the freezer—for compote, a pie, or a vegetable stew—instead of buying tasteless greenhouse alternatives at astronomical prices.
But to be honest: not all foods freeze equally well. Cucumbers, radishes, lettuce, and basically anything that’s mostly water turns into a soft, shapeless mess after thawing. It’s better to preserve these vegetables using other methods rather than freezing them.
Compared to drying or canning, freezing also saves time: there’s no need to sterilize jars, make syrup, or stand over the stove for hours. The main time-consuming steps are preparation (washing, cutting, blanching), while the storage process itself requires no attention at all. On the downside, frozen foods take up much more space than jars on a pantry shelf, so it’s a good idea to free up space in the freezer before the preserving season begins.
What You’ll Need for Freezing
Before you put your first summer catch in the freezer, it’s a good idea to put together a small set of tools—with them, everything will go much faster and more neatly.
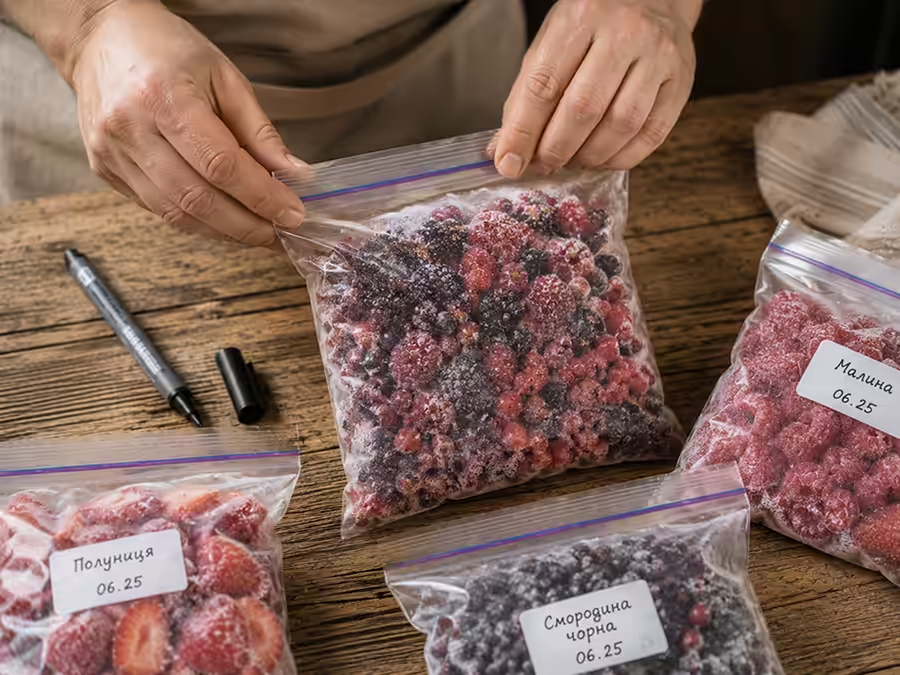
Freezer bags with a zip-lock closure. The most convenient packaging option: you can squeeze the air out by hand before sealing, and the bag itself is easy to label with a marker. Bags with a capacity of 0.5–1 liter are suitable for vegetables and berries—these portion sizes are more convenient to use in the winter.
Vacuum sealer. Not essential, but it significantly extends the shelf life and almost completely eliminates the risk of freezer burn. If you freeze large quantities of your harvest every year, this purchase will pay for itself in one or two seasons.
Flat containers or trays for freezing. Any flat plate, board, or tray lined with parchment paper will work for the IQF method—the main thing is that they fit in the freezer.
A permanent marker and some tape or stickers. A small thing that saves you from the “What’s this white stuff in the bag?” situation in the middle of January.
Kitchen scales. These are useful if you plan to portion out vegetables and berries right away for specific recipes—for example, 300 g per serving of stew or compote.
A colander and cloth or paper towels. For washing and, more importantly, for thorough drying—this step, as I’ve already mentioned, is often what determines whether you’ll end up with loose frozen pieces or a solid block of ice.
Key Principles of Proper Freezing
Before we move on to specific produce, let’s go over a few rules that apply to everything—both berries and vegetables.
Freezing speed. The faster a food item passes through the critical range from 0°C to minus 5°C, the smaller the ice crystals that form, and the better the texture is preserved. Therefore, you should set your freezer to “fast freeze” (Super Freeze/Fast Freeze), if available, for at least a few hours.
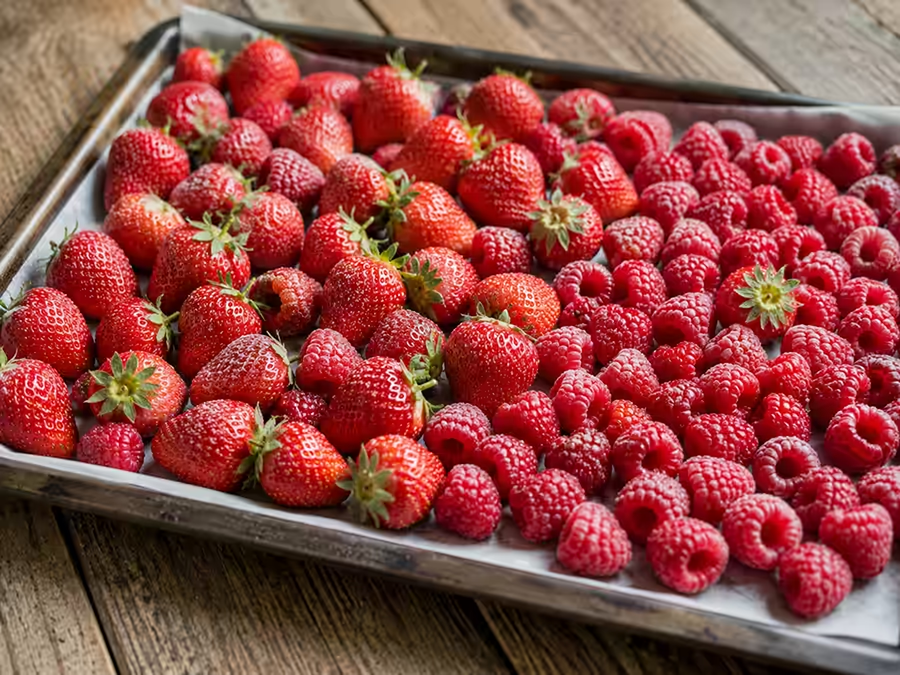
The IQF (Individual Quick Freezing) method. This is the same trick used by manufacturers of frozen vegetable mixes: the product is first spread out in a single layer on a tray and frozen in individual pieces, and only then transferred to a bag. This prevents the berries or vegetable pieces from sticking together into a single block, so you can take exactly as much as you need.
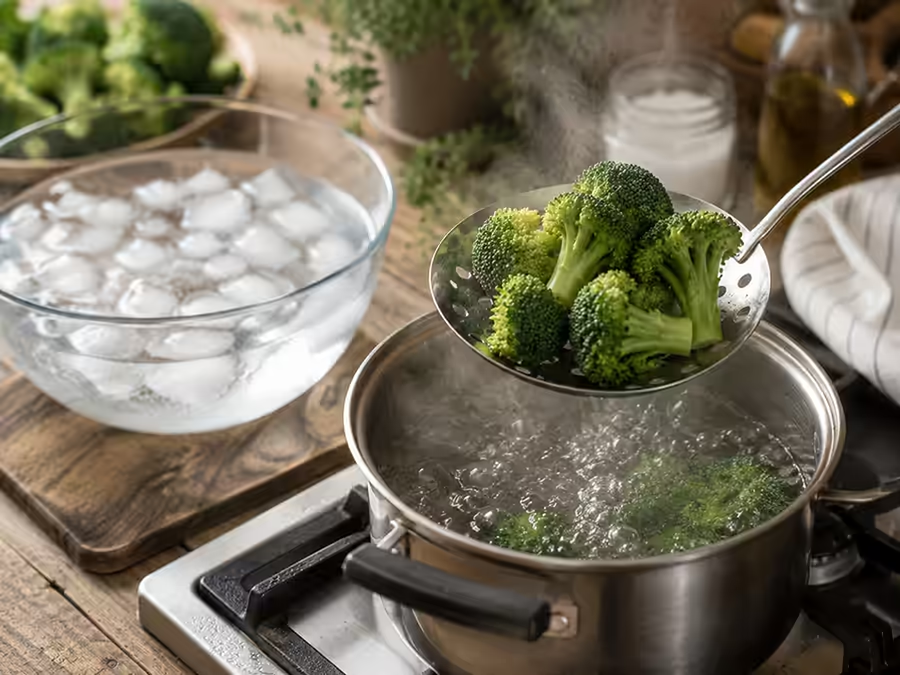
Blanching vegetables. Most vegetables (except peppers, onions, and herbs) should be blanched before freezing—that is, immersed in boiling water for 1–5 minutes and then immediately transferred to ice water. This stops the enzymes that continue to “ripen” the produce even in the freezer, causing the color, flavor, and vitamin content to deteriorate over several months of storage. I add a little salt to the blanching water—it’s not necessary, but it helps preserve the vegetables’ vibrant color, especially for green peas and broccoli. The time spent in ice water should be roughly the same as the cooking time: this is important so that the vegetable doesn’t just cool down, but is guaranteed to stop “overcooking” due to its internal heat. Here are the approximate blanching times for common vegetables:
| Vegetable | Blanching time | Note |
|---|---|---|
| Broccoli, cauliflower | 3 minutes | separate into flower clusters |
| Green Peas | 1–2 minutes | better peeled |
| Green beans | 2–3 minutes | whole pods or chopped |
| Corn (cobs) | 4–5 minutes | then cut the kernels |
| Carrots (diced) | 2 minutes | Optional, unless it's for soup |
| Pumpkin, zucchini | 1–2 minutes | or bake instead of blanching |
Air-free packaging. Oxygen is the main enemy of frozen foods; it’s the cause of “freezer burn” (gray, dry spots). Use zip-top bags from which you can squeeze out the air by hand, or a vacuum sealer—this is the most reliable option. Fill glass jars for liquid preserves (purees, juices) no more than 4/5 full—the liquid expands when it freezes and can cause the jar to burst.
Portioning and Labeling. Portion out your food right away into amounts you’ll actually use—thawed vegetables or berries should not be refrozen, as they lose both their flavor and safety. Write the contents and the date of freezing on each bag: over the winter, so much accumulates in the freezer that even an experienced homemaker will forget within a month what’s in there and when it got there.
Storage temperature. The optimal temperature is minus 18°C or lower. At temperatures above minus 12°C, food spoils much faster, even if it looks fine on the outside.
How to Freeze Berries for the Winter
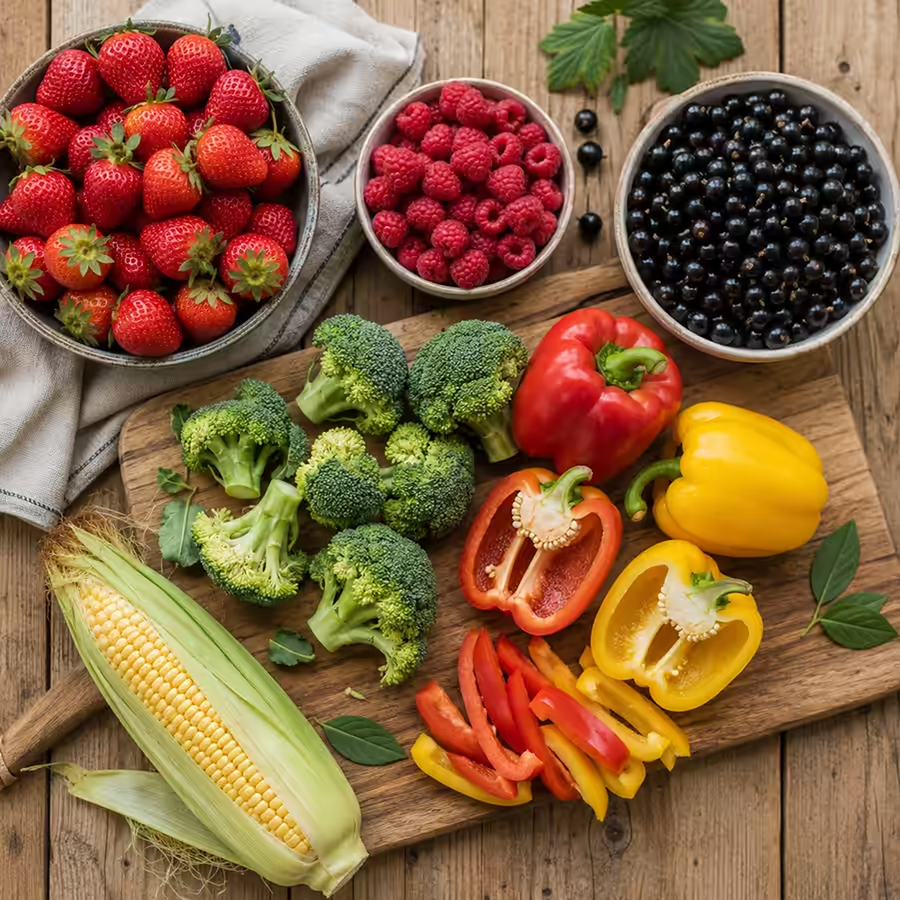
Berries are probably the easiest food to freeze: they almost always retain their flavor and shape if you take the time to follow the proper procedure.
Strawberries
I wash the strawberries, make sure to dry them thoroughly on a towel—excess moisture means more ice in the bag—and remove the calyxes. I freeze small berries whole; it’s better to cut large ones in half or into slices, especially if you plan to use them in a smoothie or baked goods. I spread them out in a single layer on a flat plate or cutting board lined with parchment paper and place them in the freezer for 3–4 hours. Only then do I transfer them to a bag—this prevents the berries from sticking together.
Raspberry
Raspberries are delicate berries that are easily damaged when washed. I wash them only when necessary, gently, in a colander under a gentle stream of water, and immediately spread them out to dry on a paper towel. Because of their high water content, raspberries always soften a bit after thawing—this is normal, and they’re still perfect for compote, sauce, or filling; just don’t expect them to look “fresh” on their own.
Currants (black and red)
Currants are the easiest to freeze: they’re firm, have a tough skin, and hold their shape well. I remove the berries from the stems, wash them, dry them thoroughly, and immediately pack them into bags—freezing them separately on a tray isn’t necessary here, though it won’t hurt if you want a perfectly loose mixture. Black currants, by the way, retain vitamin C better when frozen than most other berries.
Sweet cherries and sour cherries
You have a choice here: freeze them with or without the pits. I prefer to remove the pits right away—it’s much less pleasant to deal with this in the winter than in the summer, and pitted cherries are immediately ready for varenyky or a pie. To remove the pits, it’s convenient to use a special tool or a regular pin. After that, dry them on a towel, freeze them on a tray, and pack them.
Blueberries and bilberries
You can freeze these berries even without washing them, as long as you’re sure they’re clean (for example, if you picked them yourself in the woods and they look clean)—excess moisture will only compromise the quality of the freeze. If you do wash them, be sure to dry them thoroughly. Blueberries and bilberries have a thick skin and hold their shape better than raspberries or strawberries.
Gooseberry
Wash the gooseberries, trim off the stems and tips, and cut them in half if desired—especially if you plan to use the berries for sauces or compote. Thanks to their thick skin, gooseberries freeze particularly well and retain their texture almost entirely.
Grapes
Grapes are frozen whole, after being removed from the bunch, washed, and thoroughly dried. This isn’t the most popular way to preserve them, but frozen grapes are perfect as a quick dessert straight from the freezer—frozen grapes have a pleasant, dense texture, somewhere between a popsicle and sorbet. For compotes or baking, you can use either whole grapes or grapes cut in half, if the grapes are large and have seeds.
Sea Buckthorn
Sea buckthorn berries are harvested in the fall when they’re already slightly frozen, so freezing them is even easier than with other berries: just pick the berries off the branches, sort out any debris and leaves, and immediately pack them into bags or containers without washing them, provided the berries are clean. In winter, sea buckthorn is primarily used to make tea and fruit drink, so minor damage to the skin during harvesting isn’t a problem.
How to Freeze Vegetables for the Winter
Vegetables are a bit more complicated than berries: there’s almost always a preparatory step involved—blanching, sautéing, or at least cutting them a certain way. Here’s another rule that’s easy to overlook: cut pieces of the same vegetable to roughly the same size. If a batch contains both small and large cubes, the small ones will overcook and become mushy while the large ones are still raw inside—and the result will be uneven. Let’s take a look at the most popular options.
Broccoli and Cauliflower
I separate the head into small florets of roughly the same size—this is important so that all the pieces blanch evenly. I blanch them for 3 minutes in boiling, lightly salted water, immediately transfer them to a bowl of ice water for the same amount of time, dry them thoroughly on a towel, and freeze them on a tray before packing them into bags.
Green peas and green beans
I shell the peas and blanch them for just 1–2 minutes—they’re very tender and easy to digest. I first trim the tough “tails” from the ends of the green beans, cut them into 3–4 cm pieces if desired, and blanch them for 2–3 minutes. After cooling and drying, both vegetables freeze well when spread out separately on a tray, so the mixture doesn’t clump together in the winter.
Corn
I blanch the whole heads for 4–5 minutes, cool them in ice water, and then cut the kernels off along the head with a sharp knife. After cutting, I pat the kernels dry again on a towel to remove any juice—and then into the freezer. You can also freeze whole heads; in that case, I increase the blanching time to 7–8 minutes, and after freezing, they’re easy to boil or roast right in their husks, straight from the bag.
Sweet pepper
Peppers are one of the few vegetables that don’t need to be blanched. I wash them, remove the seeds and membranes, and cut them into strips, cubes, or rings—depending on what dishes you plan to use them for. Be sure to pat the cut pieces dry thoroughly with a paper towel, because moisture means extra ice in the bag. I freeze them separately on a tray so that later I can grab a handful of colorful strips right from the bag for stir-fry or stuffed peppers.
Tomatoes
Because tomatoes contain a lot of moisture, they don’t hold their texture well, so they definitely won’t be like fresh slices for a salad after thawing—and it’s best to accept that right away. But for sauces, soups, and stews, frozen tomatoes work perfectly. The easiest way is to wash and dry whole tomatoes and freeze them just as they are, in a bag. Before using them, the thawed skin can be easily peeled off under warm water, and the flesh can go straight into the pot. Another option is to make tomato puree or blanched, peeled, diced tomatoes in advance and freeze them in portions in containers.
Zucchini and Eggplant
I slice zucchini for freezing into rounds or cubes and blanch them for 1–2 minutes—without this step, they become watery and spongy after thawing. If you plan to use the zucchini for pancakes or baking, it’s easier to grate them, squeeze out the excess liquid by hand through cheesecloth, and freeze them in portions in bags—that way, you won’t have to bother with squeezing them in the winter. It’s best to bake or sauté eggplant slices before freezing—raw eggplant doesn’t freeze well and tastes bitter after thawing.
Mushrooms
Mushrooms—both wild and cultivated—are best frozen after they’ve been sautéed. I chop them with a knife or a slicer, sauté them in a dry skillet without oil until all the moisture has evaporated, let them cool, and pack them in small portions. You can also freeze raw mushrooms, but they’ll release a lot of liquid after thawing and will lose much of their flavor and aroma.
Greens
I wash the dill, parsley, basil, or cilantro, dry them thoroughly (damp herbs will clump together into a solid mass when frozen), and chop them finely. One of my favorite methods is to spread the chopped herbs into ice cube trays, pour in a small amount of water or olive oil, and freeze them into cubes. These cubes are convenient to toss right into soup or sauce without thawing. Another option is to simply freeze the chopped herbs in a bag in a thin layer, then break off pieces as needed.
Carrots and Beets
I peel the carrots for freezing, then cut them into cubes or strips, or grate them—depending on what dishes I plan to use them for in the winter. I blanch them for 2 minutes if I plan to add the vegetables to ready-made dishes without further prolonged cooking; if the carrots are going into soup or stew, where they’ll be cooking for 15–20 minutes anyway, I can skip the blanching. It’s best to boil or bake beets until tender before freezing, then peel and cut them into cubes or strips—you shouldn’t freeze raw beets, as they lose both their color and flavor.
Pumpkin
I peel the pumpkin and remove the seeds, cut it into cubes, and blanch it for 2–3 minutes, or bake it in the oven until it’s half-cooked—I prefer the second method because the pumpkin immediately becomes sweeter and more flavorful. Frozen pumpkin is perfect for porridges, pureed soups, and baked goods.
Spinach and sorrel
I blanch the spinach and sorrel for just 30–60 seconds—the leaves are very tender and quickly lose their volume in hot water. After blanching, I always squeeze out the excess liquid thoroughly with my hands—otherwise, a lot of excess ice will form in the bag—and then shape the greens into small, portion-sized clumps or spread them out in a thin layer. This format is perfect for borscht, green soup, or pie fillings.
Seasonal Calendar: What to Freeze and When
The tastiest frozen foods come from produce harvested at the peak of the season, when it’s cheapest and most flavorful. A rough calendar for central Ukraine looks something like this:
| Period | What to Freeze |
|---|---|
| Late May–June | Strawberries, early-season peas, radishes (for sauces, not for freezing whole) |
| July | Raspberries, black and red currants, cherries, sweet cherries, zucchini, the first tomatoes |
| August | Blueberries, lingonberries, gooseberries, peppers, eggplants, corn, green beans |
| September | Grapes, late-season tomatoes, pumpkin, beets, carrots, mushrooms |
| October | Sea buckthorn, late-season cabbage, root vegetables for soup mix |
This is a general guideline that depends on the region and the weather conditions of a given year—the main indicator isn’t the calendar, but the appearance and ripeness of the produce. It’s best to buy or harvest for freezing when market prices drop due to an oversupply—this is usually the best sign that the produce is at its peak.
Here’s another lesson I’ve learned from experience: don’t try to freeze everything all at once during the first week of the season. It’s better to buy or harvest berries and vegetables in small batches over the course of several weeks—that way, you have time to properly prepare each portion, rather than rushing to freeze several bags at once when the freezer is already overloaded.
Freezing Purees and Juices Made from Berries and Fruits
It’s also worth mentioning another way to preserve berries—as puree or juice. I blend ripe berries (preferably raspberries, strawberries, or black currants) in a blender, strain them through a sieve if I want to remove the seeds or skins, and pour the mixture into small containers or ice cube trays. Frozen cubes of berry puree are convenient to add to yogurt, oatmeal, or a smoothie first thing in the morning, without having to wait for them to thaw.
The same approach works for vegetables: tomato puree, zucchini puree for baby food, or pumpkin puree for baking keep perfectly well in the freezer for up to 8–10 months. The main rule is the same—fill the container no more than 4/5 full so that the liquid has room to expand as it freezes.
Freshly squeezed juice also freezes well, although it separates slightly after thawing—the pulp settles at the bottom, and the thinner part floats to the top. This is normal; simply give the juice a shake or stir it before serving. It’s convenient to freeze juice in small portions using ice cube trays or silicone muffin molds—that way, in the winter, you can take out exactly as many cubes as you need for fruit compote, fruit drink, or to add to tea.
How long do frozen foods last?
At a stable temperature of minus 18°C or lower, most foods can be safely stored for much longer than the specified periods—but their taste does deteriorate over time. Approximate time frames for maintaining the best flavor:
| Product | Shelf life | Note |
|---|---|---|
| Berries (strawberries, raspberries, currants) | 8–12 months | in an airtight package |
| Stone fruits (cherries, sweet cherries) | 10–12 months | preferably pitted |
| Broccoli, cauliflower | 10–12 months | after blanching |
| Peas, beans | 10–12 months | after blanching |
| Pepper | 6–9 months | without blanching, slightly less |
| Tomatoes (whole or pureed) | 6–8 months | the texture changes more quickly |
| Zucchini, eggplant | 8–10 months | after blanching or baking |
| Mushrooms (sautéed) | 9–12 months | raw — 3–4 months |
| Greens | 6–8 months | in the form of cubes with oil — longer |
These figures are approximate: if the product is stored longer, nothing bad will happen to it in terms of safety; it’s just that the taste and aroma will gradually fade.
How to Organize Your Freezer So You Don’t Lose Track of Your Preserves
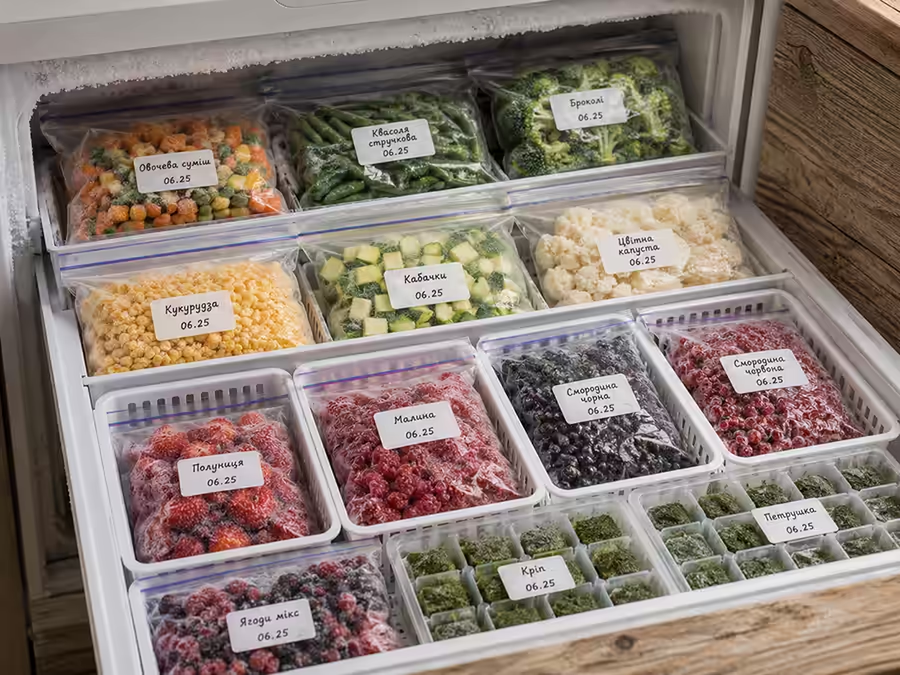
Even perfectly frozen food is pointless if you have to dig through the entire freezer in the winter just to find a bag of raspberries. Over the years of preserving food, I’ve developed a simple system that saves me a lot of stress.
Sections by category. I set aside separate shelves or bins for berries, another for vegetables, and another for prepared foods (mashed potatoes, diced greens, sautéed mushrooms). This makes it much easier to find things, even when the freezer is packed to the brim.
The “first in, first out” principle. I place new batches deeper inside or lower down, and move the older ones closer to the door or to the top so that I use the oldest preserves first during the winter. This is especially important for foods with a shorter shelf life, such as tomatoes or greens.
Flat packaging instead of round containers. Bags laid out in a thin, flat layer take up much less space than bulky containers and thaw faster when it’s time to cook. Round containers should be reserved only for mashed potatoes or liquid preparations.
A list on the freezer door or in your phone. A simple list with approximate portion sizes for each item saves a lot of time: you won’t have to open the freezer every time to check if there are any currants left for the compote.
Common Mistakes When Freezing Food
Over the years of harvesting, I’ve made these same mistakes myself, so I’m sharing my honest experience.
- Foods that are too wet before freezing. The most common mistake is putting undried berries or vegetables into a bag. The result is a solid block of ice instead of a loose mixture.
- Large portions. If you freeze two kilograms of strawberries in a single bag, you’ll either have to thaw the whole thing at once or chop up the berries with an axe. It’s better to divide them into portions for specific dishes right away.
- Skipping the blanching step. Vegetables that aren’t blanched don’t keep as long; they darken and lose their crunch much faster than it seems at first glance.
- Air in the bag. The more air remains in the package, the faster freezer burn will develop—grayish-white, dry spots that spoil the taste.
- Refreezing. Do not refreeze a thawed product: not only will the texture deteriorate even further, but the safety risks will also increase.
- Freezing unsuitable vegetables. Cucumbers, radishes, lettuce, and leeks turn into an inedible mess when thawed—it’s better to find other ways to preserve them.
- Lack of labeling. After three months, even the most experienced homemaker won’t always remember what’s inside a white, opaque bag.
- Freezing in a freezer that’s too warm. If the freezer is already packed to the brim with old supplies, new batches will freeze more slowly than they should—and it’s precisely this slow freezing that damages the structure of berries and vegetables due to large ice crystals. Before the preserving season begins, it’s a good idea to free up at least some space.
- Ignoring the differences between varieties. Not all varieties of the same crop freeze equally well: for example, watery early-season strawberry varieties spread out much more after thawing than denser late-season varieties. If you have a choice, it’s better to select firmer, less juicy varieties for freezing.
How to Use Frozen Berries and Vegetables
Frozen berries are perfect for compotes, fruit drinks, smoothies, and fillings for dumplings and pies—just add them to the dough or pot without thawing them first; that way, less juice will leak out. When baking with berries, I also coat the frozen berries in a small amount of flour—this helps prevent them from “sinking” into the dough.
Frozen vegetables really shine in soups, stews, stir-fry mixes, and as side dishes. Most vegetables should be added to a dish while still frozen, without thawing first—this way, they lose less juice and retain more of their texture. The exception is vegetables for salads or dishes where the texture of fresh produce is essential: in these cases, to be honest, frozen vegetables can’t replace fresh ones, so it’s better to stick to hot dishes.
A Bit of History: How Freezing Replaced Traditional Preserving Methods
Our grandmothers’ generation still preserved the harvest mainly by drying, pickling, and preserving in sugar or syrup—home freezers didn’t become widespread in Ukrainian households until the second half of the 20th century. Before that, it was practically impossible to keep berries or vegetables fresh for the winter without deep-freezing, so housewives made up for this with a variety of preservation methods: dried cherries, sauerkraut, pickled apples, and preserves made with unlimited amounts of sugar as a preservative.
With the spread of household freezers, freezing has gradually become the primary method of food preservation precisely because it preserves the taste and appearance of fresh produce to the greatest extent, rather than transforming it into something fundamentally different, as is the case with jam or pickling. Today, most homemakers combine both approaches: some produce is used for preserves and jarred goods to add variety to the winter table, while other produce goes straight into the freezer so that in winter they have on hand a product that’s as close as possible to the original summer version.
Frequently Asked Questions About Freezing Berries and Vegetables
Should you wash berries before freezing them? You can—and in fact, you should—if you’re not sure how clean they are. The key is to dry them thoroughly after washing; otherwise, excess ice will form in the bag.
Do all vegetables need to be blanched before freezing? No. Peppers, onions, mushrooms (if sautéed), and herbs do not need to be blanched. However, cabbage, peas, green beans, and corn do not store as well without blanching and lose their color and flavor more quickly.
How long can frozen foods be stored in the freezer? Approximately 6–12 months, depending on the type of food, provided the temperature remains stable at minus 18°C. Storing them longer isn’t dangerous, but the flavor gradually diminishes.
Why do frozen berries stick together in a single clump? Most often, this is due to moist berries or large batches being packaged without first being frozen on a tray. The IQF method (freezing individual pieces before packaging them in a bag) solves this problem.
Can you freeze cucumbers and tomatoes for a salad? Cucumbers—no, they turn into a watery mess with no texture. Tomatoes also change texture, but they work well in sauces, soups, and stews after thawing.
Do frozen vegetables lose their vitamins? To some extent, as with any form of processing, but significantly less than when canned using heat treatment. If vegetables are frozen immediately after harvest, they often contain even more vitamins than fresh ones that have been sitting on store shelves for several days.
Do you need a vacuum sealer to freeze food for the winter? No, it’s not necessary. Regular air-sealed zip-top bags or airtight containers work just fine for home use. It makes sense to buy a vacuum sealer if you preserve large quantities of produce every year and want to extend their shelf life.
Why do frozen vegetables sometimes have a bitter or “frozen” aftertaste? Most often, this is the result of freezer burn caused by air in the package or storage for too long at an unstable temperature. To avoid this, carefully squeeze the air out of the bags and make sure your freezer maintains a stable temperature of minus 18°C or lower.