
The first time I made homemade ice cream with a regular set – mixer, bowl, and ice cream maker. Nothing complicated, and the result reflects the majority of store variants. The secret is not in the equipment, but in understanding the basic principles: what to do to make ice cream creamy, what – icy, and why exactly these proportions, and not others.
From those periods when I prepare ice cream at home, I’ve tried different bases, various additives, and different preservation techniques. What’s collected in this article – are not rewritten recipes from the internet, but practical experiences and a number of good practices, with which you can also create great recipes.
Content
Next – five proven recipes from classic vanilla to banana variants. All without special equipment, all with clarity on why that or another step is essential.
Why homemade ice cream is solid “as a stone” – and how to avoid this
The most common mistake: “put it in the ice cream maker – after an hour, a crystallized mass comes out.” The reason is always the same – crystallization of excess water. The more free water in the mixture, the larger the ice crystals, the coarser the texture at the exit.
There are four mechanisms that help with this.
Fat. The cream with a fat content of 33% – does not suit the recipe, but physical necessity. Fat molecules in the finished cream separate the ice crystals and do not allow them to clump into large clusters. Ice cream with milk at least 2.5% and ice cream with fatty creams – these are fundamentally different products in terms of texture. The subtlety lies already in the first tasting.
Sugar. Sugar reduces the measurement point of the mixture — it is not a metaphor, but a thermodynamic reality. The larger the sugar crystals, the softer the texture directly from the ice cream maker. This is true in most recipes, where 150-200 g of sugar is added to 500 ml of ice cream: not only for sweetness but also for texture. Honey and inverted syrup handle this task better than regular sugar — for more details, refer to the section on additives.
Ice cream. The sorbet without any stabilizers has a mixture of foam during freezing, which prevents large crystals from forming and accumulating into a dense mass. Without ice cream, this task is performed either by hands (stirring every 30-40 minutes) or with a unit (the warmer mass already contains air and a fatty mixture).
Speaking of the mixture. In the industrial sorbet, its part can reach 50% of the volume — this is specifically made of such “fluff” and light. Homemade sorbet usually contains less sugar so water is shiner and heavier. This is not a fault, but a peculiar detail — for this specialization, its cost usually exceeds that of store-bought.
Egg yolk. In recipes based on a custard base, egg yolk serves as an emulsifier — it unites fat and water into a homogeneous mass. This emulsion stabilizes the mixture evenly and gives it a shockingly smooth texture. But the yolk needs to be heat-treated — it does not work in sorbet.
What base to choose: on custard or without eggs?
Suitable approaches vary. The difference is noticeable in taste, mouthfeel, and texture.
| Parameter | On a custard base | Without eggs (no-churn) |
|---|---|---|
| Texture | Smooth, creamy | Dense, icy |
| Complexity | Medium | Simple |
| Preparation time | 30-40 min + cooling | 15 minutes |
| Risk of crystallization | Yolks may curdle | Minimal |
| Sweet | Intensive, luxurious | Thick, lighter |
| Suitable for add-ins | Any variety | Fruits and purees — carefully |
How to prepare for the first time — begin without eggs. The result will already be significantly better than store-bought sorbet of the medium price category. A recipe on a custard base provides premium texture, but requires precise work at the stage of thermal processing.
Ingredients that indicate the result
First, before proceeding to the recipe, consider the number of words about the product, as this is often where things get confused.
Fats. Fat content should be a minimum of 33%, ideally 35–36%. Fats 10–20% do not stand out in a stable dough and do not provide the necessary texture. If it says “vegetal fats” on the packaging, please note: some brands come out nicely and even give better stability than animal fats, but the taste might have a characteristic aftertaste. I usually prefer animal fats with a fat content of no less than 33%.
Condensed milk. In recipes without eggs, water can be replaced with condensed milk, and incorporate part of the base at once. Use quality products, free of animal fats in stock — the difference in taste will be felt. Check the stock: in good condensed milk, there should only be milk and sugar.
Sugar powder against icing sugar. When replacing fats, it’s better to use sugar powder: it dissolves evenly and doesn’t “grit” in the finished product. In the boiled base, icing sugar is normal — it dissolves during heating.
Vanilla. One vanilla pod provides aroma that cannot be replaced by any vanilla sugar. Cut it lengthwise, scrape out the seeds, and boil them with the milk — it gives the best flavor, and the pod goes into the saucepan. Vanilla extract is also good if it is of high quality and free from synthetic flavorings.
Egg yolks. For the boiled base, use fresh eggs at room temperature. Yolk from eggs of category A1 or A0 is bright yellow and contains the richest taste. Eggs from pasture or homemade will add the most intense yellow color.
Milk for boiled cream. Better to have 3.2% or higher — with low-fat milk, the boiled base will turn out thinner. Part of the milk can be replaced with 10–20% fat cream — then the cream will be even richer.
Natural stabilizers for better texture
This is not mandatory, but it’s worth knowing — especially for those who want to minimize the mixing or whatever meringue gets ahead.
Cornstarch. 1 tbsp. per 500 ml of liquid. Dissolve in 2–3 tbsp. of cold milk and add to the hot base during boiling. It thickens more than jelly and reduces the risk of burning. Often used in Turkish döndurma and similar sorbet recipes.
Gelatin. 1 tsp. (or 5 g) of gelatin per 500 ml of mixture. Soak in 2 tbsp. of cold water, let swell for 5 minutes, then dissolve in warm base. Gelatin does not create large crystals during storage — the sorbet remains softer for several days in the freezer. The taste does not change.
Alcohol. 1–2 tbsp. of liquor, rum or liqueur per 500 ml of mixture usually lowers the freezing point. Sorbet with alcohol — softer, does not crystallize as quickly, gathers spoonfuls without the previous dissolution. The taste of alcohol at low quantities is practically not felt, rather gives a pleasant note.
Mascarpone or cream cheese. 100–150 g per 500 ml of base thickens the texture significantly and “creamier” — gives a balance between sorbet and ice cream. If planning a richer dessert — a variation.
Recipe 1: Classic flavor base without sorbet
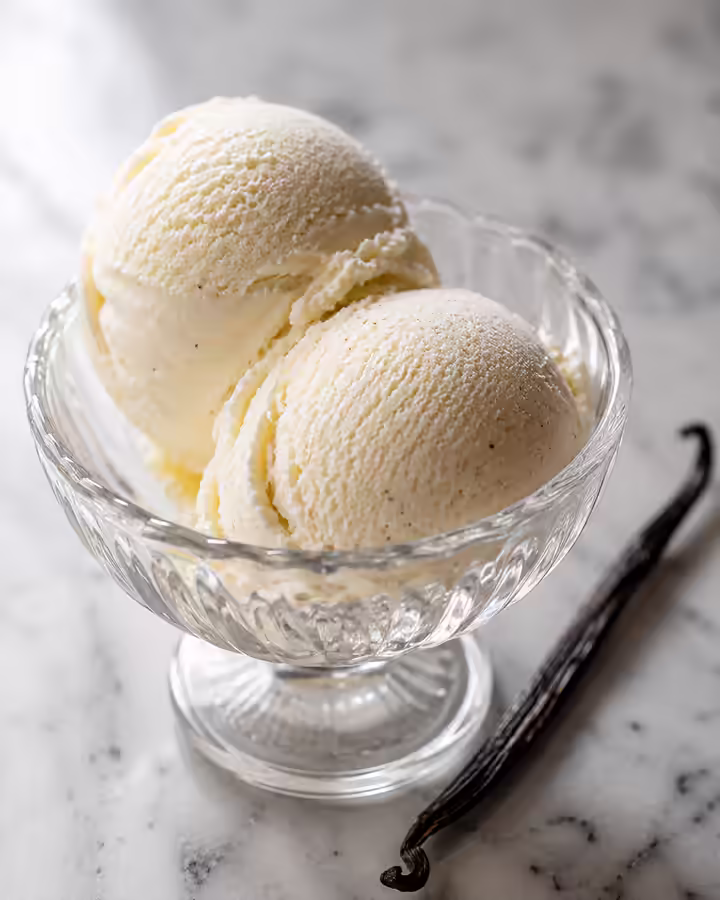
This is the same taste from childhood — smooth, creamy, with vanilla aroma. The base — custard cream on yolks. Takes more time, but the result is worth it.
Ingredients (for 6–8 portions)
- Cream 33–35% — 500 ml
- Milk 3.2% — 250 ml
- Egg yolks — 4 pcs.
- Sugar — 150 g
- Vanilla pod — 1 pc. or 1 tbsp. of vanilla extract
- Pinch of salt
Basic recipe
- Heat the milk in a saucepan, add the chopped vanilla stick along with the seeds. Bring to a slight boil, remove from heat, cover and let sit for 15 minutes — the milk will absorb the vanilla aroma.
- Whisk the yolks with sugar and a pinch of salt until pale yellow, then slowly pour in the warm milk while continuously stirring. The mixture should be about the color of light yellow and thoroughly mixed.
- A stick of vanilla to remove from the milk. It is customary to pour hot milk into a yellow mass, mixing gently and continuously. If you pour the extract – the yolks will thicken from the heat shock.
- Pour the mixture back into the saucepan, place on low heat. Stir continuously with a wooden spoon or silicone spatula, until it thickens and does not begin to cover the back of the spoon – 8-12 minutes. The temperature should not exceed 82-84 °C. If it has a thermometer – test with a spoon: draw your finger across the covered cream on the spoon, if the stripe is clear and does not fill in – the cream is ready.
- Remove from the heat, strain through a fine sieve into a bowl. Cover with food film “in contact” – the film should lie directly on the surface of the cream, so it doesn’t form a skin. Cool to room temperature, then refrigerate for at least 2 hours, better – overnight.
- Chill the surfaces until they are soft peaks. Be careful to immerse in the cooled cream with smooth movements from above down, so you do not lose the air.
- Strain the mixture into a container with a lid. The first 2 hours – remove each 30-40 minutes and good to stir with a spatula or mixer, breaking the crystals from the edges to the center. Then leave to freeze for another 4-6 hours or overnight.
- Taste for 10-15 minutes before serving, so the sorbet thaws slightly and scoops out easily with a light spoon.
What can you ask may not be that
If the boiled cream burned with egg yolks – overcooked. The temperature exceeded 85 °C, the yolks began to coagulate. Reduce the heat and do not leave.
Recipe 2: Sorbet “three ingredients” – without eggs and without pectin.
This recipe from which it is worth starting. Minimum components, maximum result – and no thermal treatment. To taste water reminds of good plumb, but it also has a lighter texture.
Ingredients (for 6-8 portions)
- The top 33-35%, very cold – 500 ml
- Condensed milk with sugar – 380 g (1 can)
- Vanilla extract – 1 tsp. (optional)
Block recipe
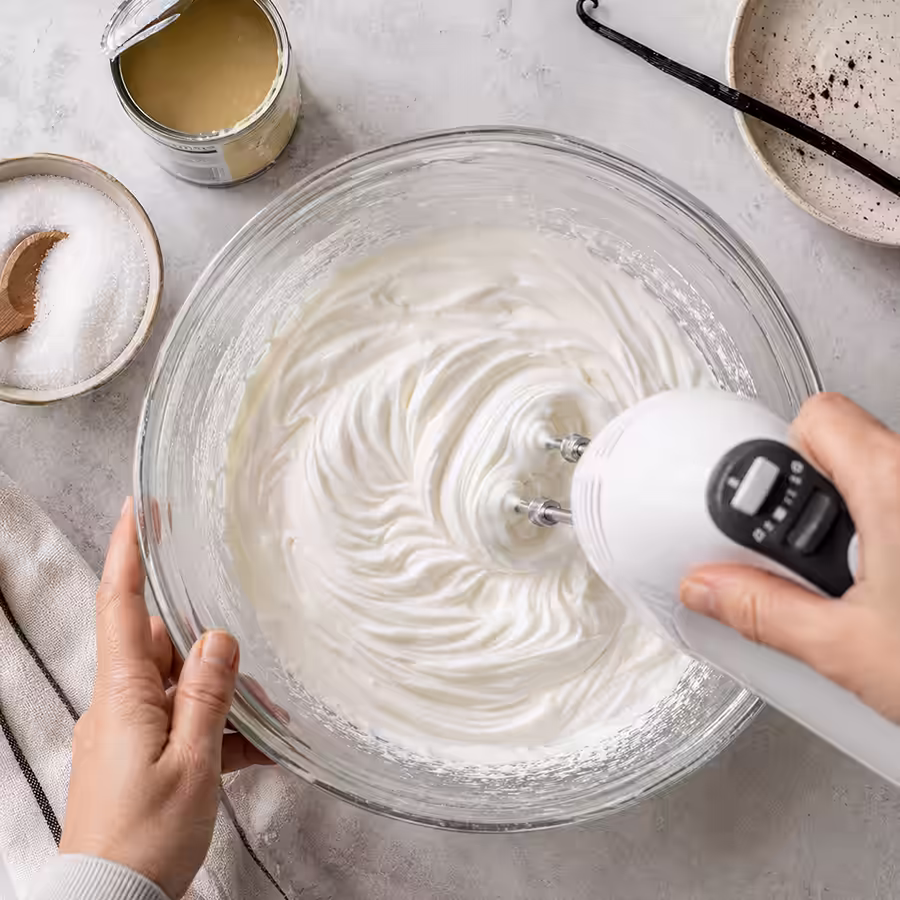
- Chilled meringue peaks whisked to stiff peaks. Start with small amounts, gradually increasing speed — it takes 4–6 minutes. Properly whipped peaks hold their shape and do not separate during baking.
- Add thickened cream with a thin stream, adding vanilla extract. Mix with a spatula using a folding motion from top to bottom — the task is to evenly distribute the thickened cream, without losing the meringue base.
- Pour the mixture into a container, covering with a lid or film. Place in the freezer for a minimum of 6 hours, ideally overnight.
This recipe does not require stirring during freezing. The whipped peaks will already have a surface, distributed between the large crystals. Thickened cream with its structure supports the retention of large crystals. As a result, the mixture freezes evenly without any additional manipulations.
Variation with mascarpone
Replace 100 ml of peaks with 100 g of mascarpone — reduce their weight from the start. The texture becomes creamier and “peaks” with a slight cheese note. An undebated balance between the cream and semifreddo.
Recipe 3: Chocolate mousse
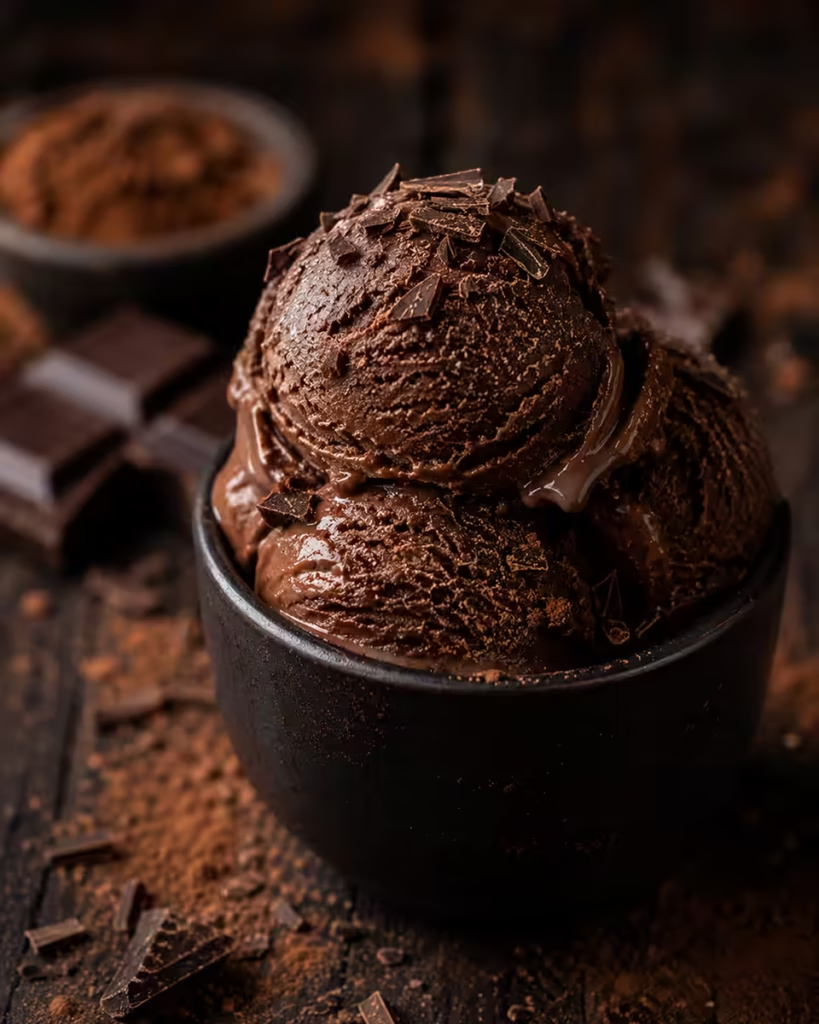
Chocolate mousse at home — this is quite a theme. How to make dry, “childish” chocolate flavor; real dark chocolate — made from quality beans and a hint of bitterness. And it’s a fundamental difference, and it’s worth different recipes.
Option A — on how to (simpler)
Ingredients
- Peaks 33–35% — 500 ml
- Thickened cream — 300 g
- Unsweetened cocoa powder — 4–5 tbsp.
- Sugar powder — 2 tbsp. (if additional sweetness is needed)
- Vanilla extract — 0.5 tsp.
Basic recipe
- How to properly whisk the cream so that it doesn’t break.
- In a small bowl, mix 3–4 tbsp. of thickened cream with a matching dough. This step is crucial: if you simply add cocoa powder to the whipped peaks, it will be unevenly distributed and will give a bitter taste of cream.
- Whipped peaks should be beaten to soft peaks. Add the rest of thickened cream, vanilla extract, and cocoa paste. Mix gently with a spatula using folding motions.
- Transfer to a container, freeze for 6–8 hours.
Chocolate that is pleasant to the taste. If you want a deeper, more complex chocolate flavor, use alkalized (dutched) cocoa powder. It is darker and has less acidity than the natural type. In Ukraine, it can easily be found in specialized stores for confectioners.
Option B — for dark chocolate
Ingredients
- Dark chocolate 33–35% — 500 ml
- Dark chocolate 70% — 150 g
- Sugar — 100 g
- Milk — 100 ml
- Egg yolks — 3 pcs.
Basic recipe
- Melt the chocolate, mix it with milk on a water bath or in a microwave, stirring each time for 20–30 seconds.
- Beat the yolks with sugar until pale.
- Whip the cream until soft peaks form.
- Fold the chocolate mixture into the yolks. Gradually incorporate the whipped cream.
- Keep in the refrigerator, mixing every 40 minutes for the first 2 hours, then every 4–6 hours.
Option “Stracciatella”. For option A — for 10–15 minutes, allow the mixture to cool after melting 50 g of dark chocolate, cool to a temperature around 30 degrees. The chocolate will harden quickly from the cold and will break into small pieces — just like the “stracciatella.”
Recipe 4: Semi-dark chocolate mousse
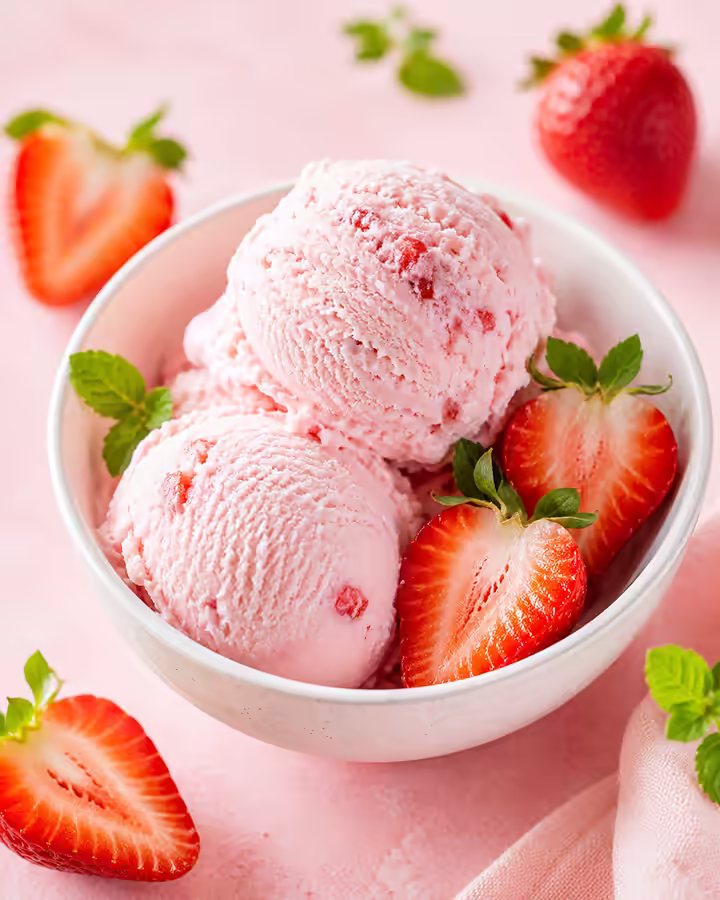
When the chocolate is inexpensive and melts best — is exactly the time for this recipe. It is based on a technique without yolks, but with berry purée.
Ingredients (for 6–8 portions)
- Fresh or frozen berries — 400 g
- Dark chocolate 33–35% — 400 ml
- Sugar powder — 120–150 g (depending on the sweetness of the berries)
- Lemon juice — 1 tbsp.
- Vanilla extract — 0.5 tsp. (optional)
Basic recipe
- Remove the berries, cutting off the unwanted stems. Blend them to a homogeneous purée. Add lemon juice and 50 g of powdered sugar, mix well. To taste — strain through a sieve for a smooth texture.
- Chill the purée in the refrigerator for 30 minutes — cold purée mixes better into the mousse and does not “sink” it.
- Chill the mousse with the remaining chocolate until soft peaks form.
- Add berry puree and vanilla extract, blending with a spatula in gentle movements.
- Store for 6–8 hours. Berry puree should be placed in a larger container than the top, so in the first 1.5–2 hours it’s worth mixing 1–2 times — the texture will settle.
About stored berries
The stored puree wonderfully suits this recipe — ideally, use fresh ones, but when stored, the berries tend to lose some of their flavor, and the puree comes out thinner. Just blend it in batches, leaving some berries whole, and immediately try blending it. Thus, the puree will be colder and better preserved when mixed with the toppings.
Include berries and fruits. Raspberries are wonderful, but the sourness can be overpowered by the sweetness. Mango — usually doesn’t require mixing: it’s rich in natural pectin and gives a very smooth structure on its own. Peach and nectarine — remove the skin, as it can be bitter in the puree. Blackberry — gives a phenomenal purple color without any food coloring.
Recipe 5: Banana ice cream — without toppings and milk
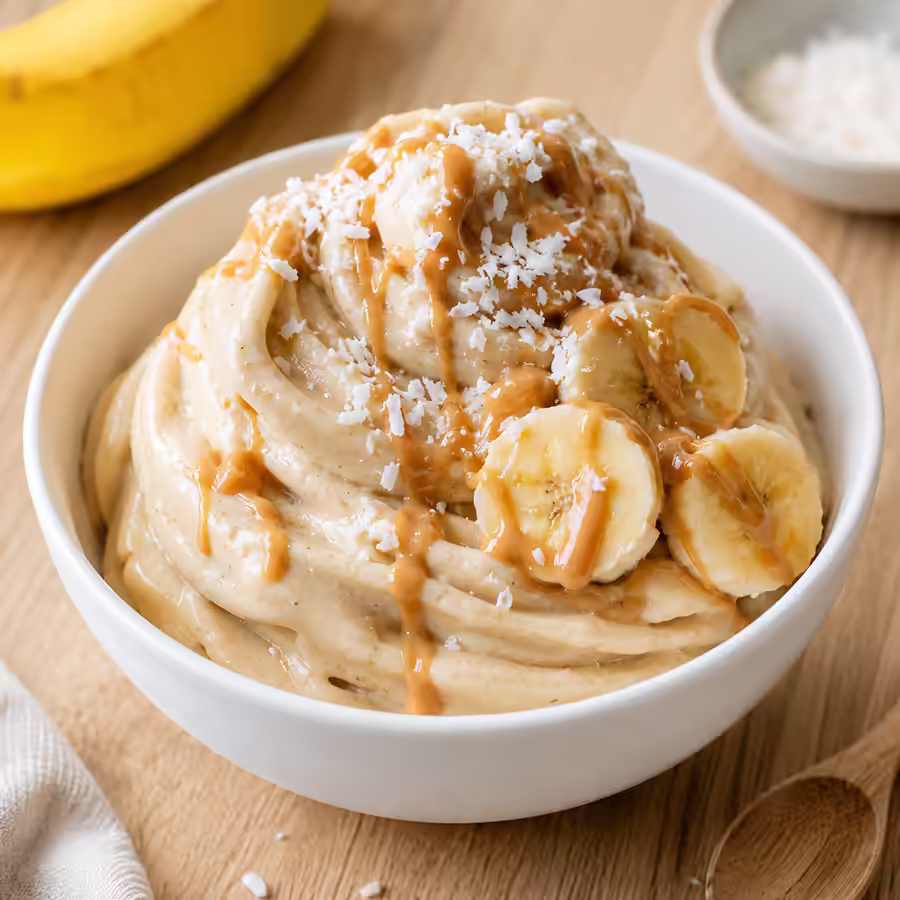
Ice cream — from the English “nice cream” — is frozen banana, whipped into a creamy mass. No dairy ingredients, no added sugars, no complicated manipulations.
Bananas during storage and freezing behave differently: slices brown, sugar and pectin solidify into a creamy structure, natural sugars provide sweetness. It’s not a replacement for ice cream, but like a standalone dessert or vegan option — definitely. And in terms of texture, it’s actually closer to soft-serve than to banana sorbet.
Ingredients (for 2–3 servings)
- Ripe bananas with dark spots — 4 pcs.
- Additions for flavor: cocoa, peanut butter, vanilla extract, berries, coconut flakes.
Base recipe
- Peel the bananas, cut into wheels 1–2 cm thick. Scatter on a plate or tray in one layer and freeze for 4–6 hours or overnight.
- Frozen chunks of cream can be blended in a food processor or powerful blender. Cutting the cream into smaller pieces—about the size of a cube—will help it blend better. Stop and scrape down the sides. The entire process takes 3–5 minutes.
- At this stage, you can add a purée (texture of soft bananas) or put it in the container and freeze it for another 1–2 hours for a firmer consistency.
- For addition, use about 2 tbsp. per 4 bananas; for peanut butter—2–3 tbsp. Add it during the blending process.
The quality of the banana is critical. Yellow bananas without spots provide a creamy texture, but those with “green” streaks tend to be more acidic. Darker bananas typically taste sweeter and creamier in the final result.
Combining with other fruits. A 50/50 mix with bananas gives a wonderful tropical version. Add a scoop of coconut milk during blending for an especially premium dessert.
How to substitute with bananas: three techniques of blending.
If there are no bananas, there are several ways to achieve a better texture without them.
The method of manual blending. You should place the bananas in the blender and mix each for 30–40 minutes. Distribute the puree or mashed substance, stirring the crystals from the edges towards the center. Repeat 3–4 times during the first 2–3 hours, then leave the residue to freeze. It’s laborious but effective for any recipe.
The method of using frozen tops. Mix based on the frozen tops (recipes 2, 3A, 4) do not require regular blending—oily mixtures usually crystallize. One or two blends in the first two years is enough. This is the most useful technique for most situations.
The method of blending. Partly frozen bananas (after 2–3 hours in the blender) provide the best texture. You should transfer to a container and keep it frozen for another 3–4 hours without blending. This method achieves the best texture among all manual techniques—especially for recipes based on a thick base.
Can you assume that the qualities can’t be altered? If the recipe requires enough fat (melted butter), a thickener (concentrated milk or 150+ g thickener per 500 ml) and contains a water content from the puree — one-off alteration or rarely ever. Recipes 2 and 3A — are exactly the same.
Tips and typical mistakes
For the year preparing homemade meringue, a separate collection of recipes has been compiled. Divide them so that you do not repeat them.
The tops should not be cold. The tops for meringue should be 2–5 °C — right from the fridge. At room temperature, they either generally do not whip, or give unstable foam, which quickly drops. In summer — cool the dishes before whipping, place them in the fridge for 15 minutes.
Avoid overbeating the tops. If you are whipping to the point of peaks and do not stop — the tops will start to separate on oil and egg whites (foam). Stop at soft or medium peaks: the mass will hold shape, but remains shiny. If you have overbeaten — add 1–2 tbsp cold tops and gently fold in with a spatula.
Reduce sugar. I know it’s tempting to reduce — but then the meringue will be as hard as a stone. Sugar is not only taste, but also structure. If you want less sweetness, instead of sugar use honey or inverted syrup: they still reduce the freezing point better.
Use a large container or a thick layer. A thick layer of the mixture freezes unevenly: the edges harden, while the center remains soft. It’s better to pour into two smaller containers — a layer up to 5–6 cm.
Opened containers. The meringue wonderfully absorbs odors from the freezer — meat, fish, everything else mixed in. Always cover with a plastic “contact” film before closing the lid.
Avoid long storage. 4 hours — is the absolute minimum. For proper structure, it should be 6–8 hours, ideally — overnight. Unfrozen meringue is soft in the center and crystal-clear on the edges — not dense, with a peculiar texture.
Golden meringue. The reason — undercooked due to the rapid addition of hot milk or overcooked during the standard boiling process. If it curdles — try to blend the mixture with a blender and filter through a fine sieve. If the curdle is rich and cheesy “yolk” — better to strain the mixture.
Merengue doesn’t gather with a spoon. Either it is overmixed (take 15–20 minutes before serving), or the recipe contained too much sugar or fat. It also helps to soak the spoon in warm water before mixing.
Variations and additions
Basic recipe — just the beginning. Here’s how to explore the creamy mass.
Caramel meringue. In the recipe “three ingredients” replace part of the usual condensed milk with caramel — it gives a creamy caramel taste and a beautiful beige color. To make simple caramel: 100 g of sugar melt over medium heat to a golden color, add 100 ml of boiling cream (carefully — the mixture will bubble), stir, cool and add to the base.
Salty caramel. That same caramel plus 0.5–1 tsp of sea salt — and it’s already a great flavor. The salt emphasizes the caramel aroma and balances sweetness. One of the most popular sweet flavors.
With nuts. Fine chopped nuts, pistachios or hazelnuts in the praline style wonderfully complement the mixture and give a caramel flavor. Nuts provide a unique green color without any dyes. It’s better to add nuts immediately after the last mixing so they don’t sink to the bottom.
Coffee meringue. Dissolve 2 tsp of quality ground coffee or chilled espresso into the mixture before freezing. It comes out nicely between the caramel and coffee cocktail. It pairs well with chocolate sauce.
Lavender mousse. 1 cup of dried lavender buds, boil them together with milk while preparing the whipped cream or steep them for 20 minutes in heated liquid, strain. Unusual, yet elegant flavor — especially with berry puree.
Mousse-inspired dessert. Spread homemade mousse between two wafer sheets or chocolate wafers and place in the freezer for 1–2 hours. A handy format for a picnic or children’s party.
Tartlets with mousse. A mousse-filled tartlet with sweet pastry dough with a caramel sauce — a simple yet effective way to serve on a plate. They can be prepared ahead of time, tartlets are kept separately.
How to serve homemade mousse
Details describing the differences between “just cream” and “sugar-coated mousse.”
Serving temperature. The optimal serving temperature of the mousse prior to serving — between -10 to -12 °C. Directly from the freezer (-18 °C) it will be very firm and “closed” with the mousse. Allow to rest for 10–15 minutes at room temperature — the aroma will bloom.
Warm spoon. Soaked in warm water or simply hold it for 30 seconds — it acquires a nice balance without melting and retains the necessary shape.
Dish. The preheated dish retains the temperature — place bowls in the freezer for 5–10 minutes before serving. Currently in the spec.
Toppings. Fresh berries, caramel or chocolate sauce, crushed nuts, waffle crisps, petals of edible flowers — all this elevates homemade mousse to the level of a restaurant dessert. But even in a simple cone — it’s also ideal.
How to store homemade mousse
Homemade mousse should not contain industrial stabilizers and emulsifiers, hence it keeps differently than store-bought.
In an airtight container at -18 °C, homemade mousse can be stored for 2–3 weeks. After this time the texture becomes worse — larger crystals appear, the aroma weakens, especially noticeably in fruity varieties.
Coating with a “contact” glaze—it’s a good practice not only at the beginning but also during storage. The glaze on the surface of the meringue prevents “shrinkage” and the appearance of icy crusts on top.
If the meringue has become very hard after a few days of storage—it’s normal. It usually takes 10-15 minutes to soften. Usually, 10 minutes at room temperature is enough for it to become suitable for lifting with a spoon.
Do not re-whip meringue, as it is likely to collapse again. After re-whipping, the structure will significantly deteriorate due to the clumping of crystals—and the taste will also change.
If you plan to store for longer than three days—add gelatin or a couple of tablespoons of alcohol during the preparation (as described in the section on stabilizers). This will essentially continue to “keep it fresh.”
FAQ
Why does my homemade meringue become hard like ice? The most common reason is insufficient fat or sugar. Check the fat content of the egg whites (at least 33%) and the amount of sugar in the recipe. You can also add 1-2 tablespoons of inverted syrup or honey—they will lower the freezing point better than regular sugar. Another option is 1 tablespoon of gelatin or agar: it doesn’t freeze, and the meringue remains softer.
Can I make homemade meringue without egg whites? Yes, but the texture will be different. Banana puree is often used to simulate without the use of egg products. Fat-containing coconut cream from the can (after chilling in the fridge) can also be a substitute: it behaves similarly and provides a creamy structure with a light coconut flavor.
How long does it need to be stored? A minimum of 6 hours, ideally overnight, but 8-10 hours is best. With a shorter time, the center may remain soft. With longer—its structure becomes even sturdier, but that’s not a problem: just let it sit for 15 minutes before serving.
Can the amount of sugar in the recipe be reduced? Yes, but with caution. Sugar in carrot recipes contributes not only sweetness but also texture. When the amount of sugar is reduced, the carrot will be firmer and crunchier. If you want less sweetness, replace part of the sugar with honey, inverted syrup, or agave syrup: they provide a milder consistency while maintaining the same level of sweetness, and some add their own flavor accent.
Do you need to pasteurize egg yolks for homemade carrot marmalade? In recipes based on boiling, egg yolks should undergo a thermal treatment at a temperature ranging from 80 to 82 °C. This is sufficient for pathogen elimination. Raw egg yolks in homemade marmalade are not used.
What equipment is minimally required? A mixer or manual blender, a pot, a container with a lid, and cooking utensils. For recipe 5 (carrots) — a blender or kitchen combine. Nothing specific: all this is found in any regular kitchen.