
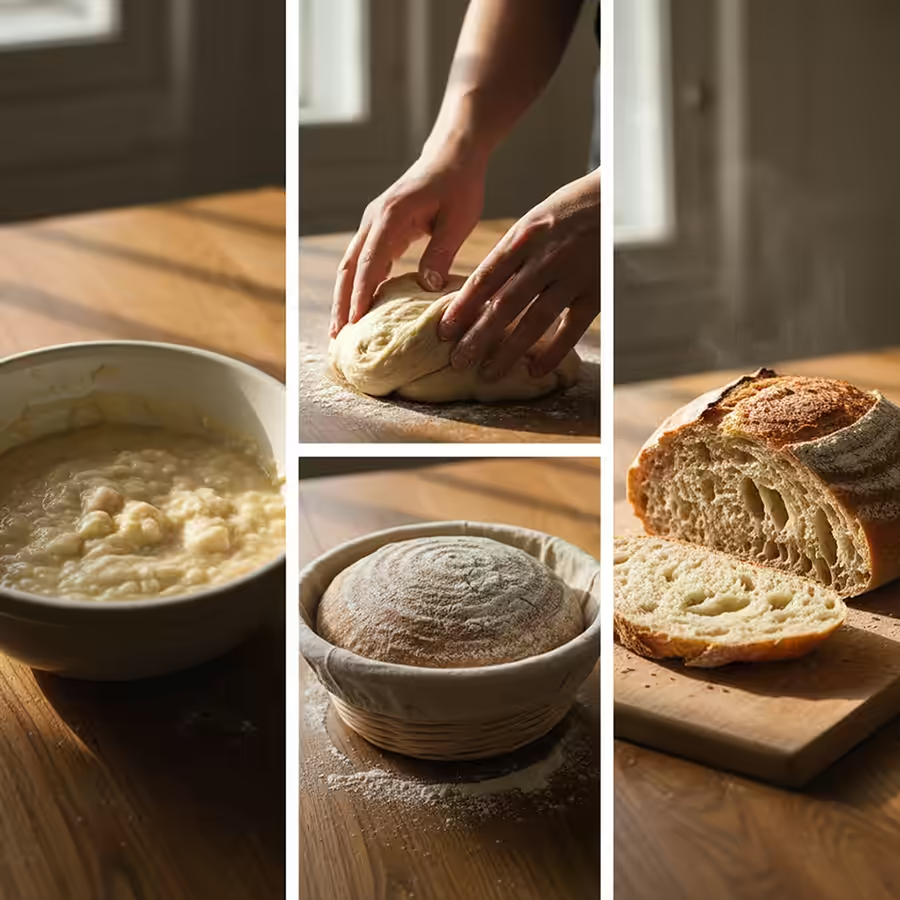
Podovyi bread is homemade bread that is baked without a mold, simply on a podu/cherene or on a flat heated surface (baking sheet, stone, steel), so the technique of shaping, the heat of the oven, and the correct start of baking are crucial here.
Content
People love sourdough bread for its aroma, “live” crumb, and distinctive crust: the dough has freedom to rise, and the heat comes directly from the heated surface. At home, it is possible to achieve results “like in an artisan bakery” if you think not in terms of “putting it in the oven,” but in terms of “creating the right conditions”: high heat, fermentation control, tension during shaping, proper steam, and baking.
Ingredients, equipment, and logic of bread making
There are a minimum of ingredients in sourdough bread, so each one is important: flour provides structure, water controls softness and porosity, salt preserves flavor and gluten, and yeast/sourdough controls fermentation. It is also important to understand that the “perfect” bread is not a single recipe, but a set of decisions tailored to your oven, flour, and kitchen temperature.
Flour: which type to choose and how it affects bread
- Premium wheat produces a softer, lighter crumb and predictable structure.
- Grade 1 wheat or wheat with a whole grain content gives a stronger aroma and a more “bread-like” taste, but requires a little more water.
- Strong flour (with higher protein content) holds its shape better in flatbread because the dough does not have any support.
- Weaker flour can be “strengthened” using the following technique: autolysis + folding + careful shaping + cold fermentation.
Practical guideline: if in doubt, start with white flour, master the technique, and then gradually introduce 10–30% whole grain or a little rye.
Water and hydration: how much to drink
Hydration is the percentage of water in the flour weight. For the first stable loaf of bread, 70–74% works well, for a more open porosity — 75–80% (but this is more difficult to shape).
- 70–72%: easier to shape, bread is taller, pores are finer, but the crumb is elastic.
- 73–76%: balance between height and porosity, most often a convenient standard for the home.
- 77–80%+: large pores, very tender crumb, but any mistake in shaping/proofing results in a “pancake.”
Important: different flours absorb water differently, so always leave 10–30 g of water “for basting” and add it gradually.
Salt, yeast, sugar, fat in rye bread
- Salt is usually 2% of the flour (10 g of salt per 500 g of flour): less than that and the bread will taste “flat,” more than that and fermentation will slow down.
- Yeast: the less yeast and the longer the fermentation, the deeper the aroma, but time/temperature control is required.
- Sugar is not necessary for classic sourdough bread; if you add it, do so consciously (for a softer crust or other characteristics).
- Fat (oil/butter) softens the crumb and makes the crust more delicate, but this style is closer to a sandwich loaf than a classic loaf.
Equipment: what you really need at home to bake bread
Minimum:
- Bowl/container with lid.
- Scales (better than “glasses”).
- Blade/razor for incisions (a very sharp knife can be used, but a blade is more stable).
- Parchment or shovel/planting board.
- Cooling grille.
Highly recommended for a “baking” effect:
- Stone or steel for baking (they accumulate heat and transfer it rapidly to the dough).
- Or a heavy cauldron/goose pot with a lid: this is the easiest way to achieve consistent results, as the lid traps the steam.
Steam in the oven: why and how
Steam is needed primarily at the start: it delays the moment when the crust “seals,” and the dough has time to rise as much as possible and open up beautifully along the cuts. Homemade option: place a heat-resistant container at the bottom of the oven, heat it well, and add boiling water at the beginning of baking.
Safety rule: steam causes burns, so wear gloves, pour boiling water carefully, and do not lean your face toward the door.
Oven temperature and mode
For bread, the following pattern usually works: a hot start + a reduction in temperature in the second half of baking. This helps to combine a powerful rise at the start with even baking of the crumb later on.
If you have convection:
- It is often necessary to reduce the temperature by 10–20°C from the “static” mode.
- Make sure that the top does not brown too quickly; cover with foil at the end if necessary.
Detailed basic recipe (pulish + long fermentation) and timings
This recipe produces a classic “artisan” profile (sourdough bread): crispy crust, distinctive aroma, good porosity, and stable shape. It is designed for baking on stone/steel with steam or in a cauldron.
Formula (1 large loaf ~850–950 g)
Total flour weight: 500 g (100%)
Total water: 360–385 g (72–77%)
Salt: 10 g (2%)
Proofing (overnight, 8–12 hours)
- Wheat flour: 150 g
- Water: 150 g
- Dry yeast: 0.2 g (or pressed ~0.6 g)
Basic dough for flatbread
- The entire pool
- Wheat flour: 350 g
- Water: 210–235 g (leave 20 g “in reserve”)
- Salt: 10 g
- Dry yeast: 1 g (or pressed yeast 3 g)
If you want maximum “yeast minimalism,” you can reduce the yeast in the main dough to 0.5 g, but then the timing will be longer and more dependent on temperature.
Day 0 (evening): prepare the dough for sourdough bread
- Mix water, yeast, and flour into a smooth, thick mixture.
- Cover and leave at room temperature overnight.
Signs of ripe pulp:
- The surface is bubbly, and the volume has increased.
- The aroma is pleasant, grainy, slightly creamy.
- The weight may start to “sag” slightly in the center — this is normal.
Day 1: kneading, fermentation, shaping, baking
Step 1. Autolysis (20–40 min)
- In a bowl, combine: all the pulp + 350 g flour + 210 g water.
- Mix until you have a “shaggy” dough without smoothness.
- Cover and leave for 20–40 minutes.
Autolysis simplifies life: the dough tears less, holds its shape better, and is easier to stretch.
Step 2. Add salt and finish adding water.
- Add 10 g of salt and yeast (if using).
- Knead for 5–8 minutes by hand (or 4–6 minutes with a mixer on low speed).
- If the dough looks dry, add water 5–10 g at a time, mixing well each time.
Signs of sufficient development:
- The dough holds together and becomes elastic.
- The surface is smoother than at the start.
- It is still sticky, but already elastic.
If you want to strengthen the gluten without a mixer: after the initial kneading, do 2–3 series of “slap & fold” movements, 20–40 times each, but do not overwork the dough until it becomes “rubbery.”
Step 3. Primary fermentation (bulk) 2.5–4 hours
Transfer the dough to a container and leave at 24–26°C, performing the following steps:
- 1 assembly after 30 minutes.
- 2 assembly in 60 minutes.
- 3 assembly after 90 minutes.
- 4 assembly (if necessary) after 120 minutes.
Signs of bulk completion:
- The volume has increased by approximately 1.5–2 times (not necessarily “twice,” see the condition).
- There are bubbles on the surface, and the mass is elastic.
- The dough “breathes” and, when the container is shaken, has a slight jelly-like tremor.
Tip for monitoring: pinch off a small “beacon” (20–30 g), place it in a small glass, and mark the level—this makes it easy to see the growth.
Step 4. Pre-shape + rest for 15–25 minutes
- Place the dough on the table (with a minimum amount of flour).
- Easily round into a ball or make a rough oval.
- Cover with a bowl/plastic wrap and let it “relax.”
This stage greatly affects the height of the loaf: without resting, the dough springs back and tears, but with resting, it becomes pliable.
Step 5. Final shaping
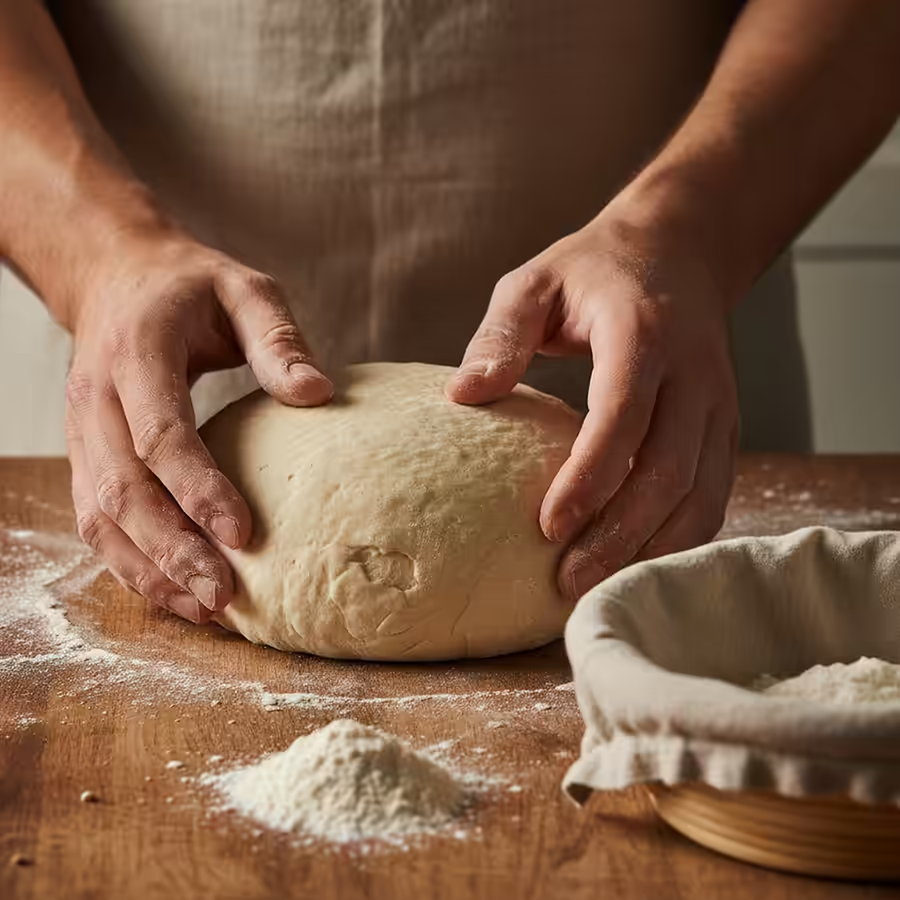
The task is to create surface tension, as if you were stretching a “skin” over a ball while keeping gases inside.
The “ball” (boule) shape:
- Gently flatten the dough into a disc (do not squeeze out all the air).
- Fold the edges toward the center 4–6 times.
- Turn it over with the seam facing down and pull the dough toward you in several movements, creating tension.
Oval shape (batard):
- Spread it out into a rectangle.
- Fold the top edge toward the middle and press down.
- Fold the bottom edge toward the middle and press down.
- Fold in half lengthwise, pinch the seam.
- Easy to roll up to tighten the surface.
Next, place the dough in a basket or bowl lined with a towel (dusted with flour) with the seam facing up.
Step 6. Proofing: room or refrigerator
A) Room temperature: 45–90 minutes at 24–26°C.
B) Cold fermentation: 8–16 hours in the refrigerator (4–6°C).
Sign of readiness (finger poke):
- The dent returns slowly — you can bake.
- The dent does not return — it looks like a dent.
- The dent disappears instantly — it’s still too early.
Baking: on stone/steel with steam or in a cauldron – flatbread
Option 1: Stone/steel + steam
- Preheat the oven with the stone/steel to 250°C for at least 45–60 minutes.
- Place a heatproof steaming dish on the bottom of the oven and preheat it as well.
- Remove the dough from the refrigerator (or room temperature proofing), turn it over onto parchment paper.
- Make incisions: one long one for an oval or a “cross/square” for a ball.
- Place the bread on a hot surface, pour boiling water into the steaming tray, and quickly close the door.
Mode:
- 15–20 minutes at 250°C with steam.
- Then remove the source of steam, reduce the temperature to 220°C, and bake for another 20–30 minutes.
Option 2: Kazan/goose pot with lid
- Preheat the pot with the lid in the oven to 250°C for 30–45 minutes.
- Transfer the dough to a cauldron on parchment paper, cut it.
- Bake for 20 minutes covered, then 20–25 minutes uncovered at 220°C.
Pros: no need to worry about steam and heat escaping when opening the door, as the microclimate under the lid remains stable.
How to accurately understand readiness
The most reliable method is to use a thermometer: the center of the crumb should reach a temperature of about 96–97°C. Additional signs: strong aroma, dark golden/brown crust, a “hollow” sound when tapping the bottom, and lightness of the loaf after baking.
Cooling is part of the recipe: let the bread stand on a wire rack for at least 1 hour (preferably 1.5–2 hours), and only then cut it.
Variations, formats, and baking techniques
To keep whole grain bread from becoming boring, change one variable at a time: the proportion of whole grain, the type of starter, the additives, the shape, the degree of crust browning, or the baking method.
Dough variations (simple and working)
- Whole grain 20–40%: replace 100–200 g of white flour with whole grain flour, add +10–30 g of water, autolyse for 40 minutes, proofing in the refrigerator is highly recommended.
- Rye-wheat 10–25%: add rye for aroma, but remember that the dough will be stickier; for stability, bake in a cauldron or shape as confidently as possible.
- With seeds: Roast 50–120 g of seeds (sunflower/pumpkin/flax/sesame) for aroma and soak for 20–40 minutes in part of the water from the recipe.
- With onions: 60–120 g onions, fried until caramelized; cool and add at the end of kneading or during the first folding.
- With olives/sun-dried tomatoes: 80–150 g of additives, dry thoroughly; add during the second folding to minimize damage to the gluten.
- Garlic and herbs: 1–2 teaspoons of dried herbs + 1 teaspoon of dried garlic.
- “Rural” with a long cold period: make the bulk a little shorter, and the final proofing 12–18 hours in the refrigerator.
- Softer profile for sandwiches: add 15–20 g of oil, do not overcook the crust, reduce the final temperature.
Other doughs: pulish vs biga
- Poolish (liquid starter) often gives a softer texture and sweet aroma, good for porosity.
- Biga (thick dough) often gives more “body” and easier handling of the dough.
If you want to run: make a starter with 150 g of flour + 90 g of water + a pinch of yeast for 10–14 hours, then follow the basic recipe, adjusting the amount of water.
Formats: not just “round loaves”
- Bâtard (oval): easiest to slice, often the most stable in the oven.
- Bulb (ball): looks beautiful and opens well with a cross-shaped incision.
- Two small loaves: easier to bake and more convenient to store.
- Flatter “panini” format: bake a little shorter and make sure not to overdry.
Incisions: how to achieve a controlled rupture
- An incision is a controlled “opening point” where the bread should rise and break the crust where necessary.
- For a batard, one long cut is usually made along the angle; for a ball, a cross, square, or arc is used.
- Cut quickly, holding the blade at an angle, with a depth of 0.8–1.5 cm (depending on tension and moisture).
Crust color: how to control “browning”
- Lighter crust: lower final temperature and shorter baking time without steam/without lid.
- Darker and crispier: bake longer without steam/without a lid; at the end, you can open the door slightly for 5 minutes to remove excess moisture.
Tips, common mistakes, and FAQs for bread making
Below is a practical section: what to do when something goes wrong and how to repeat the result.
Common problems and quick solutions
- The bread spreads out: reduce the water by 10–20 g, shape it more firmly, shorten the proofing time, bake it in a cauldron or on a well-heated stone/steel.
- No volume: either under-fermented (not enough time/too cold) or over-fermented (over-proofed); monitor the dough by its appearance, not just by the clock.
- Cracking on the side: the incision is weak or there is no steam at the start; let the steam run for the first 15–20 minutes and cut confidently.
- Sticky crumb: often caused by underbaking or cutting too early; bake until done and cool on a wire rack.
- The bottom is burning: raise the baking level, place a “screen” (empty baking tray) below the stone/steel, reduce the starting temperature by 10–20°C for your oven.
- The crust is too hard: overcooked; reduce baking time without steam/without a lid or lower the final temperature.
- Pale crust: insufficient heating of the stone/steel, low temperature, or lowering the temperature too early; allow for longer heating and do not rush to lower the temperature.
Storage and “how to restore crispness”
- Once completely cooled, store in a paper bag or wrapped in a towel; in an airtight bag, the crust will quickly soften.
- To freeze: cut into slices, freeze in portions; reheat in a toaster or 5–8 minutes in the oven to restore texture.
- To make the crust crispy again: quickly wet your hands, “pat” the loaf with water, and heat for 6–10 minutes at 200–220°C, then cool for 2–3 minutes on a wire rack.
Frequently Asked Questions
- Can you bake flatbread directly on a baking sheet? Yes, that’s the basic idea behind flatbread: baking without a mold on a flat surface, but the result will be better with a stone/steel or in a cauldron.
- Is autolysis mandatory? No, but it significantly improves dough handling, especially with higher hydration or whole grain content.
- Why is the dough sticky even though I weighed everything? Because flour and conditions vary; the water in the recipe is a guideline, so add it gradually and stop when the dough is “holding together.”
- How long should bulk fermentation last? Until the dough becomes elastic, increases significantly in size, and bubbles appear; the time varies depending on the temperature.
- How to recognize over-proofing? The dough becomes soft, spreads out, does not hold its shape well, and when pressed, the indentation hardly returns.
- Why does the incision “grow over”? Insufficient heat/steam, weak tension, or an error with the stand; heat more thoroughly, steam at the start, and cut confidently.
- Why is the bottom burning? Too aggressive bottom from steel/stone or low position; raise the grate, use a “screen” made from an empty baking tray.
- How to check readiness without a thermometer? Tap the bottom (the sound will be more “hollow”), evaluate the color of the crust and the weight of the loaf after baking.
- Why does the crumb crumble? Not enough water, over-drying, or cutting hot bread; add a little water next time and always let it cool.
- How to make sourdough bread more aromatic without sourdough starter? Less yeast + sponge + long cold proofing in the refrigerator.